

Hello again and welcome back! We are really moving along on our beautiful quilt. Last lesson left us with our 1.5″ blues and reds all sewn together. They are so pretty:)
Today we are going to tackle the 2″ reds and cream squares. So let’s take them all over to our sewing space .
For this step, we need to change back to our regular sewing foot. The 1/4″ one will get caught on the fabric.
We are going to be learning a technique called “stitch and flip”. It is very easy and you are going to LOVE how it looks in the end! But first we need to mark our machines.

- Raise your presser foot and lower your needle.
- Place a ruler or straight edge right up against the needle. The arrow in the picture above shows the needle against the ruler. Make sure the ruler is straight.
- Place a piece of painters tape right against that edge of the ruler to give you the center line of your needle mark all the way to the edge of your machine.
Now we are ready to stitch and flip!
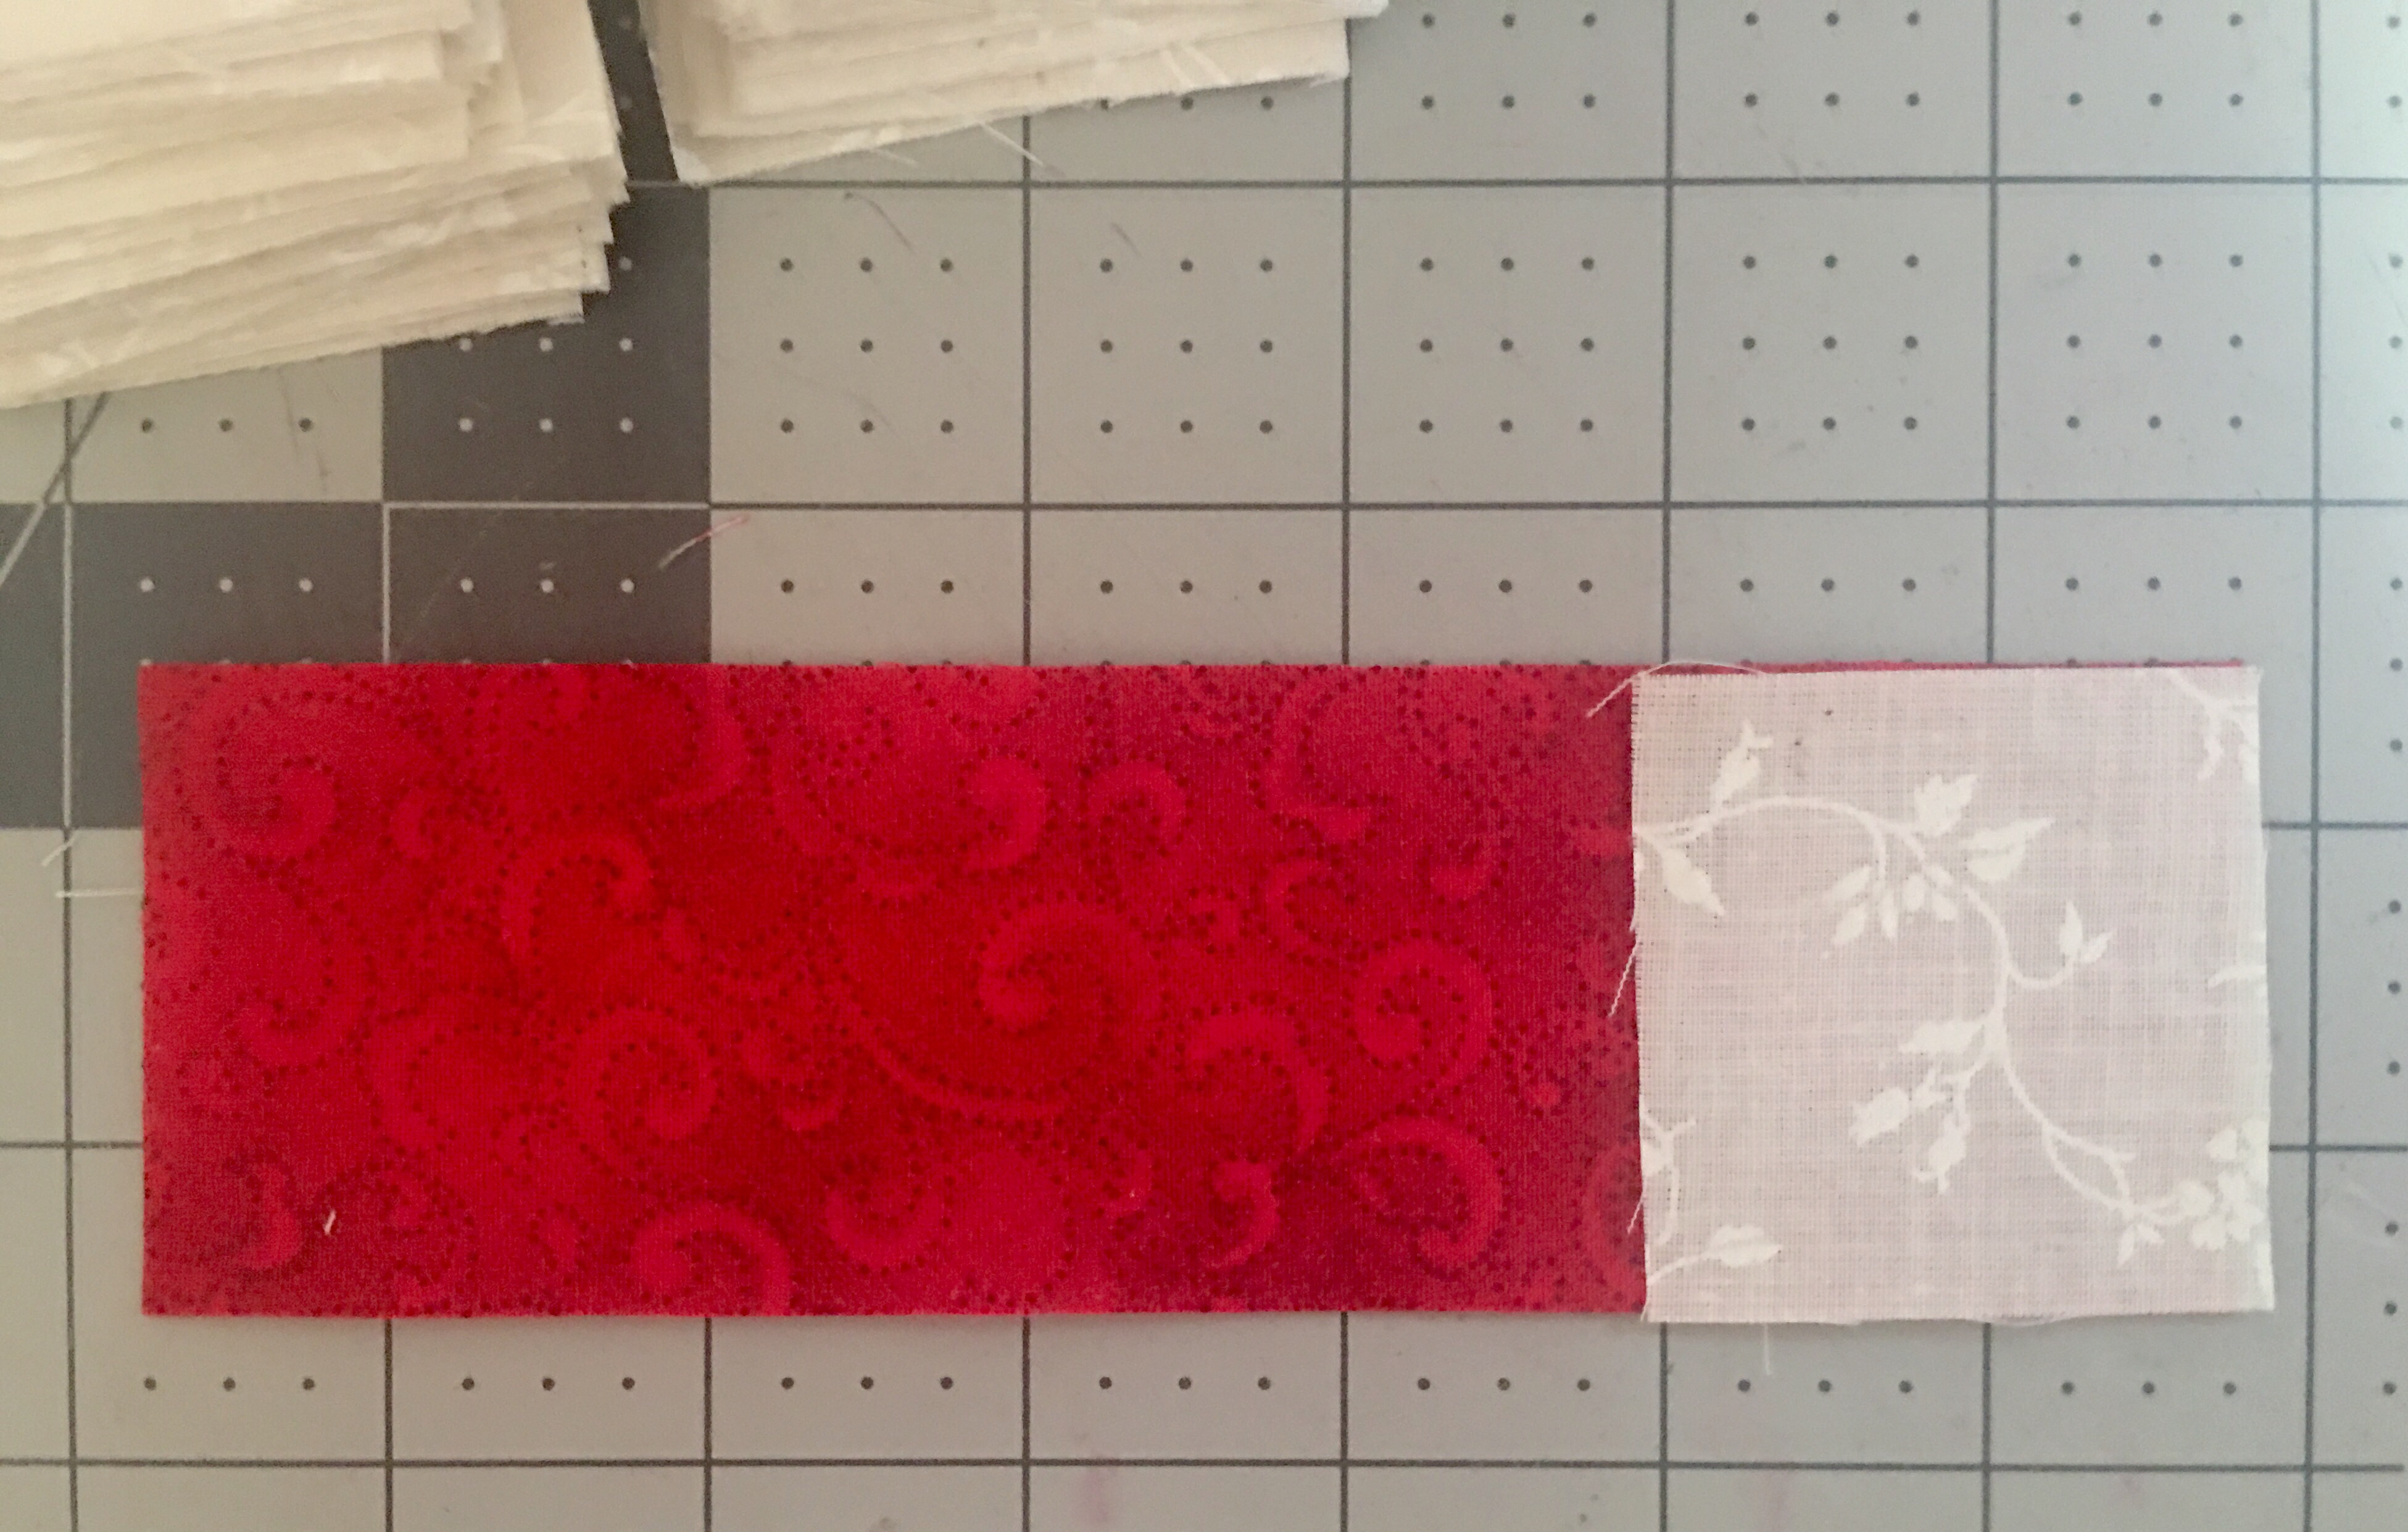
Place a square right sides together on the edge of your rectangle as shown above. We are going to be stitching from the top left corner to the bottom right corner.

Some people like to draw a line to help them sew a straight line.
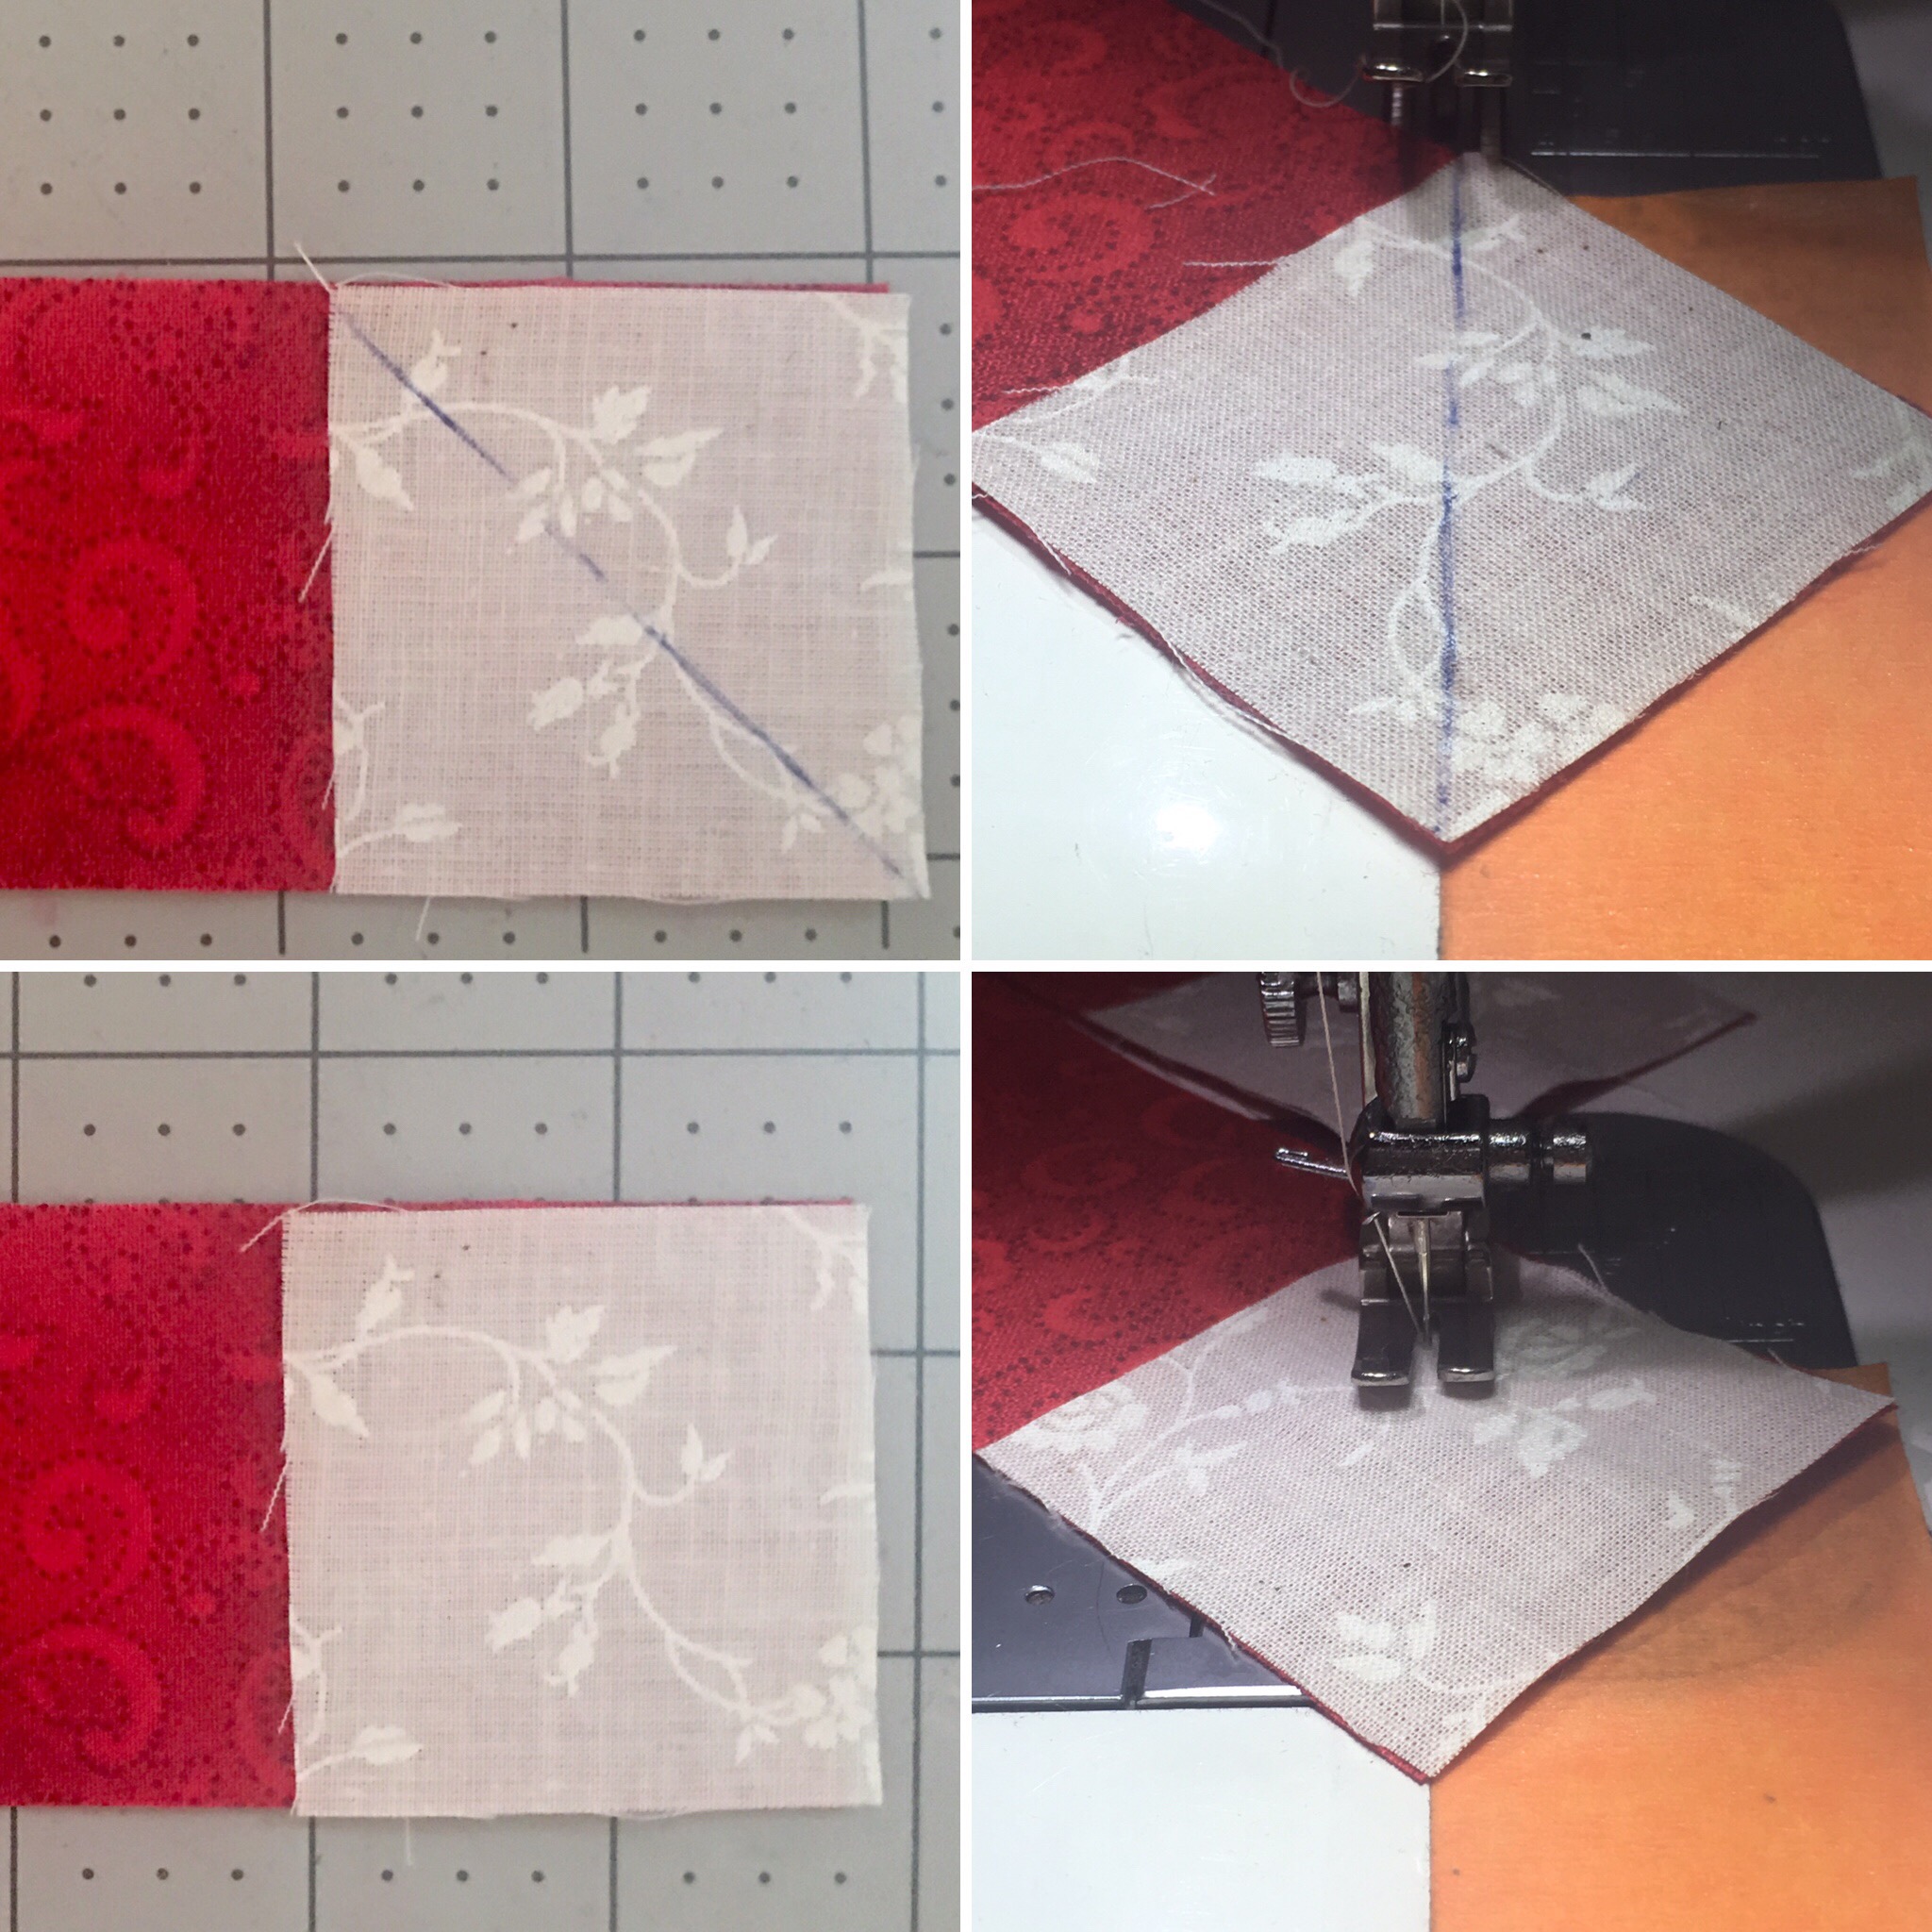
But we don’t have to do that because we have marked our machine. All we have to do is line the bottom right corner on the masking tape and sew from corner to corner. Perfect!!

Sew all 240 rectangles and squares together this way.
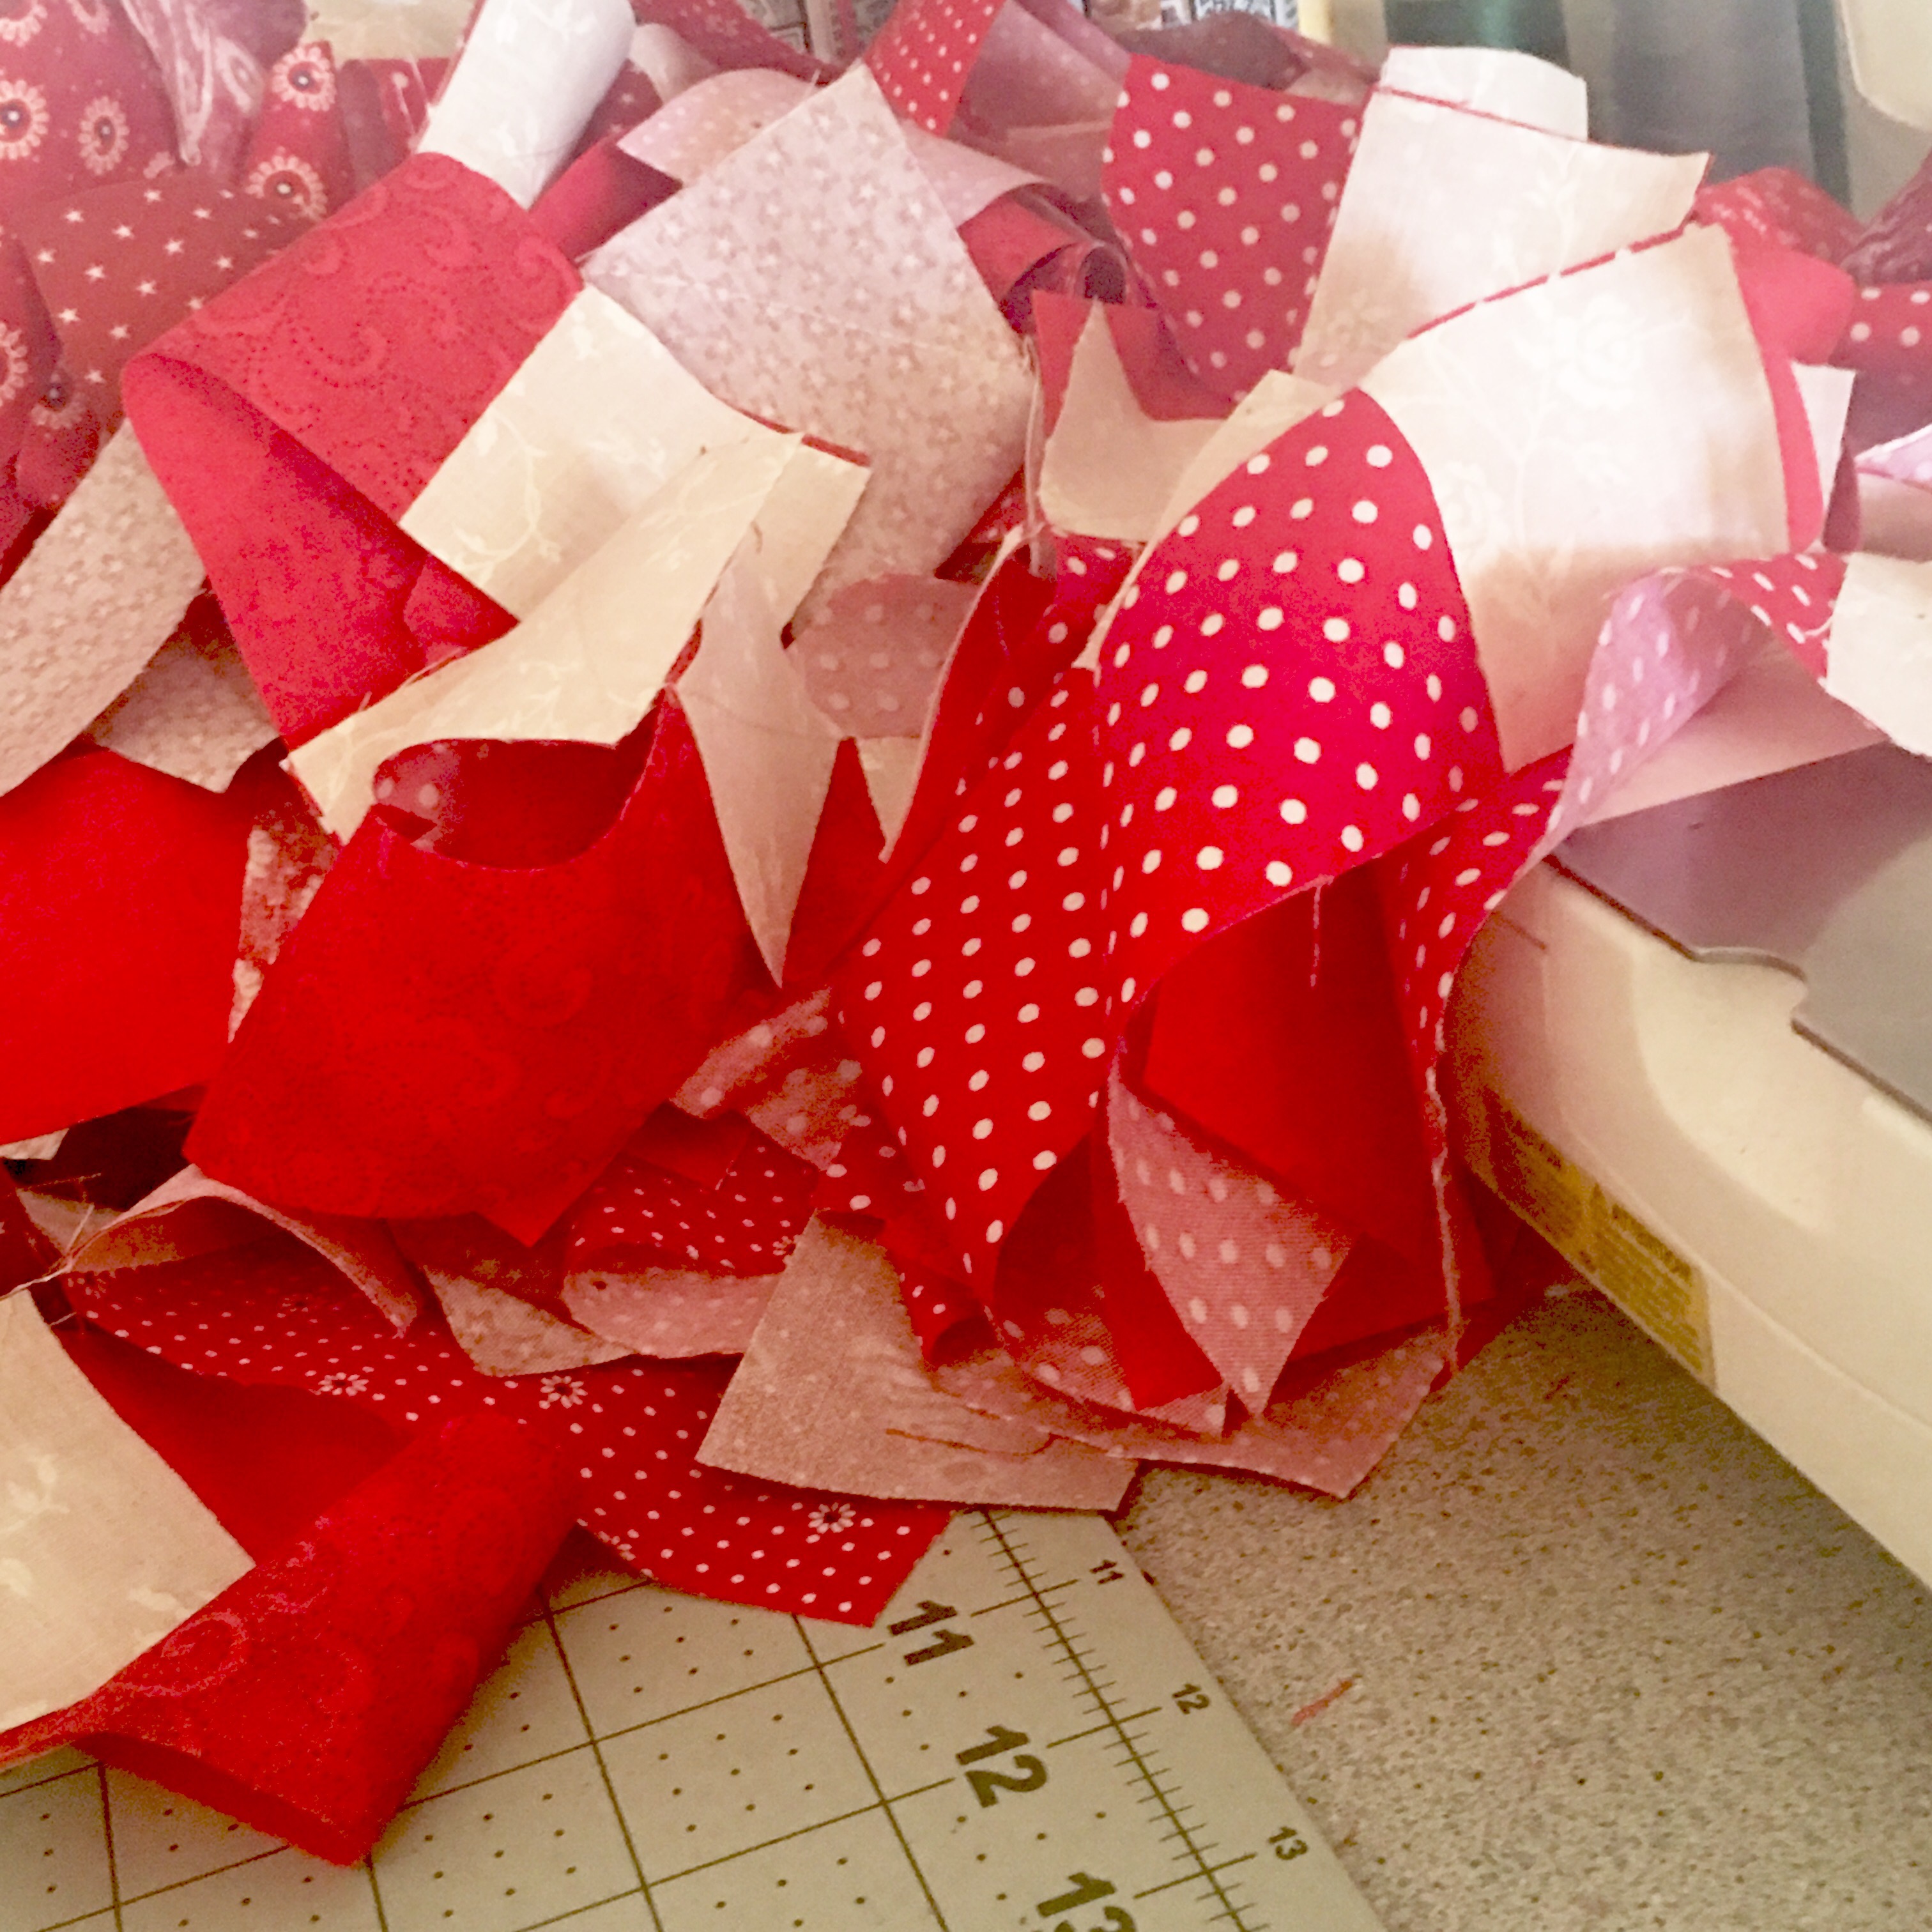
Yep, that’s what I said. Chain sew all of them together. Just keep adding another rectangle/square pair under your presser foot until they are all sewn together. You will have a very large bundle of fabric behind your machine when you are done. Yea!! You are doing fantastic!!:)

Cut them all apart, and take them to the ironing board.
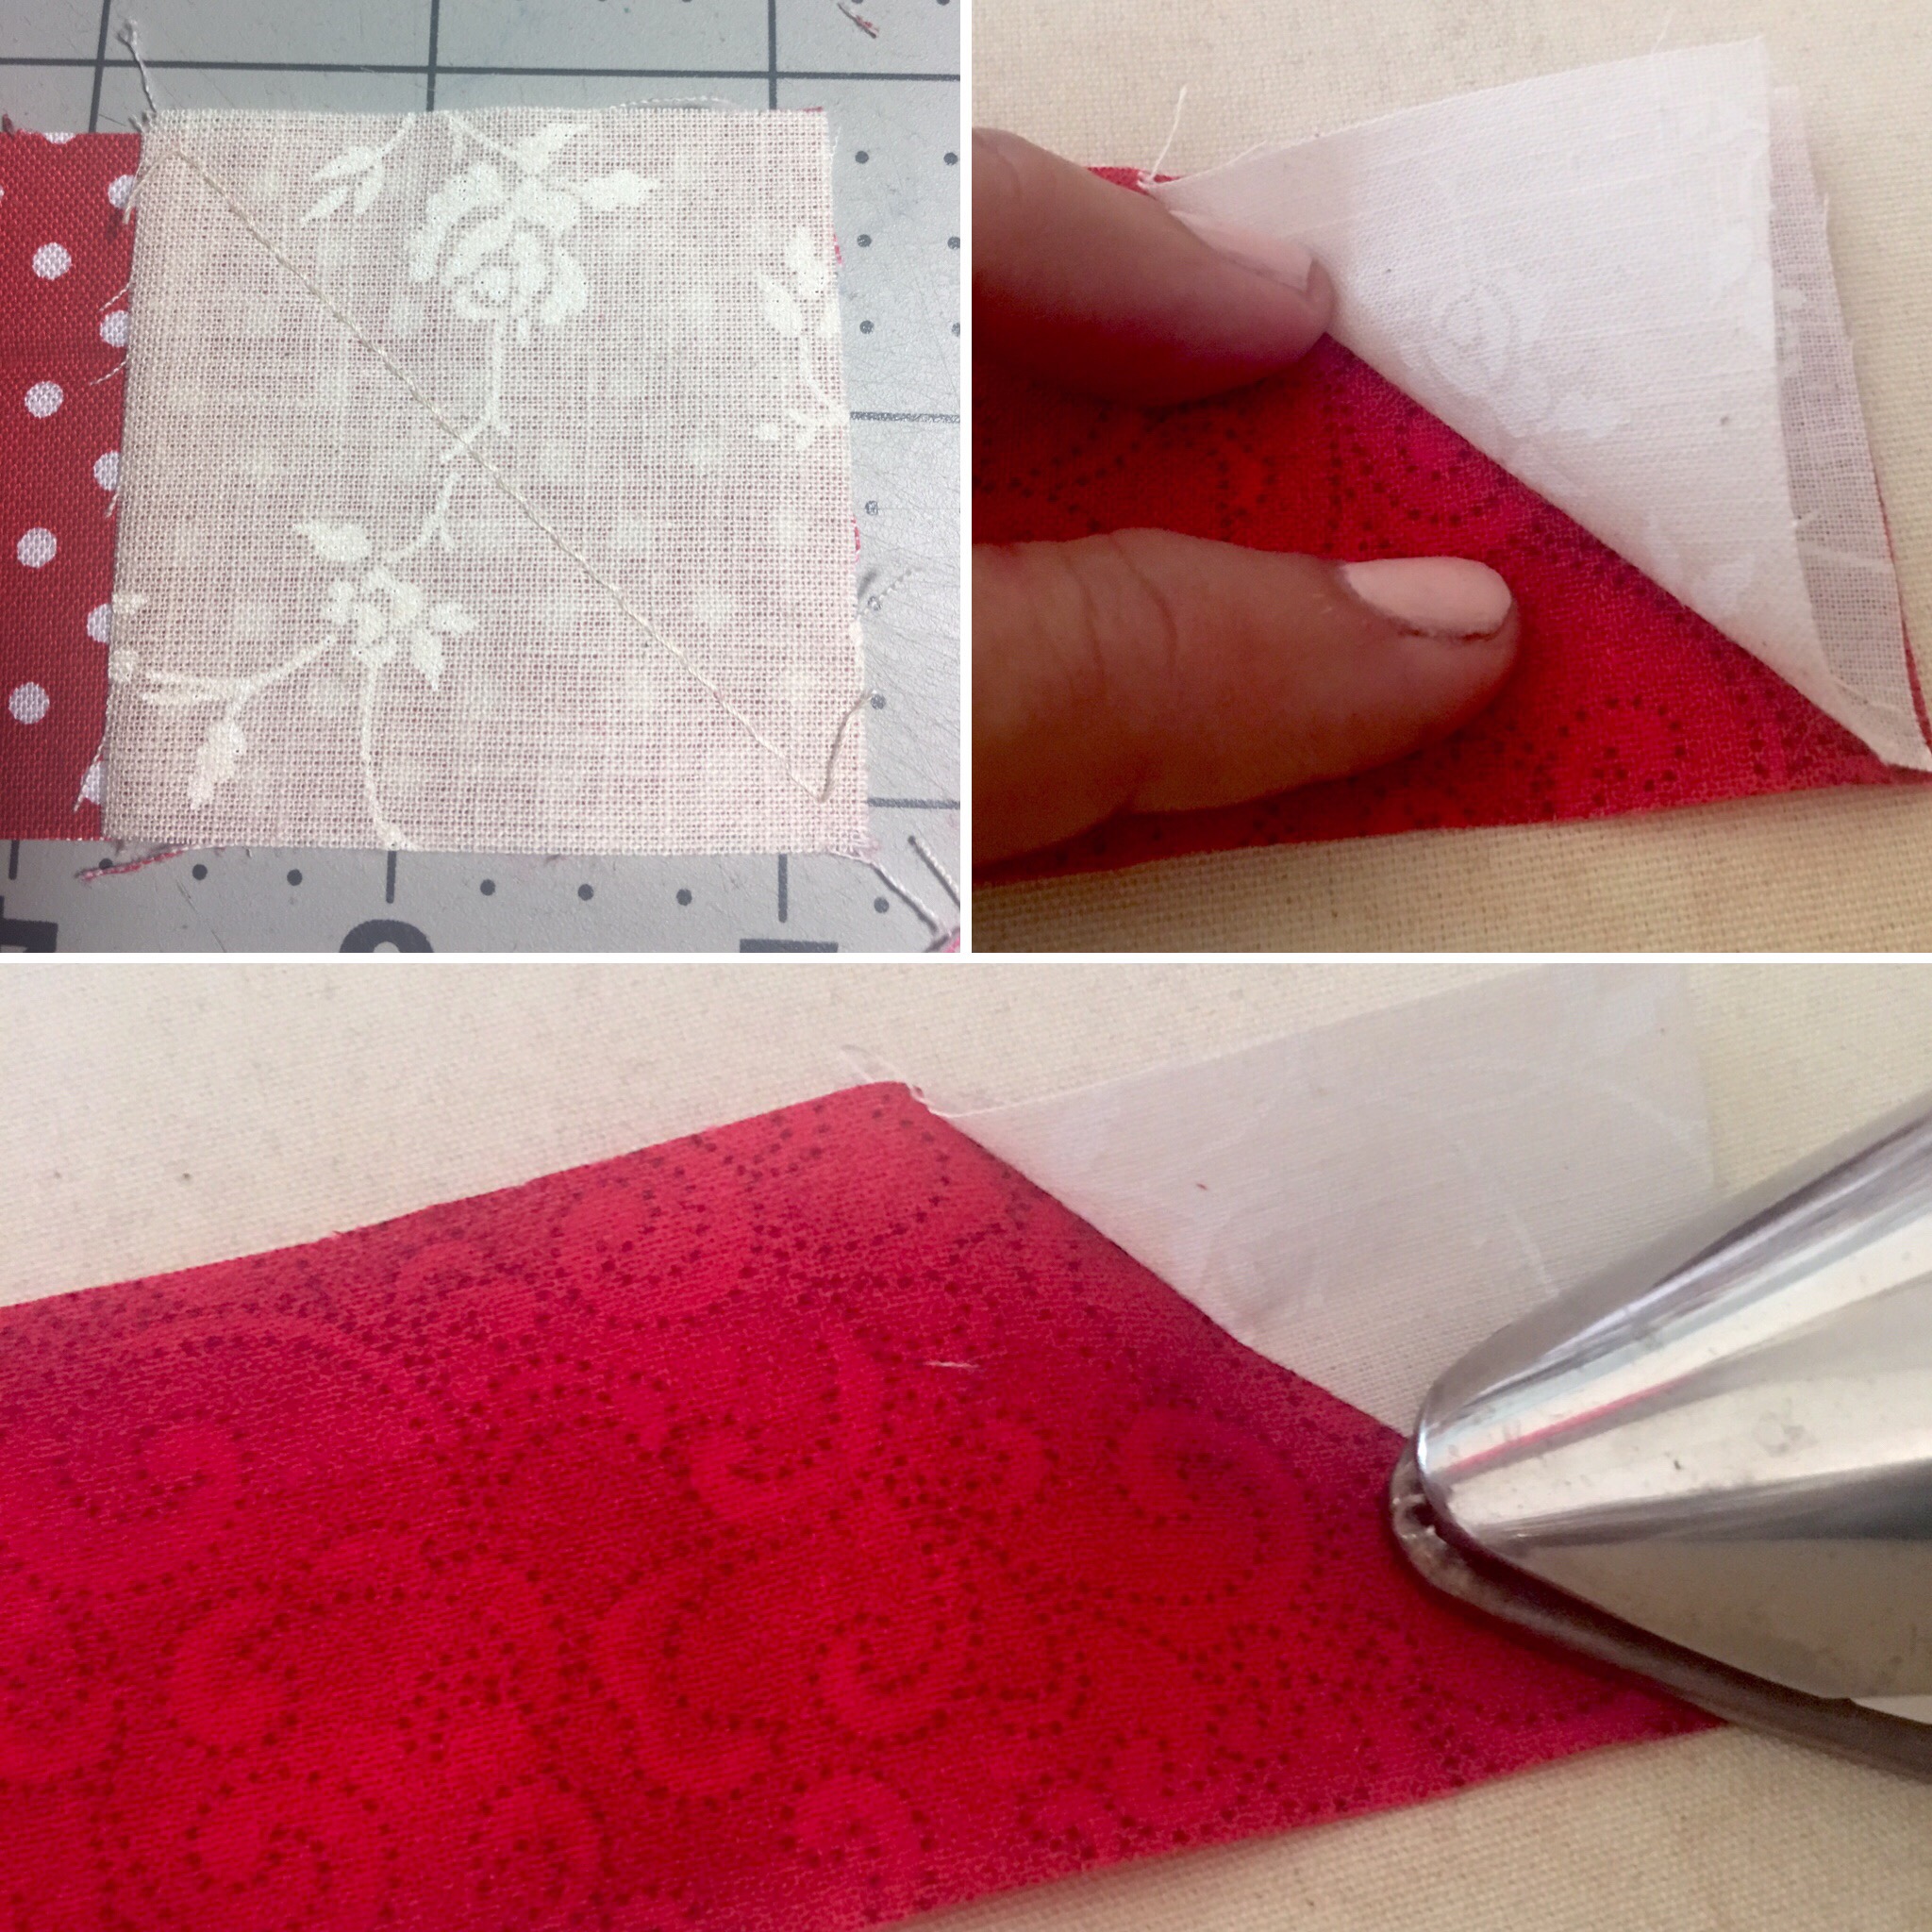
Now for the flip part of the stitch and flip. Flip the bottom left side of the square up and press it even with the top right edges. How easy is that?! No trimming is needed.
Don’t worry if the flip isn’t EXACTLY up to the corner. As long as it is CLOSE, within 1/8 of an inch or so, it will be covered when we sew them together:)

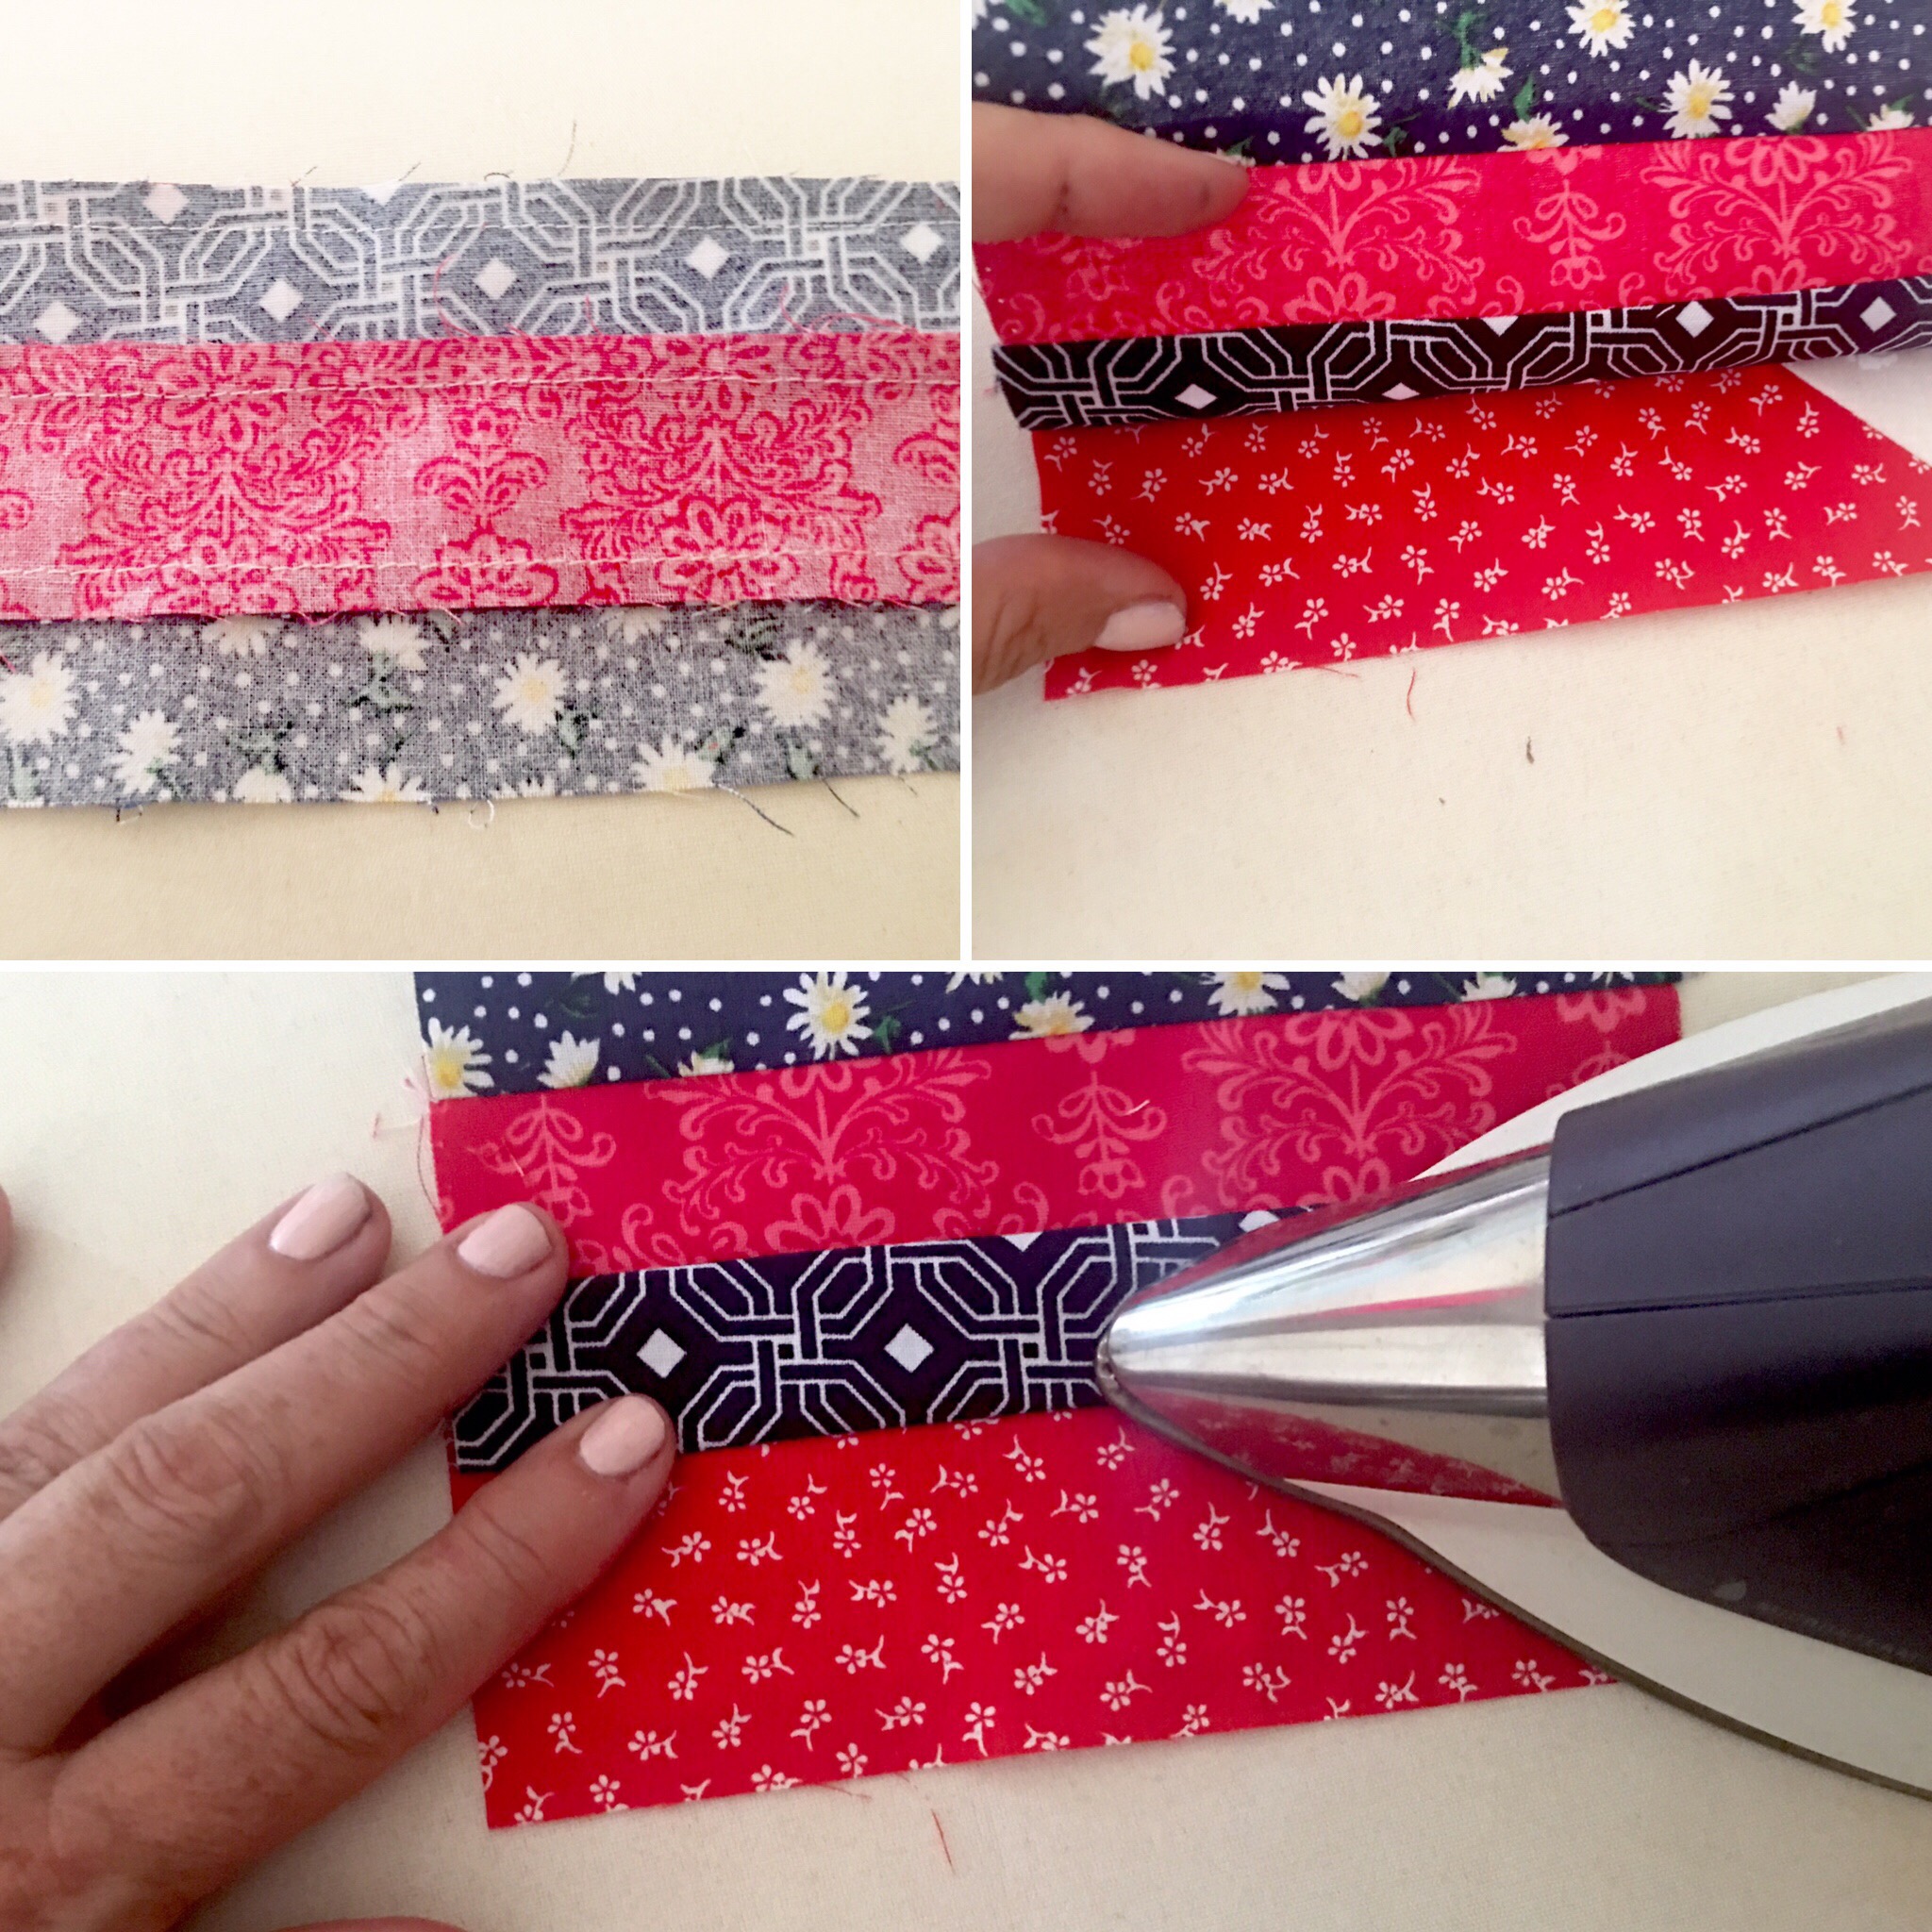
Now we are ready to sew them to our blue stripped pieces. Take everything to your sewing area and set them up as in the above picture. We are going to sew the right red piece to the middle blue piece first.

Change back to your 1/4″ foot.

Fold that right, red piece over on top of the blue piece and sew them together. Chain sew all 120 of them this way. Cut them all apart and bring them to the ironing board.

- Place the fabric with the larger piece on top
- Lift it up and press it open. This makes the seam allowance go to the blue fabric and away from the bulky part of our stitch and flip piece.
- Make sure that the seam is very open before you press
Take these blocks back to your machine.
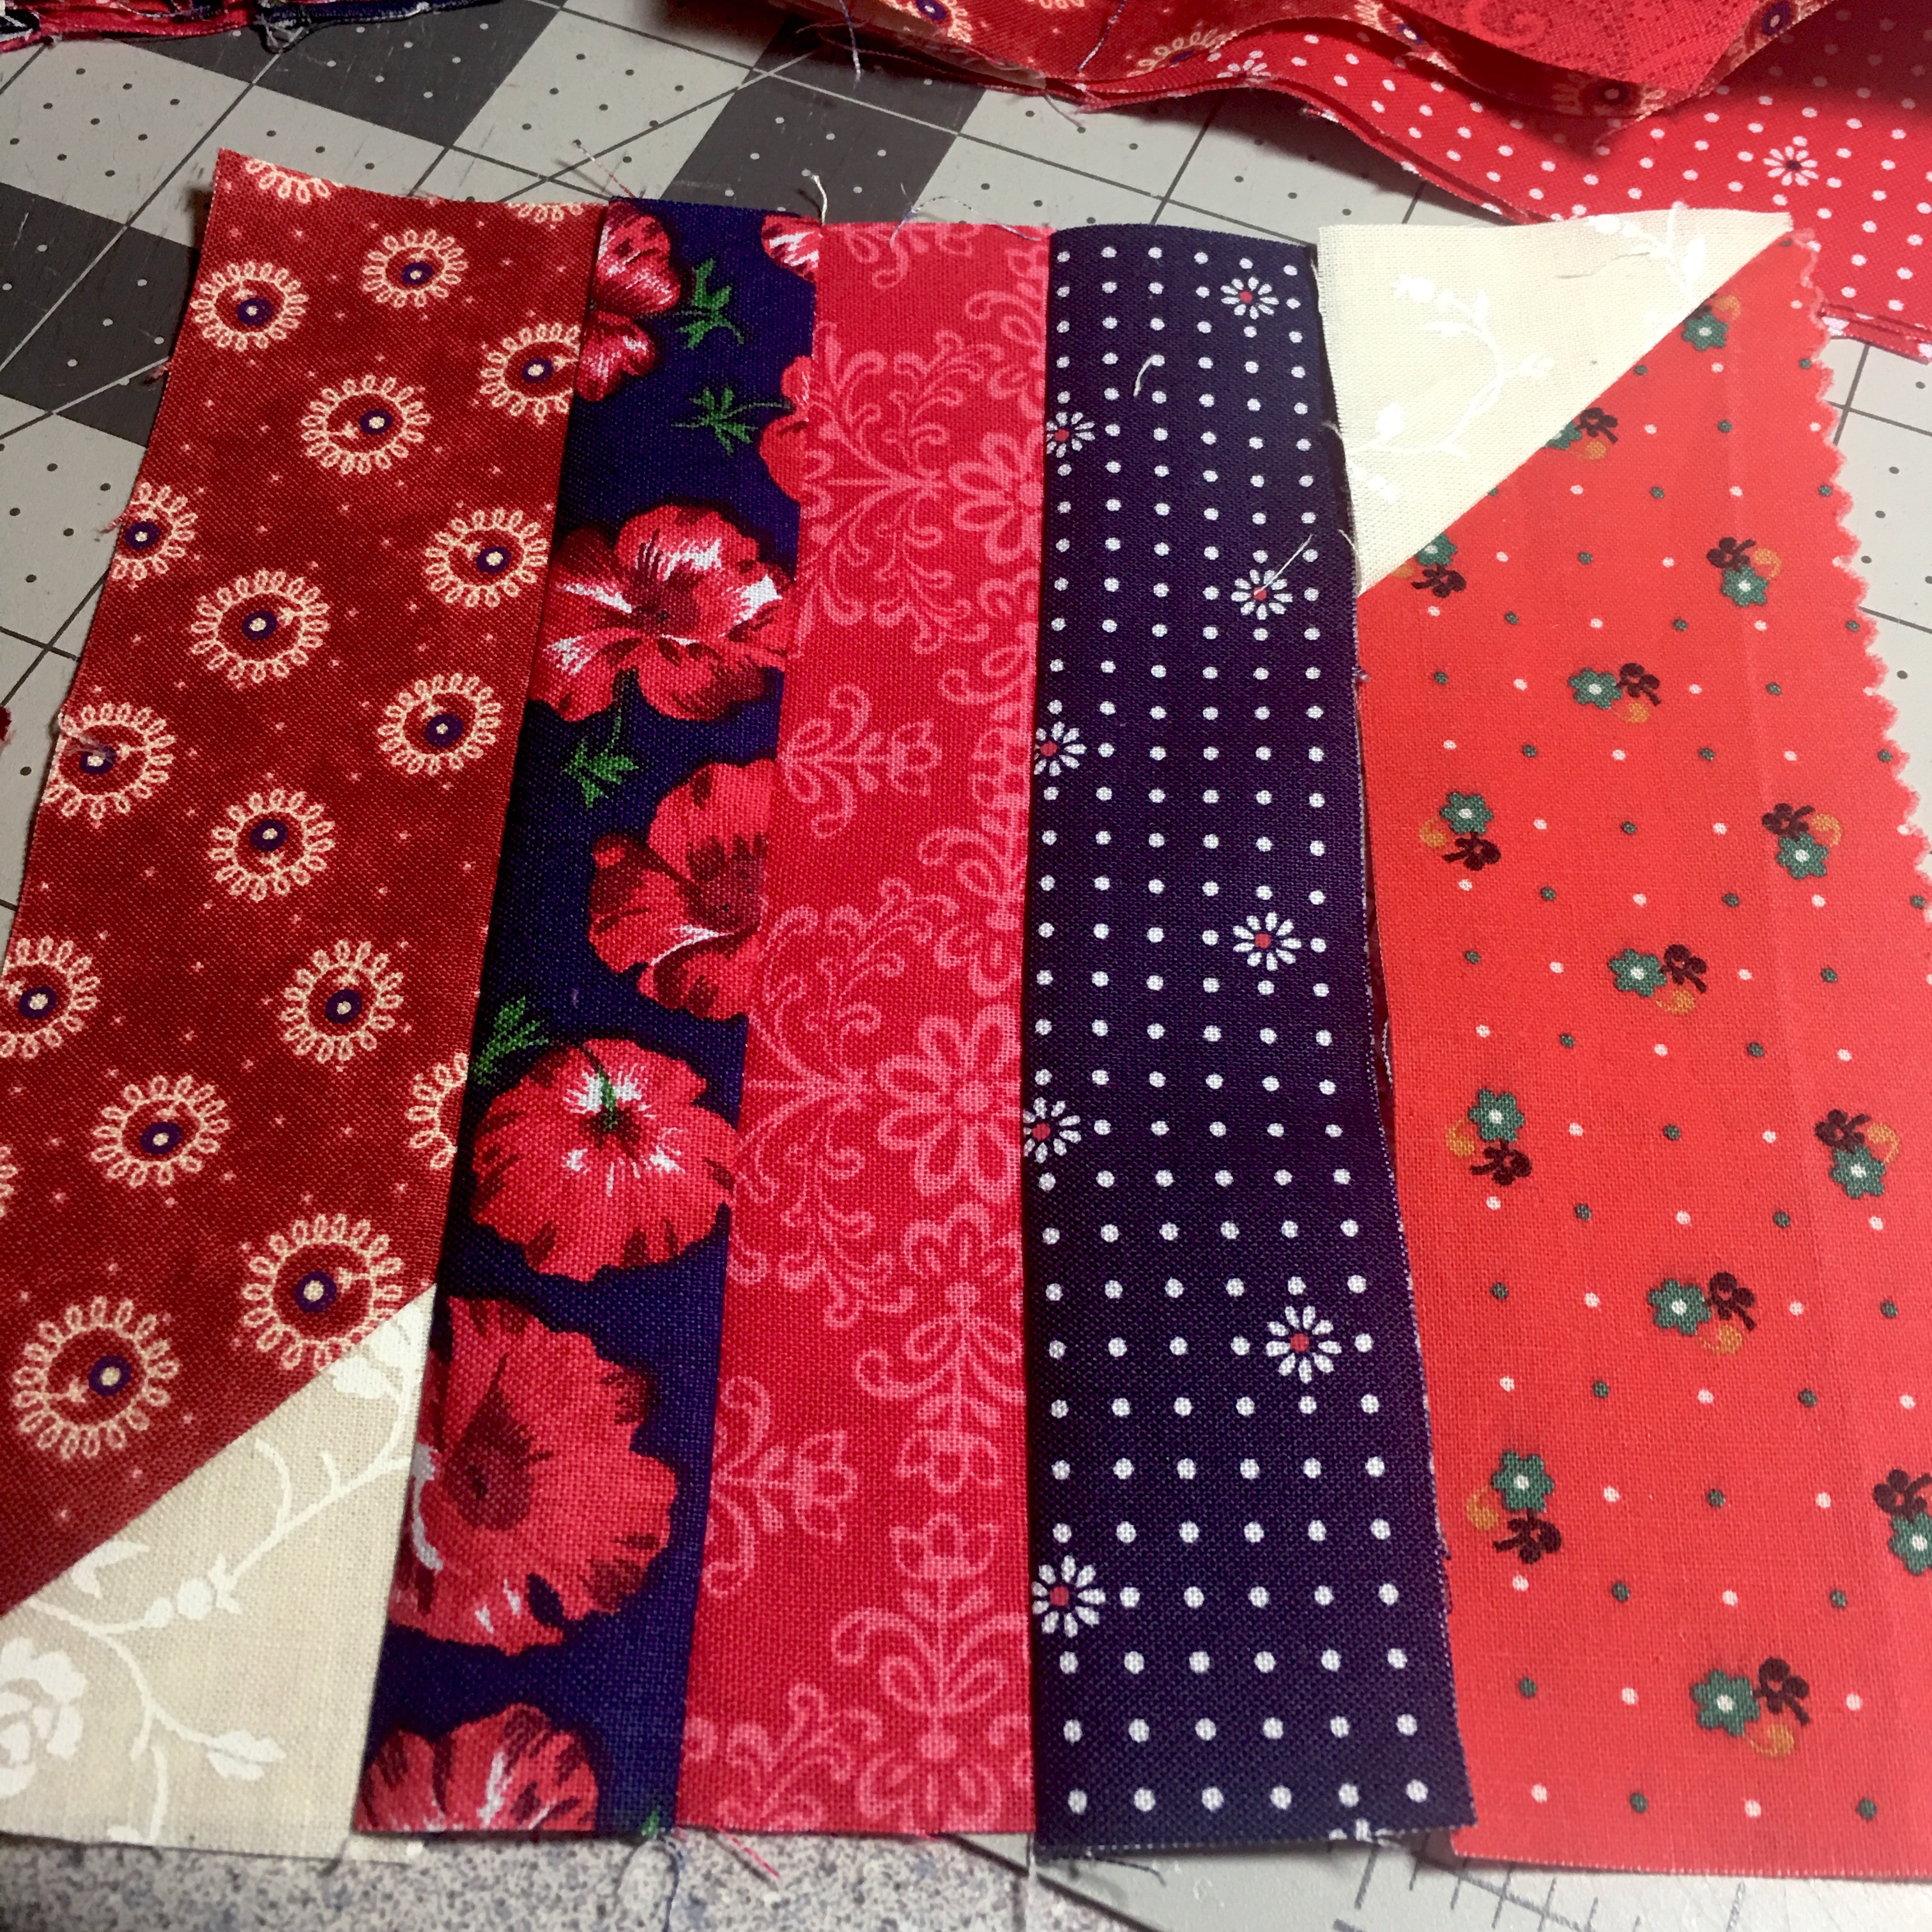
Place the block on your space with the free blue side on the right with the rest of the red flipped pieces also to the right as shown above. Sew these just like we did on the other side,
Cut them apart and press open.
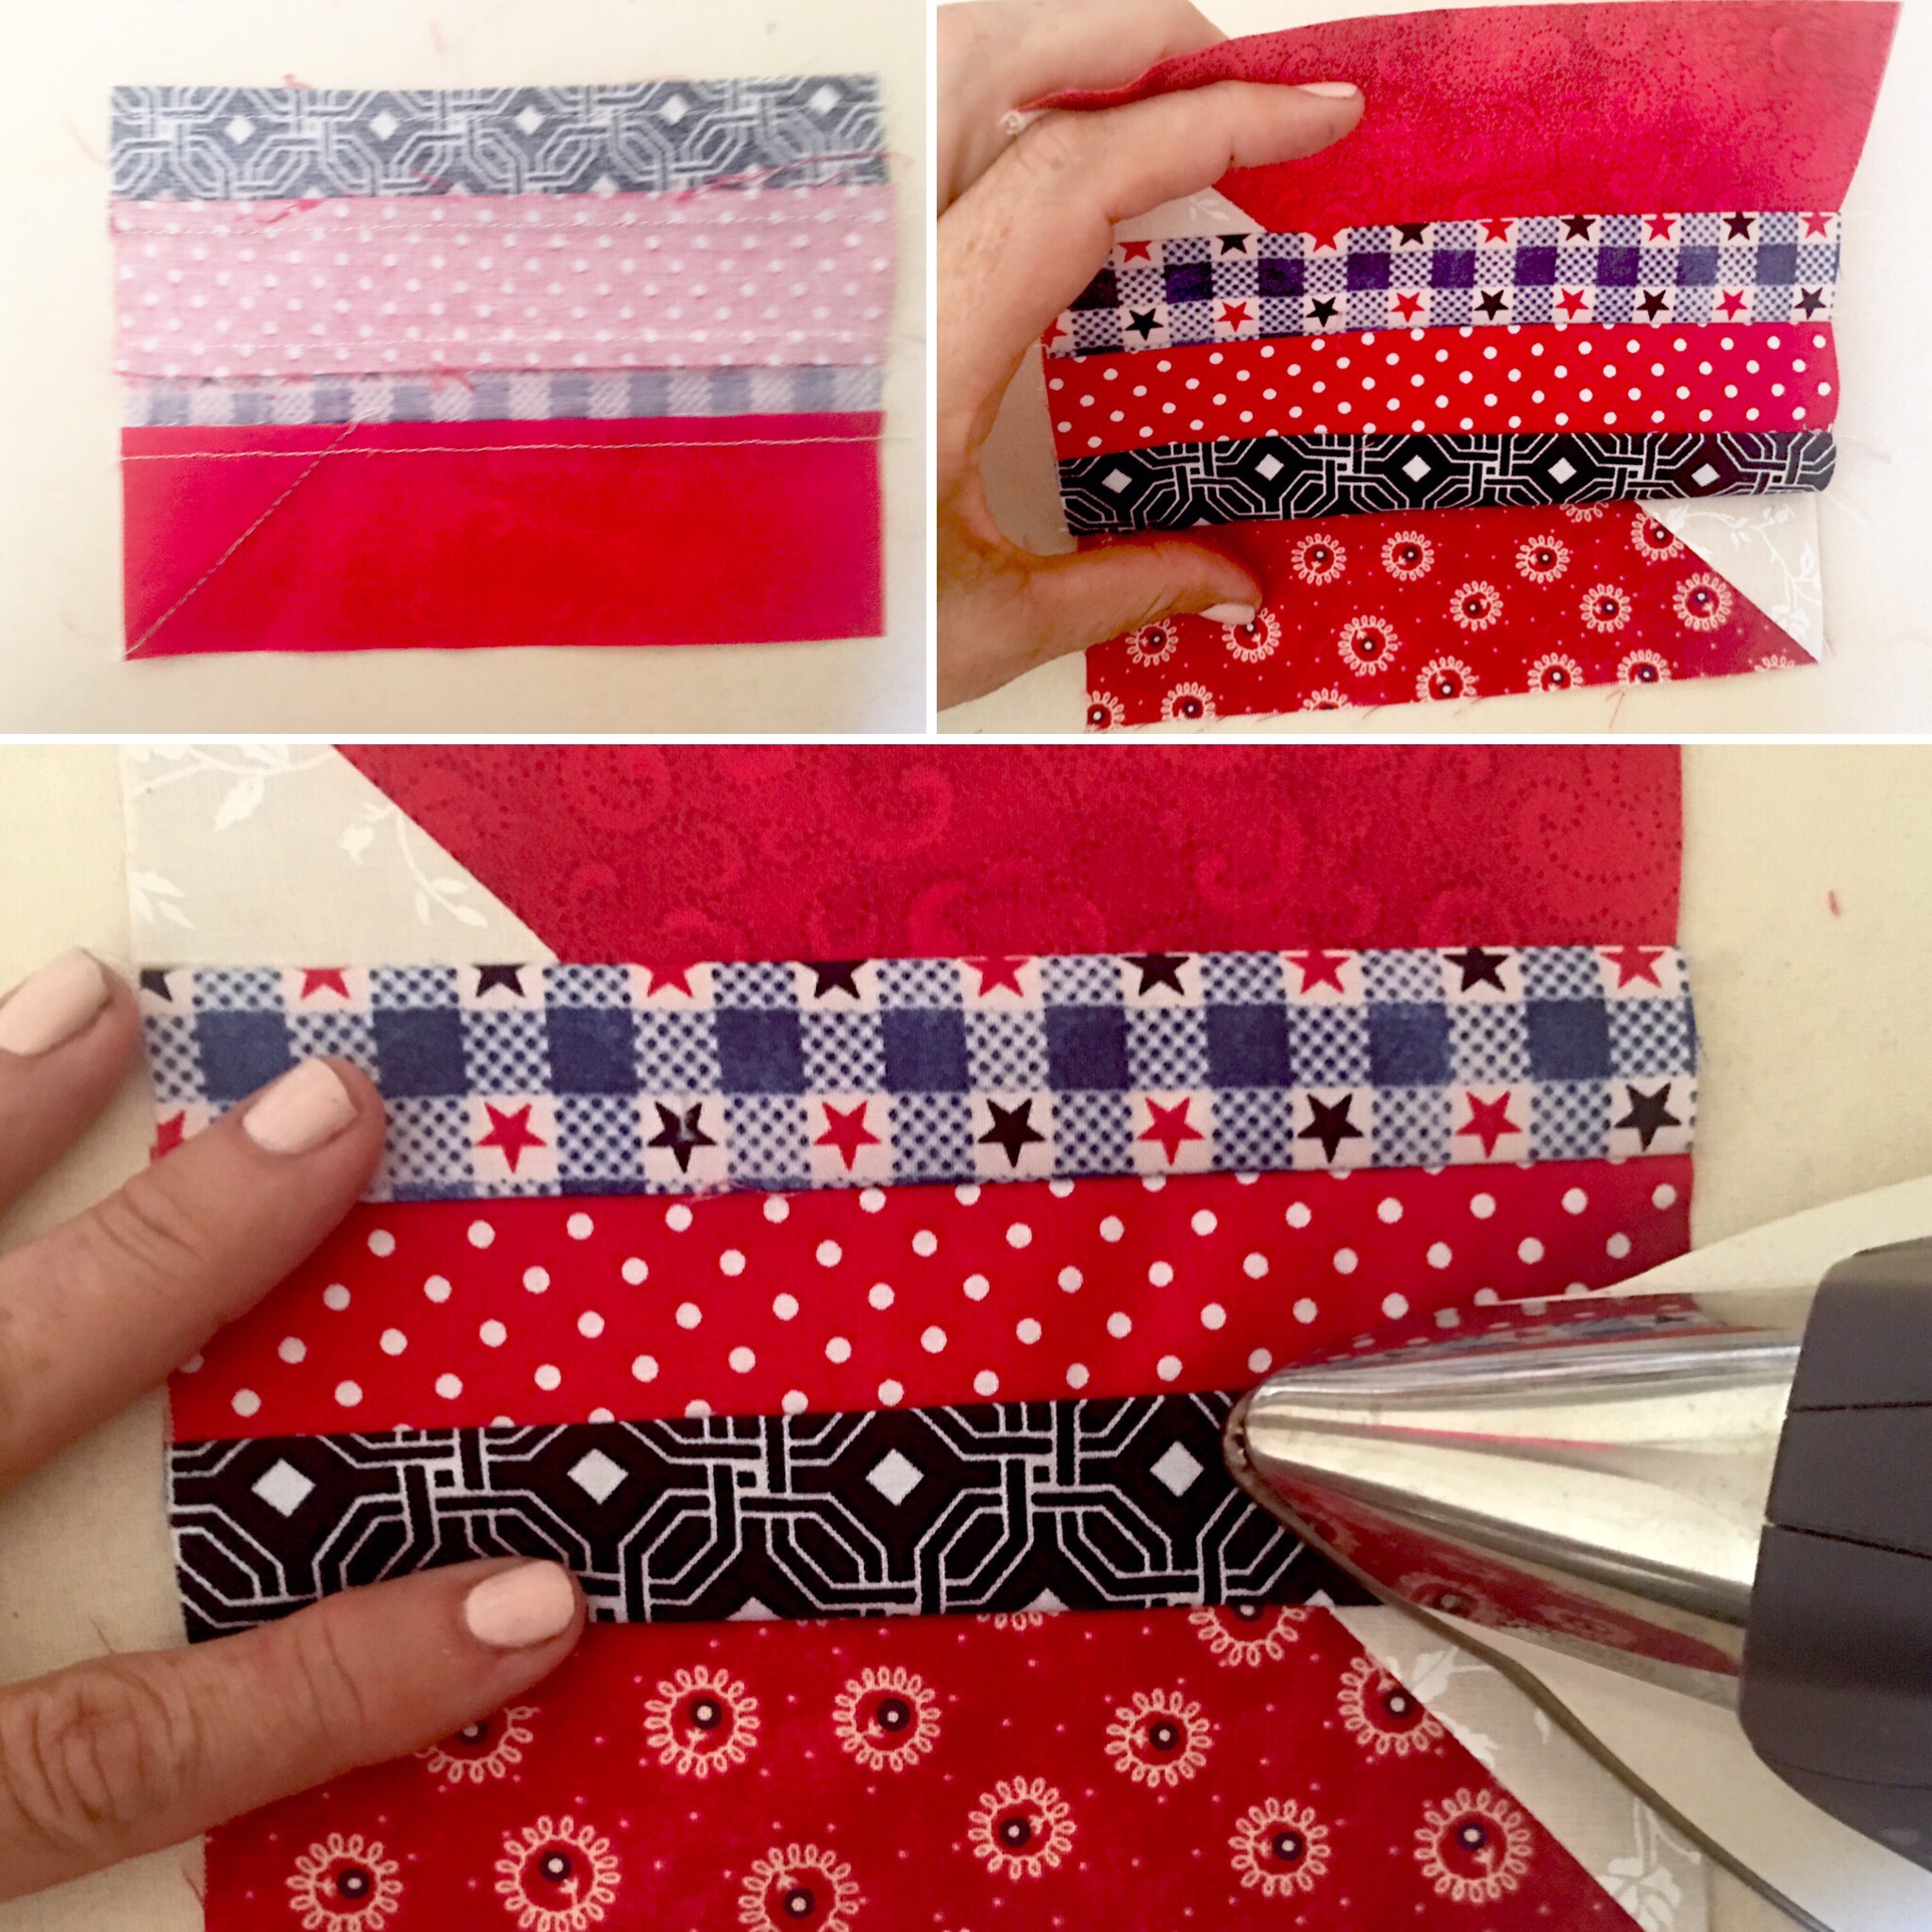
Remember to put the larger piece on top and then press open.
Congratulations! We have 120 pretty, finished blocks. SWEET!!

They are absolutely gorgeous!

I’m looking forward to next time when we will be putting them all together:)
If any of you are just joining us, you can find the previous lessons here:
- Lesson #1 – Planning
- Lesson #2 – Fabric preparation
- Lesson #3 – Chain Sewing
- Lesson #4 – Stitch and Flip
- Lesson #5 – Lay Out
I hope you all are having as much fun as I am! Until Thursday, –Happy sewing:)

Don’t forget to post pictures of your fabric and progress on Instagram #pinsandstripesqal I will be giving away a jelly roll to someone who posts a picture from all seven lessons and a picture of themselves with their new quilt by the end of July 2017!!

Looks good… I dont think quilting is done here in mumbai india at least never seen it
LikeLiked by 1 person
Hello to a new friend from India!! Glad to meet you Shalini:). When I think of India, I think of colorful silks with gold stitching. They would make a GLORIOUS quilt:). ❤️❤️
LikeLiked by 1 person
Yes I suppose so… But I haven’t seen any or heard of any being made here… Yours is fab..
LikeLike
Oh, hope you will give it a try then! You could be the inspiration for others in your community:). You could order your supplies online. But even if you don’t, you can always enjoy them here on the blog:)
LikeLiked by 1 person
Yeah.. I saw your steps and I was soooo impressed.. You are so talented… Amazing
LikeLiked by 1 person
I have a question. If you have a lighter colour against the stitch and flip piece, would you still press toward that piece since it would be less bulky? I have a light pink pattern against the teal stitch and flip piece.
LikeLiked by 1 person
Good question Kate:). Yes, press as if it were dark. It will keep the bulk away. I’m excited to see it:)
LikeLiked by 1 person
Thanks! I wasn’t really haunting your page waiting for an answer, just happened to be on my iPad, lol.
LikeLiked by 1 person
My gosh, I leave you alone for just a few days and you go crazy posting! LOL This quilt is going FAST!
LikeLike