
It is Scrap Happy Time and I have just the project for you!
Moving cut scraps from the cutting board to the sewing table can be a bit tricky. The pieces can shift and move or even fall to the floor! I like to place my pieces on a fabric covered board as I cut and design my block.
The batting makes it so I can design my block and move it with ease. How cool is that?!
I have been using my old design boards for over five years and they are still going strong. They have quite a few strings attached, but that just shows that they are well used and well loved.

A reader of mine asked me about them a day or so ago and I thought that maybe a few more of you might be interested in learning how to make one or two of these fantastic boards for yourself. Plus, I was just thinking I could use a few more boards. They are so quick and easy!
The items needed are probably all just lying around your house anyway, so why don’t you gather them up and let’s get started? 🙂

- A large cardboard box
- Scraps of leftover fabric and batting
- A marker
- A razor blade
- Clear packing tape
- Spray glue
Now that’s not much, is it? This is going to be EASY!

- First choose a box with a piece that is large enough to cut a square from.
- Mark the size of square you would like. I cut two. One is 12.5″ and the smaller one is 7.5“
- With a ruler and a razor blade, cut your squares out
- Next we will be using the packing tape

- Cover one entire side of the square with packing tape. This is so you can layer them on top of each other without the fabric sticking to the cardboard back of the board above.

- Now we are going to be using our scraps of batting and spray glue.
- Cut your batting the size of your boards
- Lay a piece of scrap paper down to cover your work area
- Spray the non shiny side of your board with glue
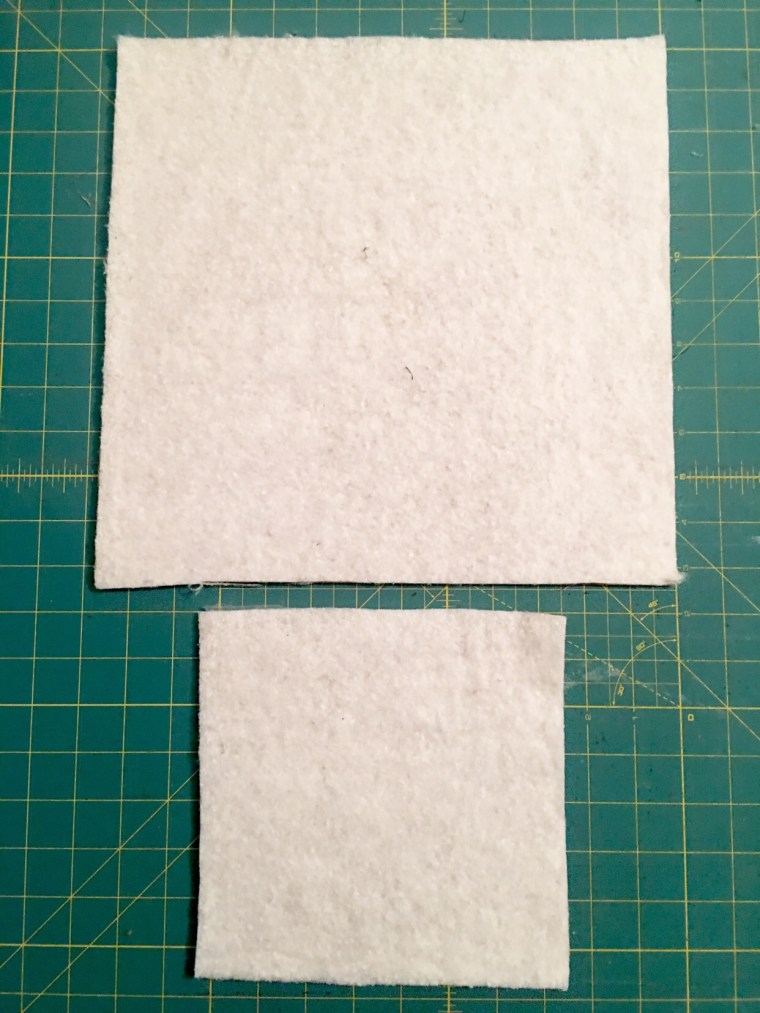
- place your batting on top of the glue on the board
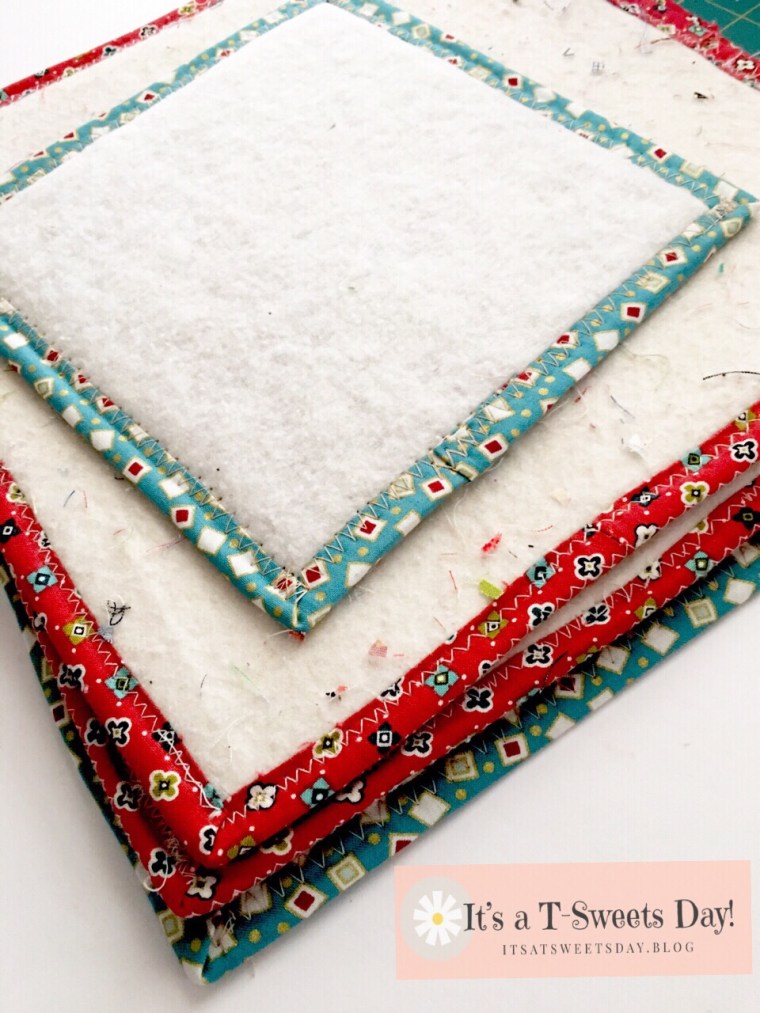
They will look like this. Now it is time to make some binding from your fabric scraps

- Cut 2″ strips the width of the fabric.

- Sew the strips together by placing the fabric together as shown above and sewing from corner to corner.

- Fold the edges to meet in the middle and press.
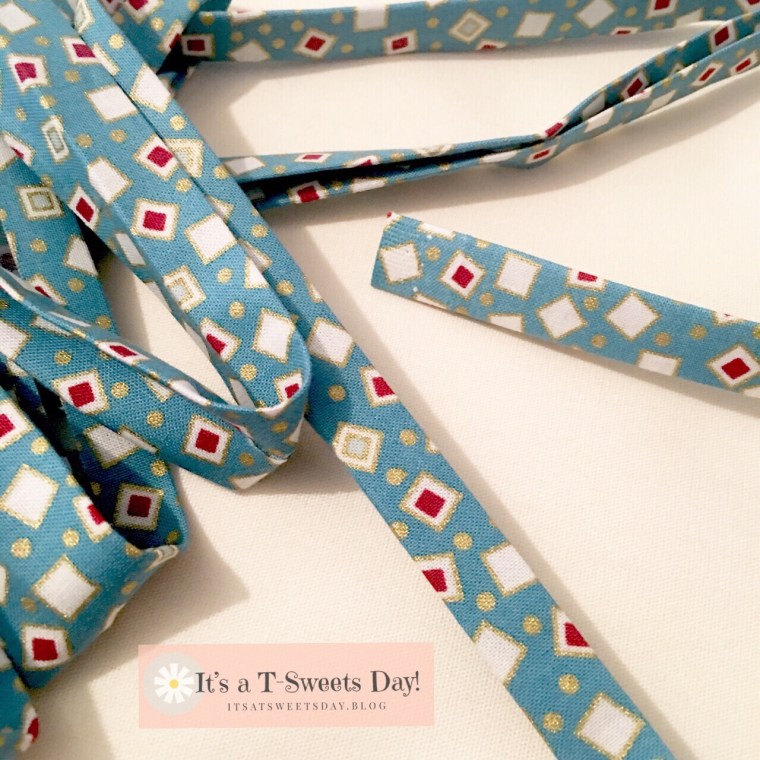
- Fold the strip in half and press to make binding.
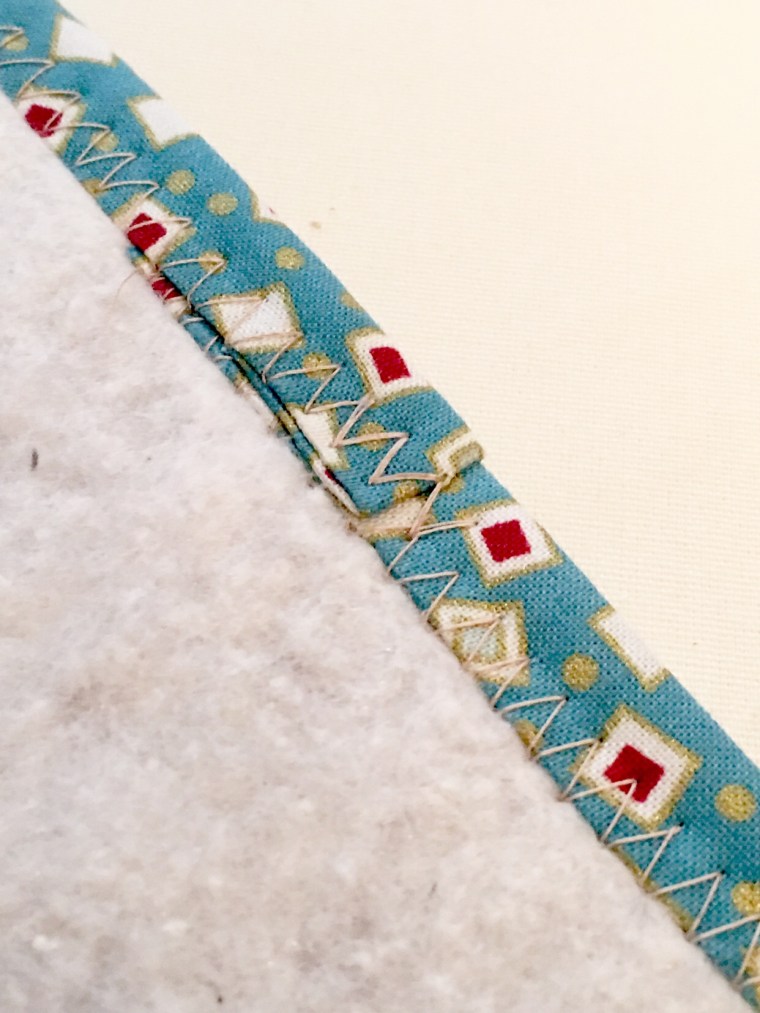
Next we are going to be sewing the binding to the boards. You will be sewing through the cardboard. Don’t worry, it will work! 🙂

- Set your machine to a wide zig zag stitch and starting in the middle of one side, fold the fabric over the board. Stitch through the fabric and board. If the left side of your stitch is at the edge of your binding, it should easily catch the back of the binding as well.
- Stitch just to the edge of the board. Back stitch and cut your thread
- Pictures 3 and 4 go together. Lift the board and pull the fabric down on the next side making a miter. You may want to add a drop of glue to hold the corner in place. I just held mine. Sew the next side down . Repeat for all four sides.
- When you come to the end, cut the binding about 1.5″ over the starting point. Fold the binding back on itself and stitch to the end.
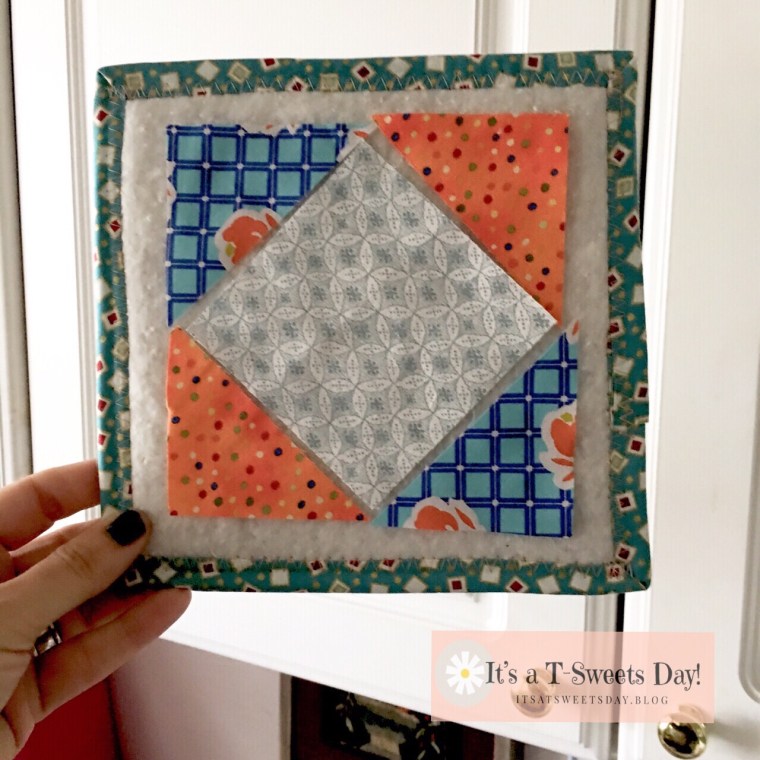
Yea! You are finished! Don’t they look great?!

I can’t wait to use them with my next Delilah project. There are always so many pieces to cut and carry!
And how do I store all of these boards? I have a fun Totally Tipster tip for you today as well. SWEET!
I have a letter holder next to my wall that holds my favorite rulers and these boards. 
It takes very little space and they are all ready to be used at any time. I just love multipurpose objects!
I hope you will make a few of these boards for yourself. I would love to hear about it if you do:)
Until tomorrow!


Very informative! Thanks for sharing!
LikeLiked by 1 person
You are so welcome! Thank you for stopping by today ❤️❤️
LikeLiked by 1 person
Hi Tracy – I made a couple of these boards last summer, using foam core board from the dollar store, and pretty duct tape. They turned out very nicely and I just love them. I lay blocks out at the cutting table and take to the sewing machine, I lay sections back out on the board to take to the iron & back to the machine. Every once in a while I clean them off with my sticky lint roller. Here is a tip – I use the sticky lint roller to clean my cutting table too! If I was going to use binding on them, I think I would make sure I put in a 16 needle (heavy duty / denim). Yours turned out SEW CUTE! Here is a link to my post about these boards – https://stitchinggrandma.wordpress.com/2017/09/01/strings-and-grandmas-kitchen-blocks-9-and-10-and-more/
LikeLiked by 2 people
Good ideas! Aren’t these type of boards the best? I have made a few with the core board as well. I like them, but I especially like the batting and the use of scrappy items at home. Changing to a larger needle would be a good idea:). Thx for the added info. You are the BEST!!❤️
LikeLiked by 1 person
I’ve had it in my head to make 2 more, and there is PLENTY of cardboard around our house! I like using what is on hand too!
LikeLike
What a genious idea! Have to put that on my ever growing project list to do before continuing the quilt I started three years ago – thanks for sharing.
LikeLiked by 1 person
You are so welcome! Never fear though, this project won’t take a few hours much less a few years:) lol!❤️
LikeLike
These are pretty and useful, and best of all, SCRAPPY. Mine aren’t nearly so pretty or scrappy: I used sheets of very fine grit sandpaper, mounted on thin card and backed with clear book-covering plastic. The great thing about having one of these in the same size as your block is that you can lay out scrap pieces to make a random block, and when you reach the edge you know it’s time to stop! Great post for ScrapHappy 🙂
LikeLiked by 1 person
Thank you Kate! Fine sandpaper on a board sounds like a great idea:). Scrap Happy is always a fine time of the month❤️❤️
LikeLiked by 1 person
Great idea Tracy & although I’ve a smallish design board that sits on the floor (propped against wall), near my machine, pieces do occasionally fall off. It’s done good service though, as we made it back in the late 90’s for a workshop I did at a store. (giggle). I store a lot of my rulers in a block that hubby made me, but the letter rack idea is a great one & I’ve plenty of rulers. You could run a challenge on using our rulers??? Have a good week & take care.
LikeLiked by 1 person
Hi Susan! I think a ruler challenge sounds interesting… what were you thinking of?
LikeLike
Maybe to use a ruler you’ve bought, that you haven’t tried before. I’ve many (whoops), that sit there gazing at me & although quite a few have been played with, there are quite a few that haven’t. Could be interesting to see what others have not used too, as they all look so interesting.
LikeLiked by 1 person
Great idea! I will try to get something together in the next few weeks😊
LikeLiked by 1 person
Good idea 🙂
LikeLiked by 1 person
Thank you! I hope you give it a try sometime 😊
LikeLiked by 1 person
Awesome idea! 🙂
LikeLiked by 1 person
Thanks Cindy! These really do work:)
LikeLiked by 1 person
I have no doubt. 🙂
LikeLike
Love learning more about sewing and quilting through your blog! I’m a pre-beginner (meaning I’ve thought about taking up sewing as a hobby).
Do you have any sewing machine recommendations for a beginner? Brands, features, specific models, etc.?
Maybe you’ve already written a post about it?
Thanks!
LikeLiked by 1 person
Hi Brenna! Great question! I will definitely write a post, but in the mean time, I always recommend to beginning sewers to go to your local Walmart and buy the most expensive machine there. It is usually a Brother. It should have all of the bells and whistles like electronic stitch selection and maybe even an embroidery attachment at a fraction of the price. Think if it as your first car. You aren’t going to end here, but in the meantime you will have everything the big names have and you will be very happy with it. If you don’t continue with your new hobby, you aren’t out the price of a high end Pfaff, Viking, Juki or Janome Etc. Thank you for the question. I hope this helps
LikeLike
Creative use of ALL kinds of scraps today, Tracy!! Great idea!
LikeLiked by 1 person
Thank you Kathy! It always feels so good to waste not want not
LikeLiked by 1 person
Amazing Tracy! I think I will need some of those, I’ve decided to take the plunge this year and start machine piecing!
LikeLiked by 1 person
Really?!!❤️. Oh I’m so excited for you! Let me know if I can help❤️❤️❤️
LikeLiked by 1 person
Thanks Tracy you’re the best 🙂 I will start with making one of those cute design boards and then I might do the quilt you published last year, it looked super pretty! ❤
LikeLiked by 1 person
I hope you do :). You will love it❤️❤️
LikeLiked by 1 person
I obviously need to bookmark this to come back to it later! What a great idea!
LikeLiked by 1 person
Thank you so much Kate!
LikeLiked by 1 person
Your design boards are great and I really could use a few. I’ll add this to my upcoming tasks once I get some time. I’m loving working on my Mystery QAL. Thank you for this fun group opportunity which has me so psyched!!
LikeLiked by 1 person
Oh yea! I’m so glad you will be able to make a board or two:). I’m also way way excited about the MQAL!! We will be posting our first progress this weekend anytime. Do I have your email to give you monthly reminders? You can contact me in my contact page. Yea! Yea!😊❤️❤️❤️
LikeLiked by 1 person
Hmmm, I don’t have batting but I do have felt. Thanks for the ideas.
LikeLiked by 1 person
Hi Christine!
I think felt would work just fine. It just needs to be a fabric that will grab your cut pieces and keep them from shifting around. I might double the layers for a bit of cushion between the fabric and the cardboard.
Thank you for dropping by today and your thoughtful comment:)❤️❤️
LikeLike
Love that letter holder idea, brilliant! I’m in “desperate” need of a mat holder.
Thanks
Darlene
LikeLiked by 1 person
Wonderful! I really like this storage method. I hope you do too:)
LikeLike
Next time I’m in town I’ll be on the hunt for one. So appreciate your help Tracy. Enjoying your blog, (just had to subscribe).
Have a wonderful evening.
Darlene
Nova Scotia
LikeLike
I really like the simplicity & usefulness of these boards. Instead of packing tape on the back, I’m going to use Contact Paper. Prints would be pretty but I always keep some clear on hand to use for simple laminating projects. The secret is to lay the Contact Paper on a flat surface, sticky side up then lay your item on it. This way, static electricity doesn’t get in the way and mess up the Contact Paper.
LikeLiked by 1 person
Great idea Susan! I may give that a try with my next board. Thank you for stopping by and sharing;)❤️❤️
LikeLike
Great idea especially to make as gifts for a fellow enthusiasts .
Love the letter rack idea !
LikeLike
Thank you Libba! I use my boards all of the time. I’m sure any quilter would love them as a gift. Great idea!! The letter rack is perfect for rulers. I hope you give it a try:). Thank you so much for dropping by. I hope you have a wonderful day! — Tracy:)
LikeLike
That is a good idea. Because I am not very good at binding, I would just ask and see if you would be able to make a pocket with two layers of fabric and your batting. My suggestion would be to stitch the batting and one fabric, right side out together. Second fabric half inch longer on one side(making it a rectangle) this is so you fold the edge over twice to make a hem. Lay right side of fabric next to batting. Stitch together on three sides. Leaving the fourth side open. This gives you the opening /pocket to slide in the cardboard.
LikeLiked by 1 person
Great idea! Thank you for your hint:)
LikeLike
With a fabric back if you stacked them with blocks on, wouldn’t some pieces stick to the bottom of the one above? I think I am going to try using some leftover shelf liner I have. It is white with black flowers on and somewhat sticky like contact paper. I think it will be enough if I don’t make it too big. Plus, I am going to use a pretty solid flannel I have instead of the batting. Then I can clean up the loose threads easily!
LikeLike
Great idea:)! I only covered one side so the bottom did not stick to the covered top side. Whatever works for you is the right thing to do. Enjoy your boards!
LikeLike