
 I love a clean bathroom, but I hate the look of a big ugly cleaning wipe container on my counter. I usually put the wipes under the sink, but very often forget to get them out and use them after I brush my teeth. When I was asked to make a household item tutorial for the Facebook page “Stashbusting Sewalong 2016“, I knew immediately that I wanted to make a cover for these useful, but unsightly cleaning necessities:)
This is a really easy project that can be made with fabrics from your stash. You can make one in less than an hour. It would be a breeze to make several extra for wedding showers or Christmas presents. So if you have a few creative minutes, here is the “recipe”–
Items Needed:
- 3 fabrics from your stash -2 fat quarters and one 2×20″accent strip
- cleaning wipes
- 1/4″ elastic
- large button or brooch
Directions:

Cleaning wipes

Fabric from your stash

- Measure around your wipes and +add 1″
- Measure from the bottom of the lid to the bottom of the wipes and +add 3″
This is the measurement for your large, main piece of fabric. Mine measured 13.5″x 7.5″. So I cut my main fabric 14.5″ x 10.5″. Easy so far!
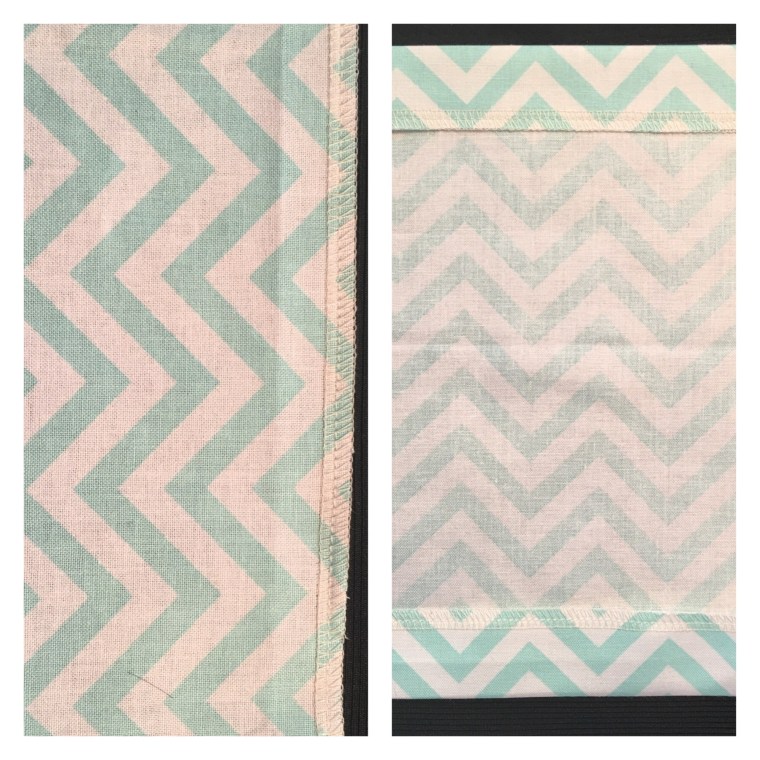
- Finish all around the edges with a serger or a zig zag stitch.
- Press the long edges up 1″ on both sides.
Piece of cake:)
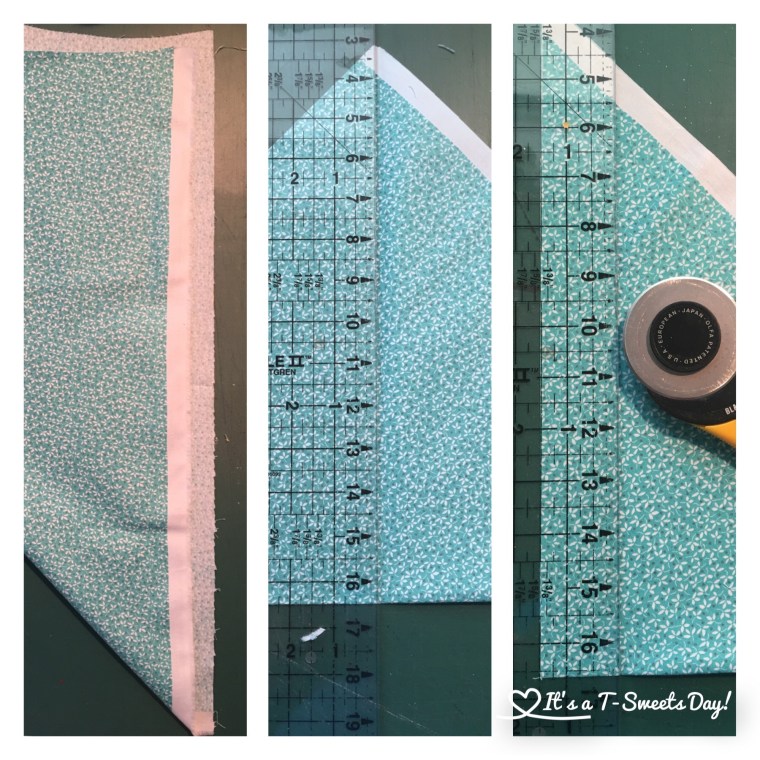
- Fold your accent fabric diagonally and cut in half from the tip of the triangle down. This is shown in the middle picture.
- After you have a nice straight edge, cut 4 or 5 strips 1.5″ wide.
This will give you bias strips that will not ravel. Yea!

- Trim the selvedges off
- Line the strips together as shown in the bottom left picture
- Turn the pieces right sides together leaving 1/4″ dog ears on the top and side. You may want to pin this if you are worried about it shifting. Don’t worry. It doesn’t have to be exact. Just as close as you can.

- Sew the strips together using a 1/4″ seam allowance. Try to hit the “V”s where the fabrics meet. Sew them all together making one long strip.
- Press the seams open and trim the dog ears.
- Set your sewing machine to the longest stitch with the tightest or highest #setting on the tension. (write your normal settings down so you don’t forget)
- Sew down the middle of the bias strip to make a lightning face gathered ruffle! YEA!!

Now that’s what I’m talking about:)!
- Set your stitch length and tension back to it’s normal setting.
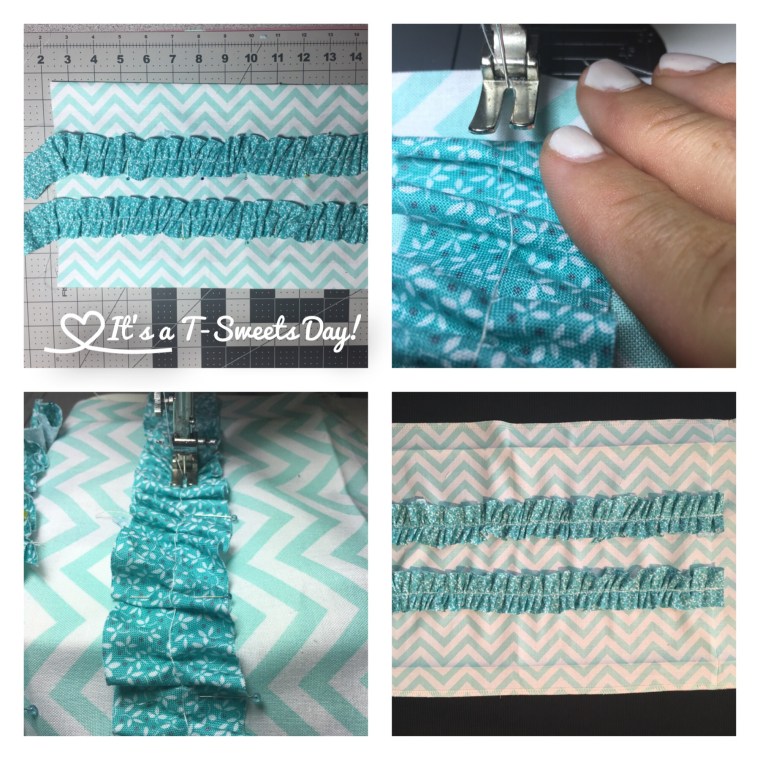
- Pin your ruffles on your back ground fabric where you would like them. 2 or 3 or even 4 deep. I chose to put 2 ruffles on my cover. You may want to draw a line to help you.
- Leave enough extra on both ends of the ruffles to fold under on itself. Cut any extra so there is not a huge amount of fabric folded behind the ruffle.
- Fold under leaving about an inch of background fabric free. This is shown in the bottom right picture.
- Sew the ruffle down with a straight or zig zag stitch making sure to take out the pins as you go.

- Fold your fabric in half matching the short ends
- Sew the short ends closed making a tube.
- Turn your tube right side out
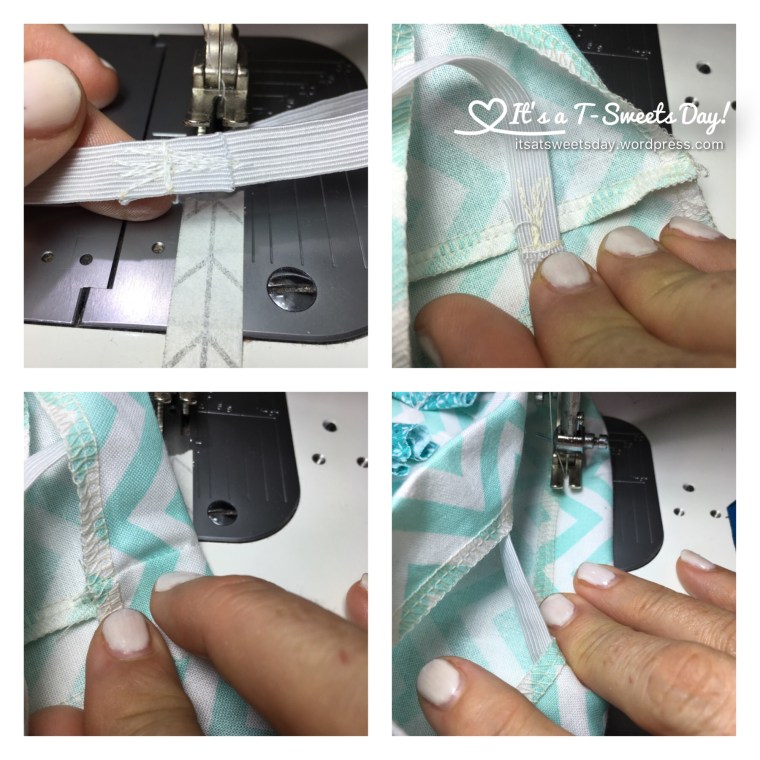
- Cut two pieces of elastic 2″ shorter than the width of your container. Mine measured 13.5″ so I cut my elastic 11.5″
- Sew each elastic strip into a circle. Secure the ends as in the picture on the top left.
- Place the elastic inside of the fold on the main fabric.
- Fold the fabric over the elastic circle as you sew, make sure not to sew into the elastic. You are just encasing it.
- Sew all the way around on both sides.
Fantastic! You do not have to thread the elastic in. It does it all by itself like magic!!
Now we can add the optional bow–

- From the second accent fabric, cut a 2″x20″ strip. This is not on the bias because we want it to fray a bit.
- Sew the short ends together making a circle.
- Thread a needle and make a large running stitch all the way around the circle. It is very quick and easy.
- Pull the thread tightly together and knot.
- Sew a button to the center. You could use decorative embroidery thread here if you want.
- Sew the flower to the front of the cover.

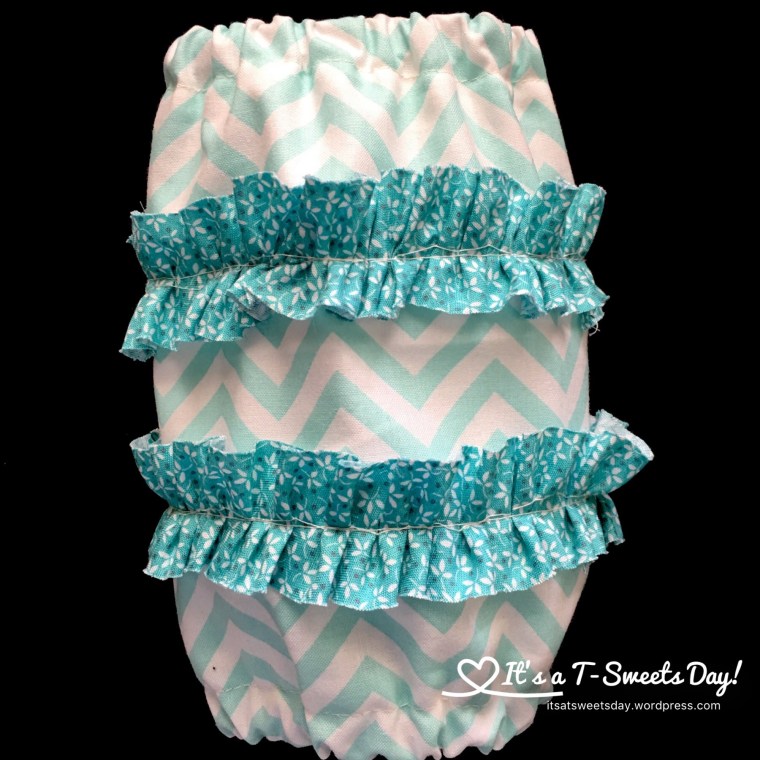
There you go! That wasn’t hard at all:) Now you have a SWEET cover for your wipes that can be thrown in the wash. These can be as fancy or as plain as you like. I can see one made up with Christmas or Halloween fabric for the holidays. Or you can leave off the ruffles and flower for a boys bathroom. (Maybe they will actually keep their bathroom clean now!)
I hope you enjoyed this tutorial and will give it a try. Let me know if you do. I would love to hear from you!
–Tracy:)

I love this creation! It’s a fantastic idea and a great way to use up some of those smaller pieces you don’t want to throw out! 🙂
LikeLiked by 1 person
Thank you!! I have made several now and just LOVE them:).
LikeLiked by 1 person