
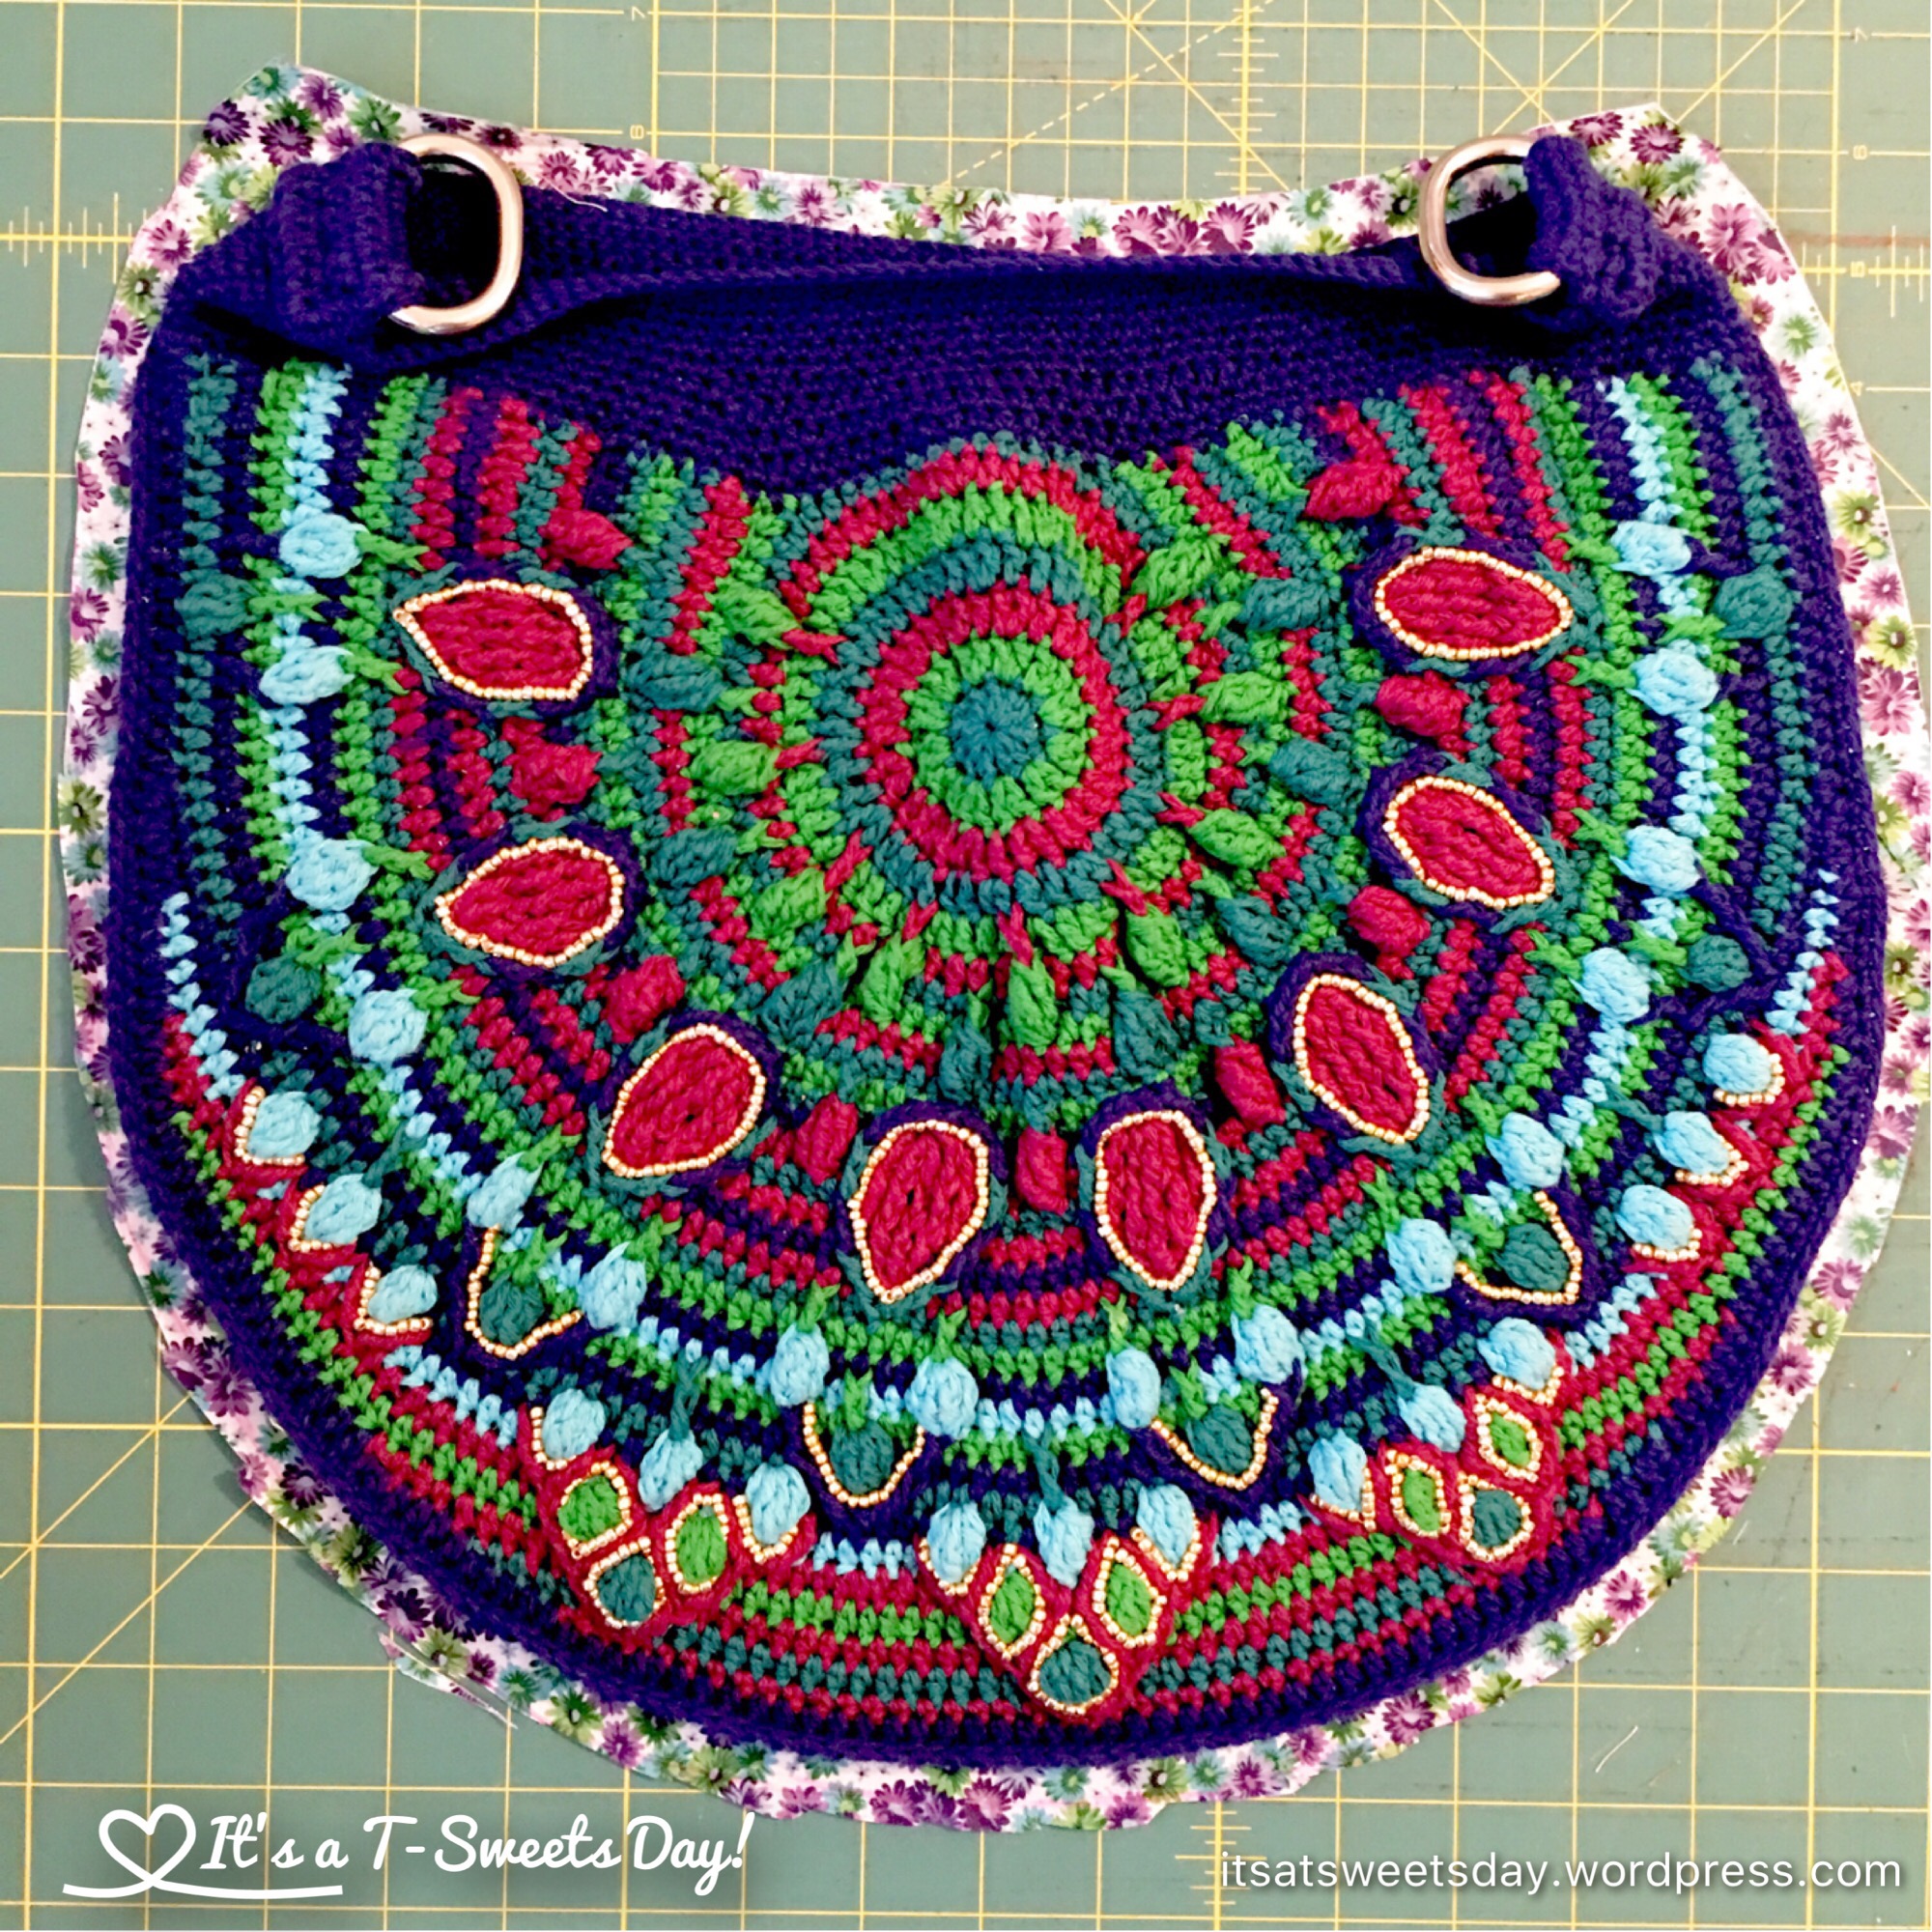
Good day! I have been busily sewing on my peacock bag. It is so so pretty! I have enjoyed the colors and textures, really I enjoy just about everything about this bag. I have embellished it with beads and even added two fobs! I used a necklace that I picked up at the store for $2.00 and took apart. Oh yea!! And well worth it, don’t you think?
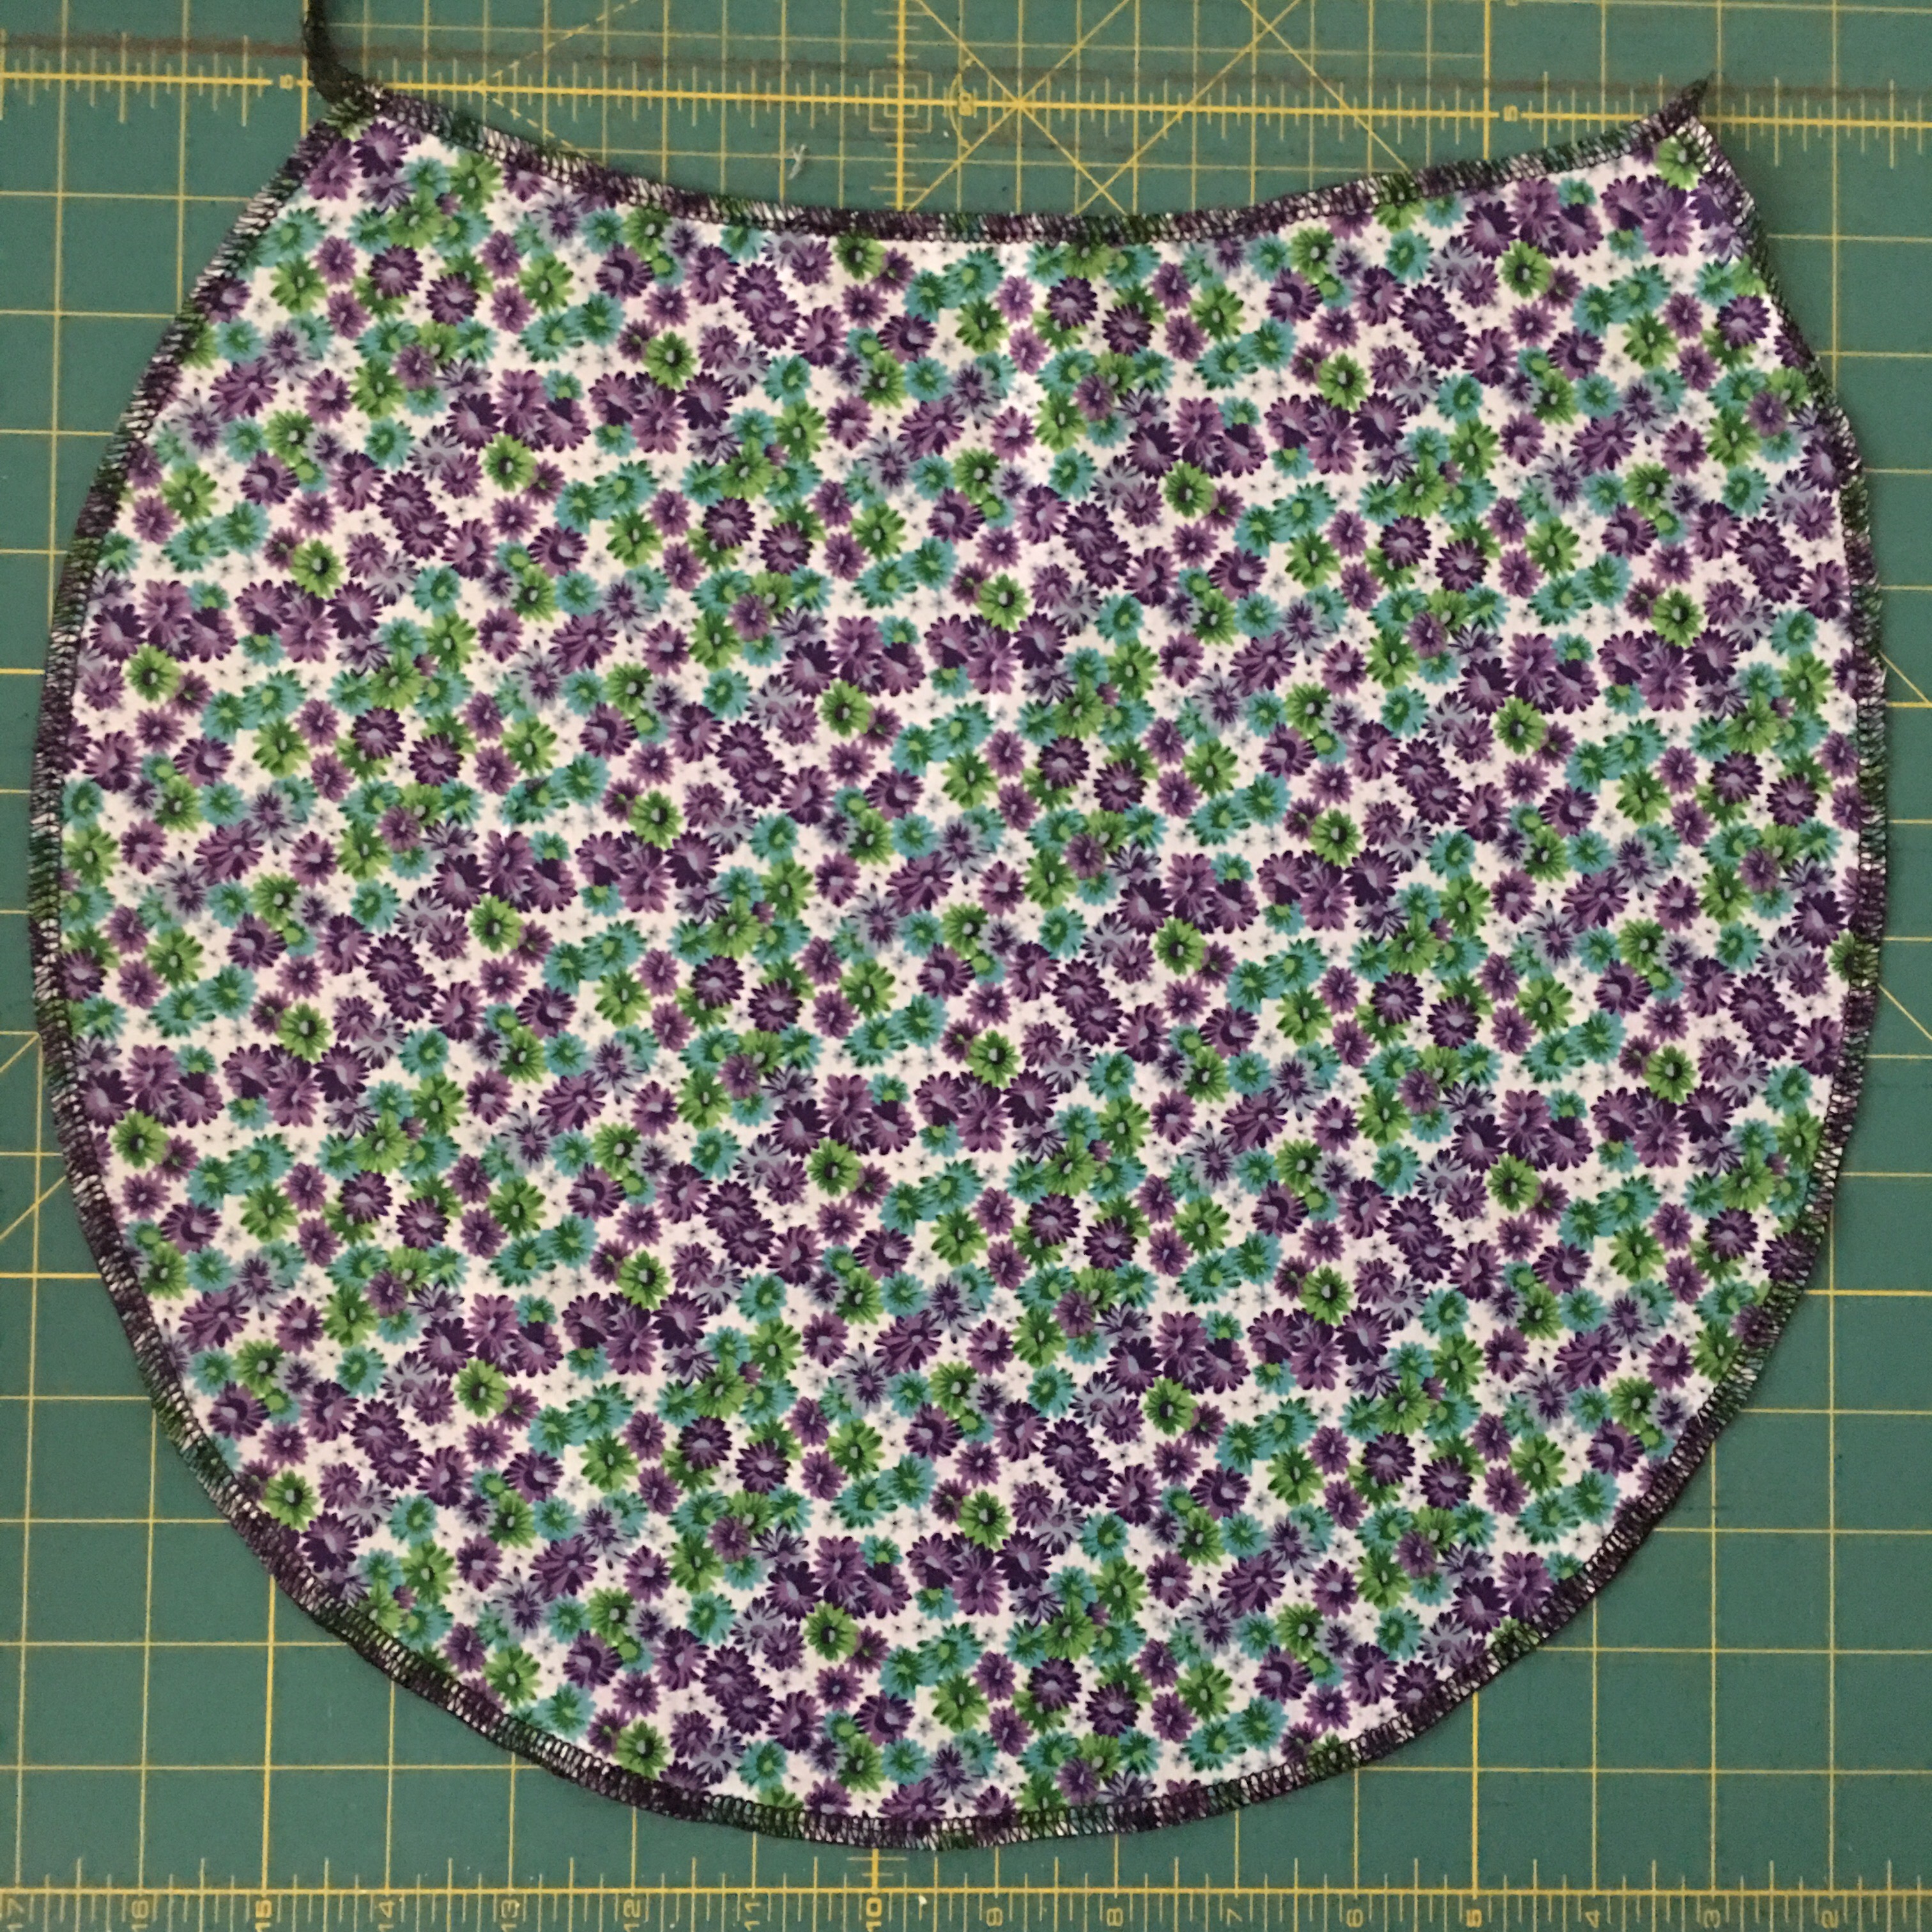
Now this bag is ready for the lining. I like making lining. It really finishes a bag off to perfection. But I think a purse needs a zippered pocket. They are really easy to do. Here is how you do it:
Supplies:
I’m not giving exact amounts because every bag is a different size.
- Lining fabric
- Coordinating pocket fabric scraps
- Interfacing
- Matching zipper
Directions:
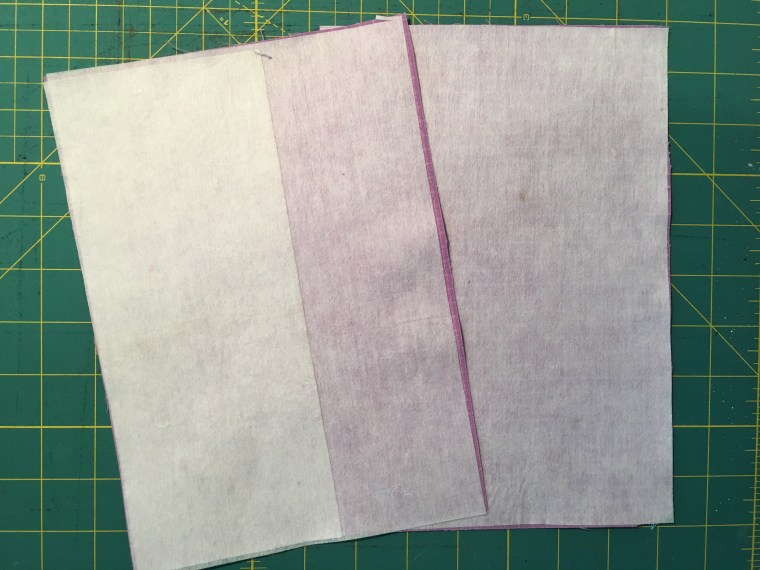
- Place your bag over folded fabric and cut around it making it about an inch bigger all around.

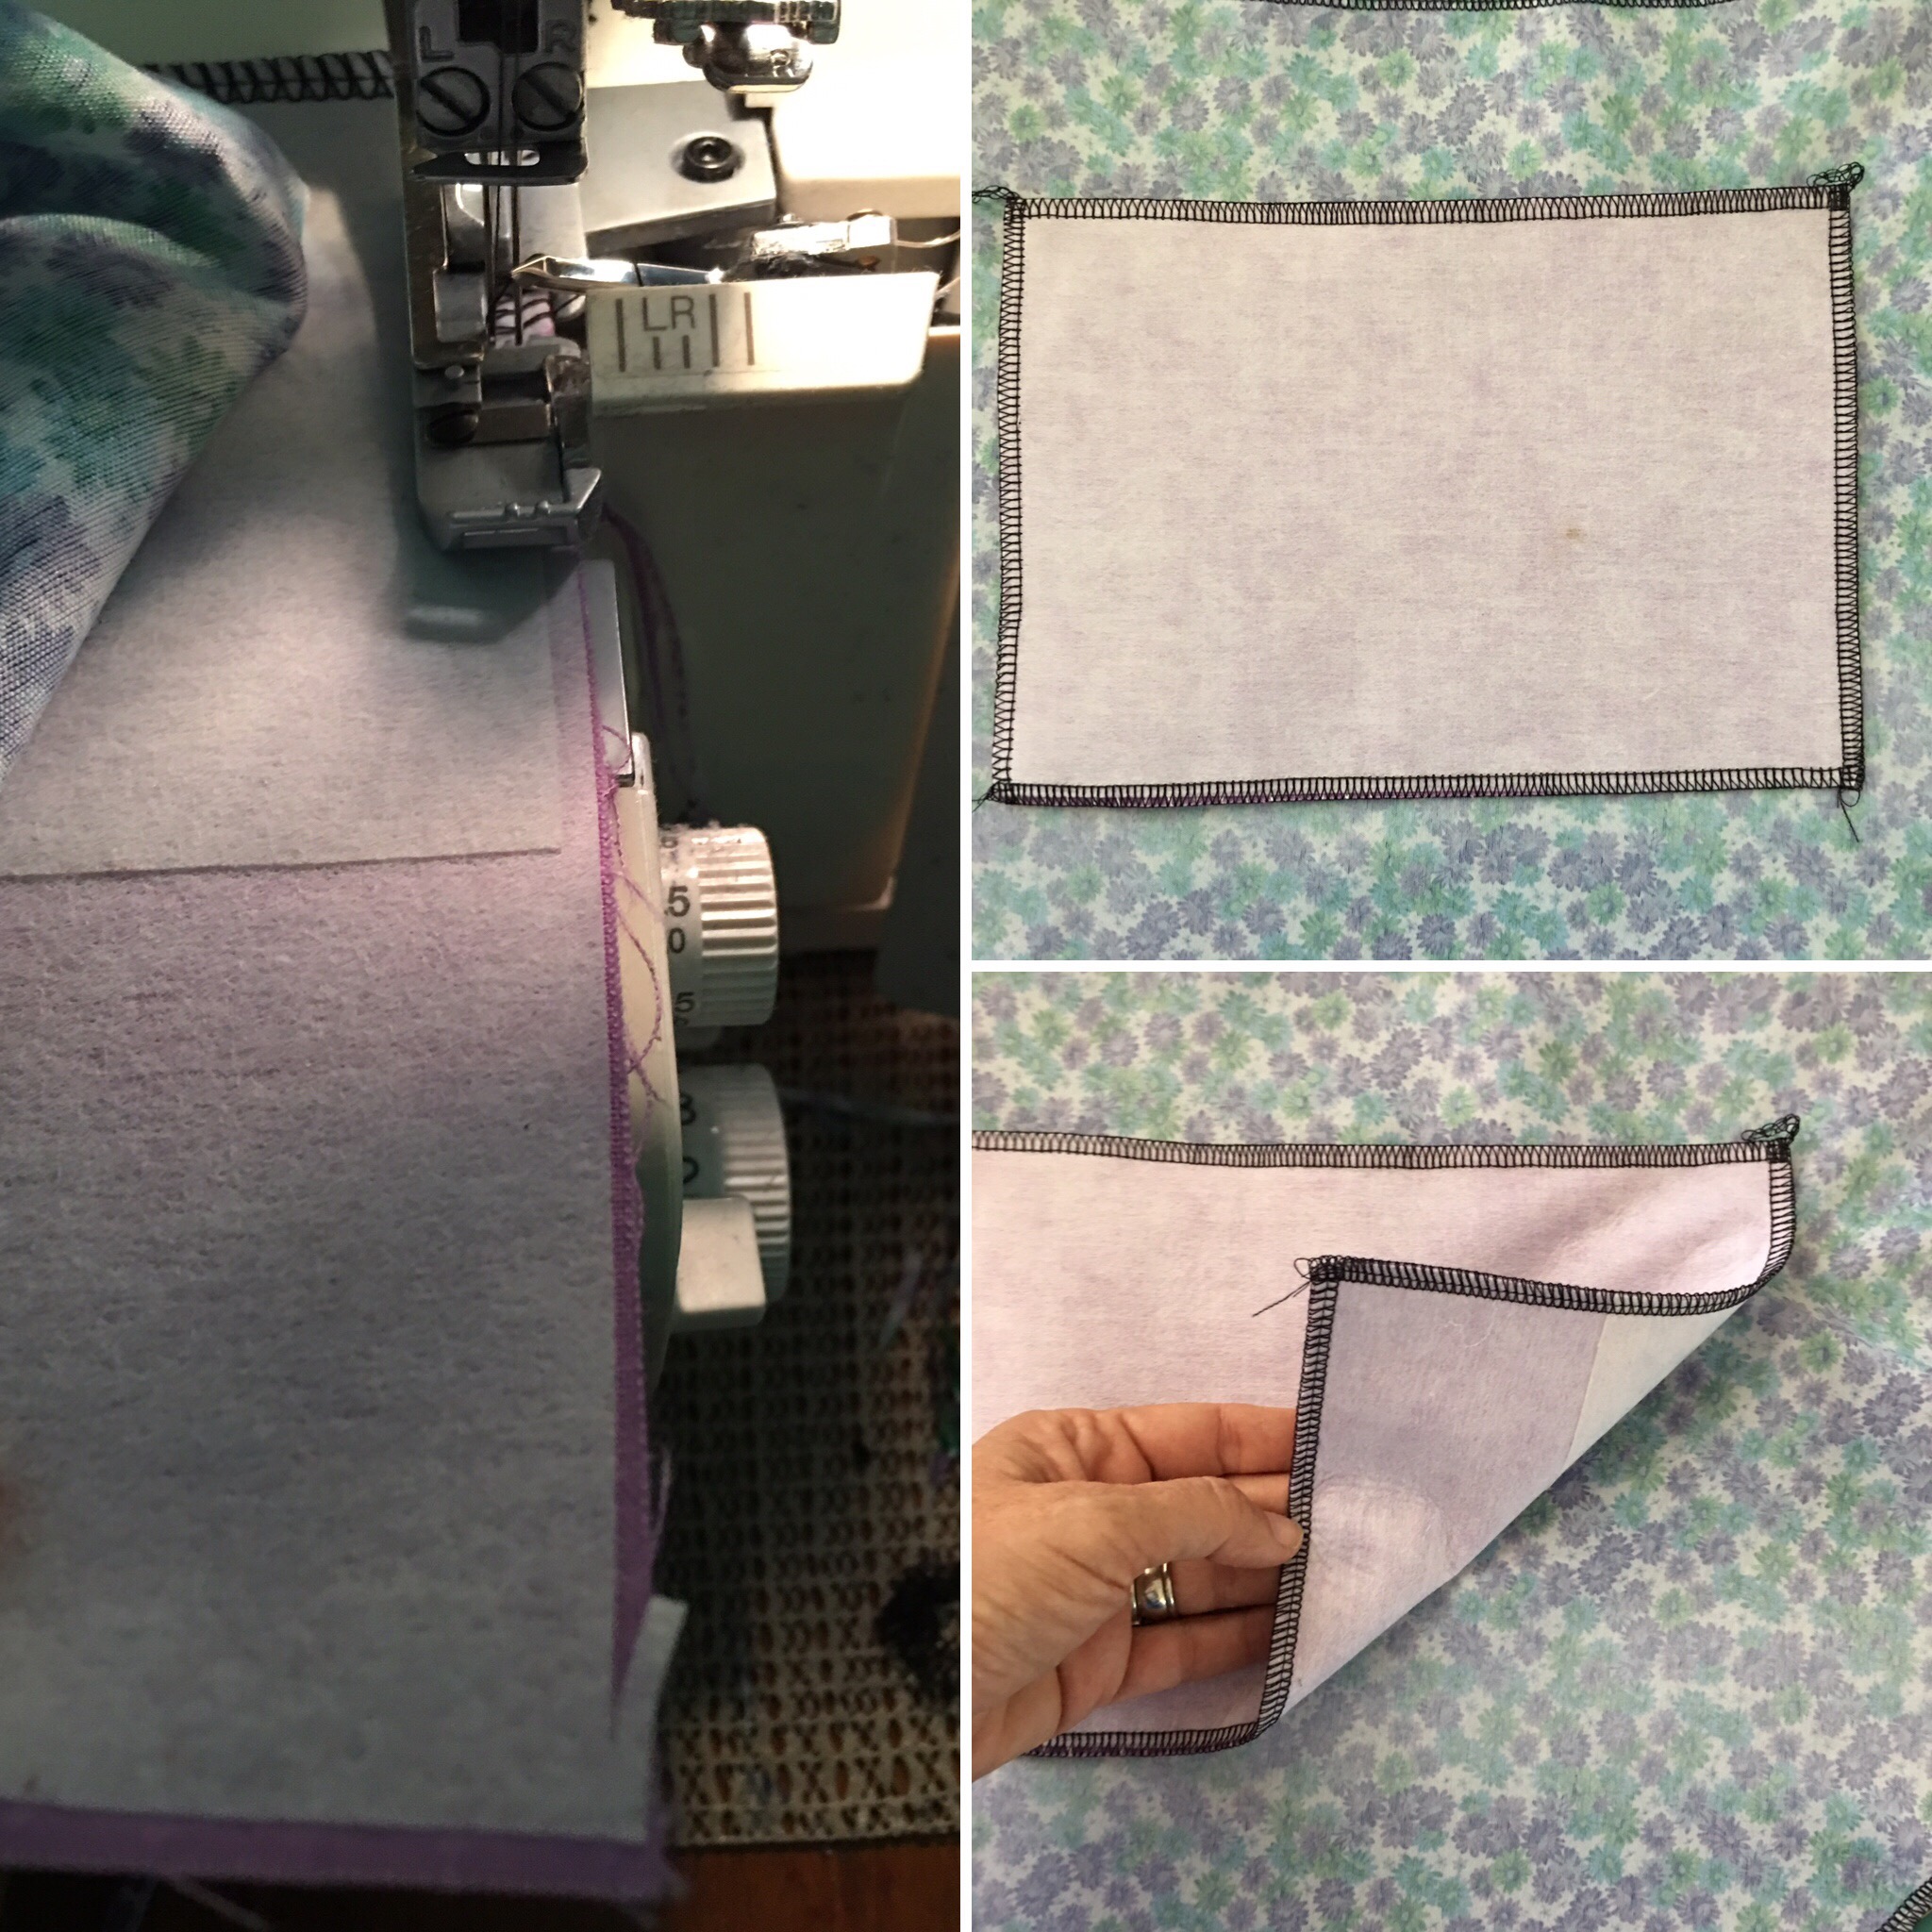
- Serge or zig zag around each piece to keep the edges from fraying.

- From your coordinating fabric and interfacing cut 2 pieces the size of pocket you want. Mine measured 7×10″.
- Cut one more interfacing half the width. Mine measured 3.5×10″

- Iron one large piece to the back of both pieces. Iron the extra pieces to the top edge of one piece making it extra sturdy.
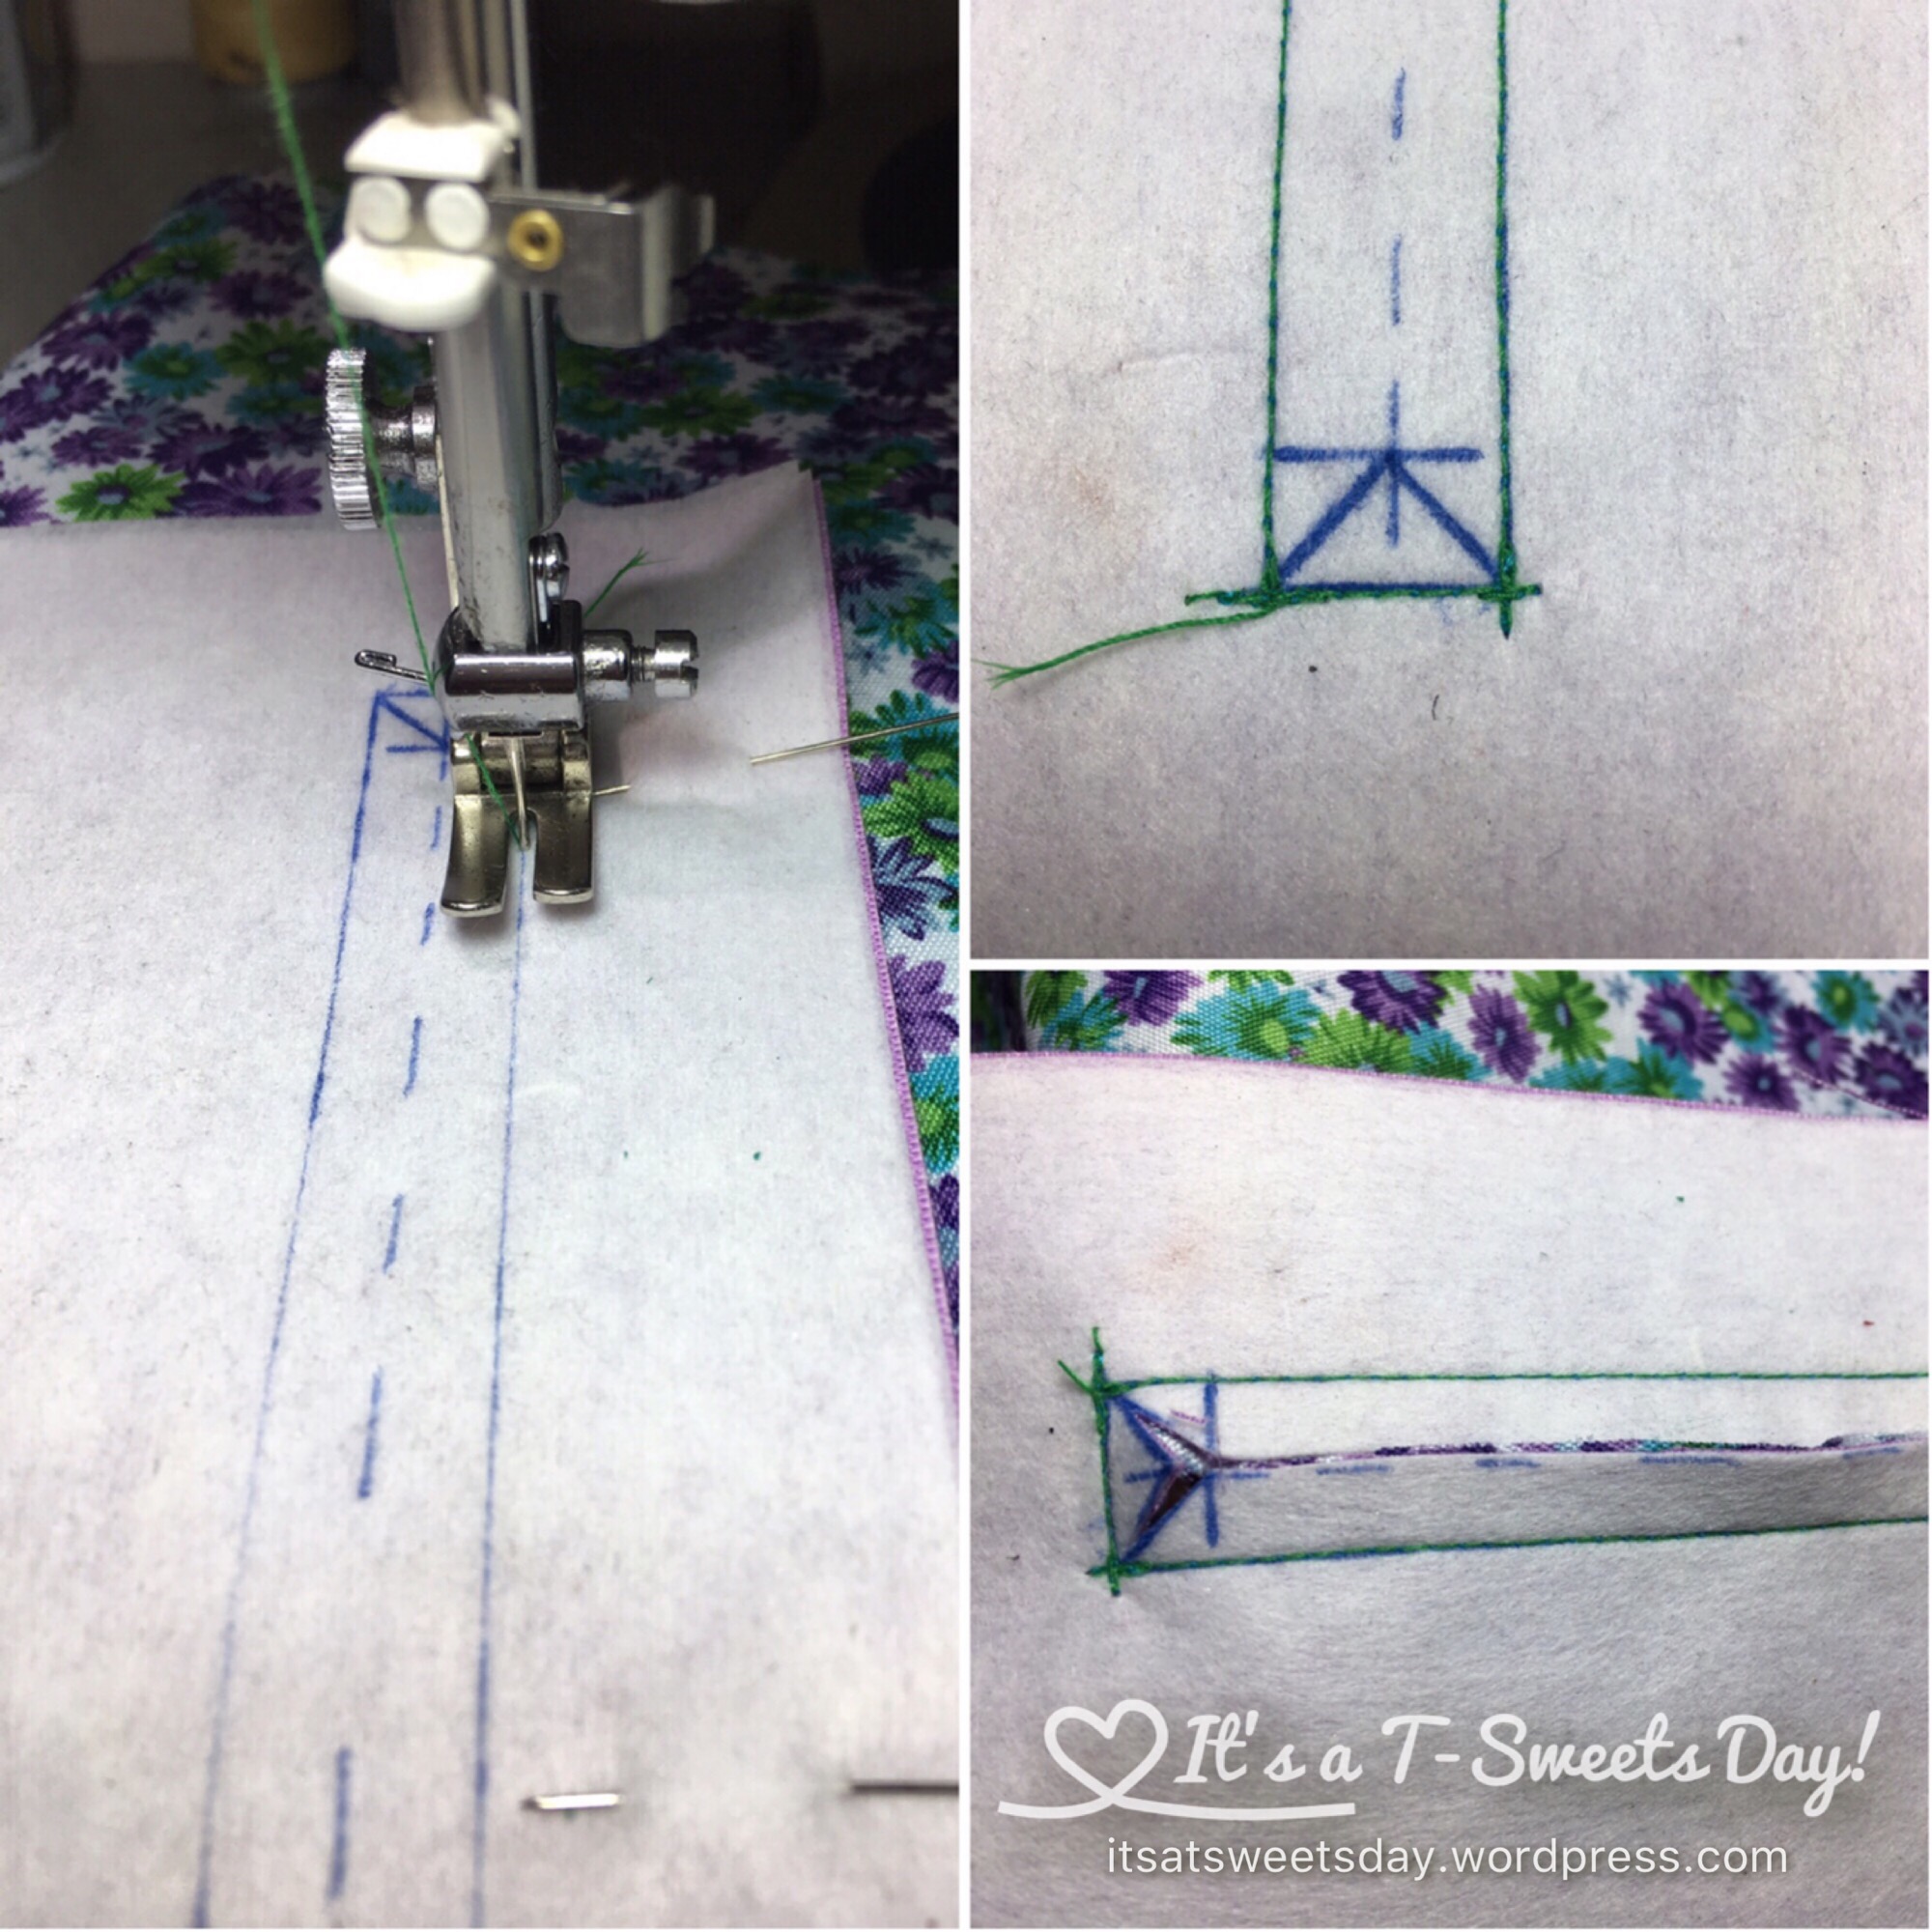
- Measure your zippper about a 1/4″ above and below the teeth.

- Mark the double interfaced piece of fabric by making a 1/2″ wide rectangle the length of the zipper about 1″ down from the top. Mine measured 7.5 x 1.5″. The picture is upside down. Sorry:)
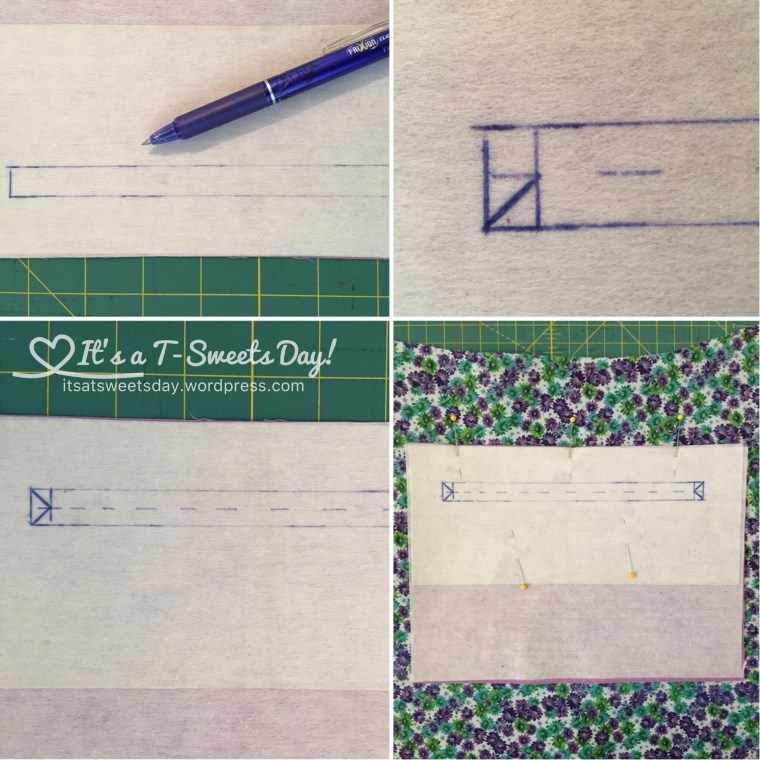
- Mark a dashed line down the center and 1/4″ line from both ends
- Make a diagonal line from the corner.
- Pin the piece right sides together where you want the pocket opening to be.
- Sew around the rectangle on the solid line. Don’t go over the edges like I did. You will get puckers.

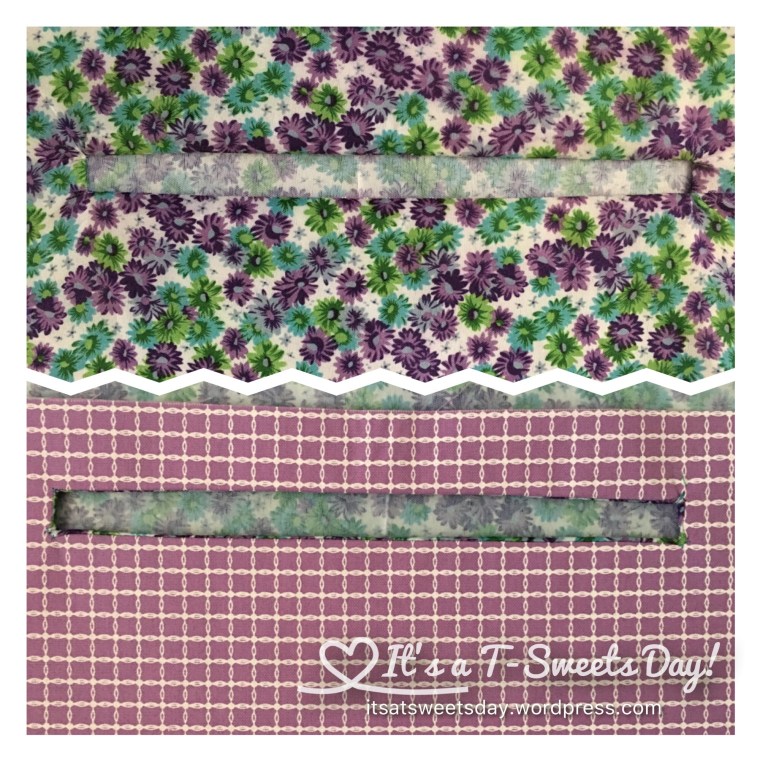
- Cut on the dashed line and into the corners. Be very careful here because you are cutting the lining as well.
- Pull the lining piece inside of the hole you have just made. Look how nice it looks on both the front and the back!
- Now it is time to sew in the zipper-pin the zipper on the right side opening. I like to place my pins going in the direction of the fabric because they cause less movement that way. But be careful though, they will poke you!

- Sew with a zipper foot around the zipper.
- Place the remaining pocket piece on top of the other and sew around it making sure to not sew the lining. In other words, sew the two pocket pieces together.

- Use a zig zag or a serger to keep the fraying under control.
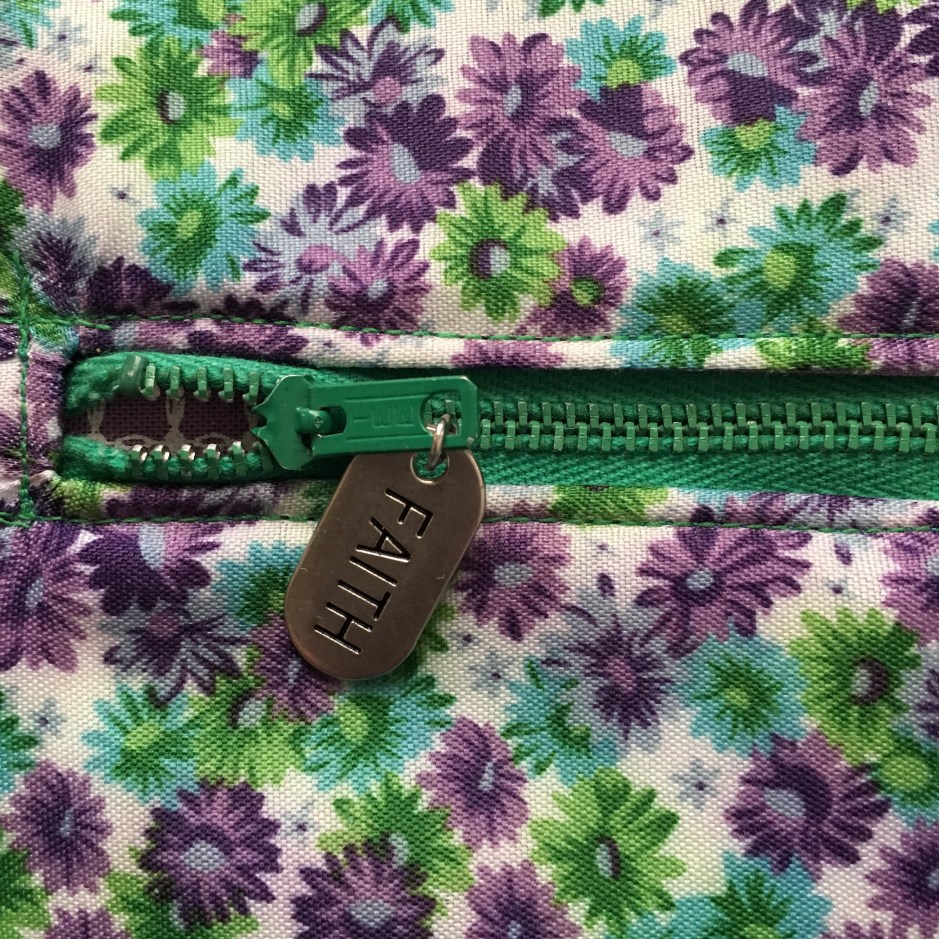
- Doesn’t that pocket look nice?
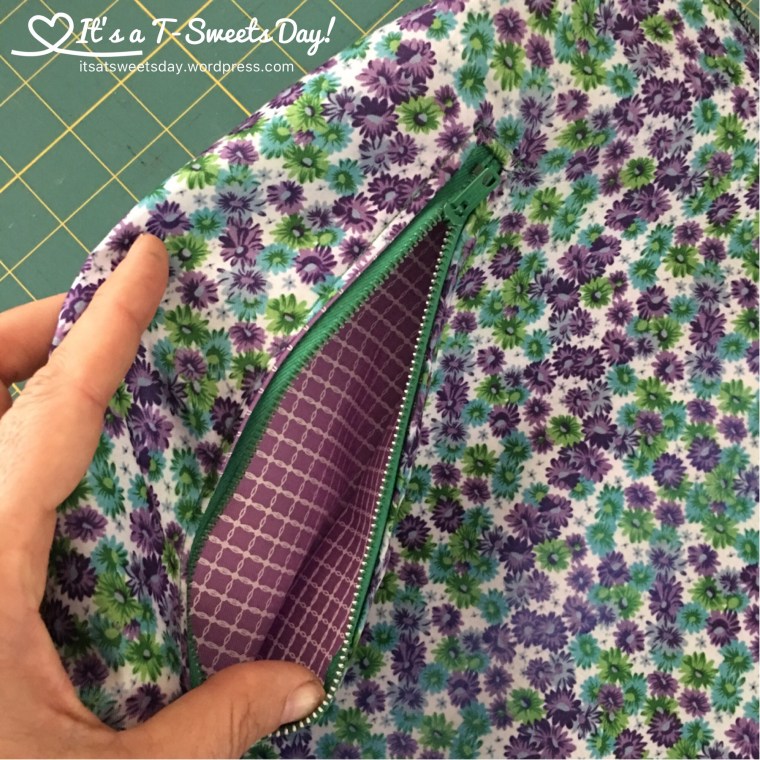
- Next I added a little bling to the zipper pull for a little bit of fun:)


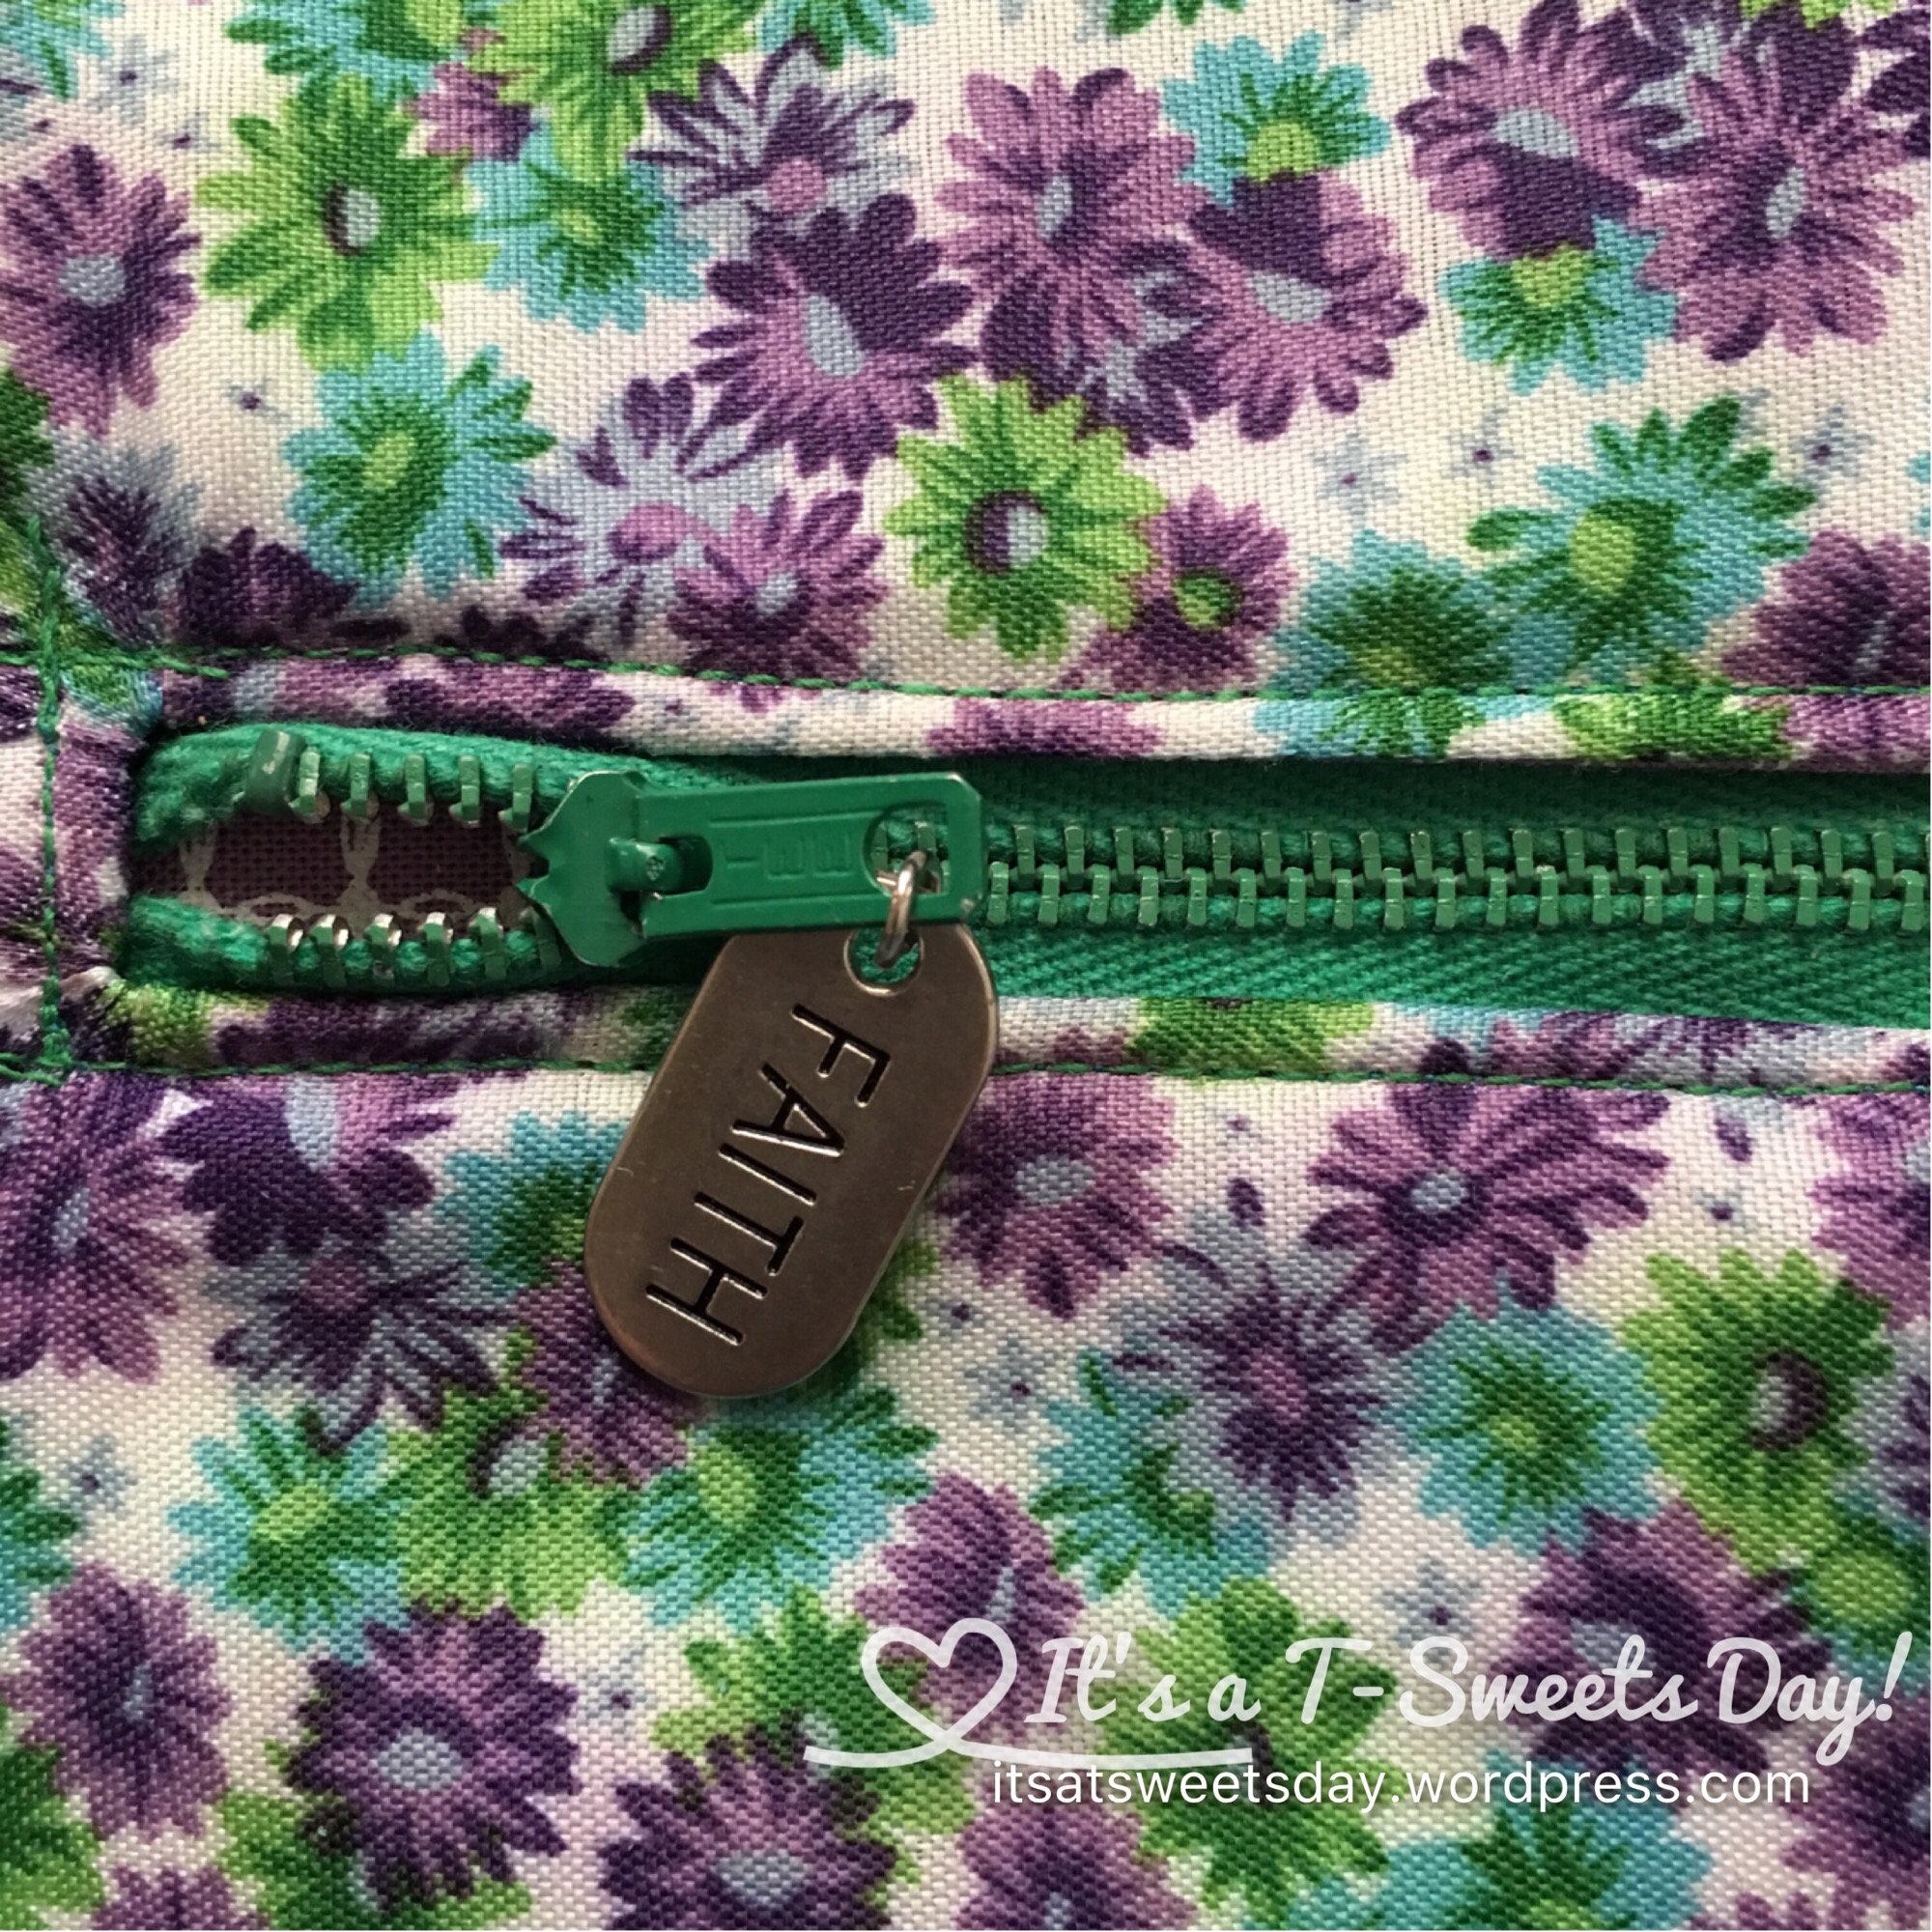
There you have it! A beautiful blinged up zipper for a purse or a jacket, or whatever!! That wasn’t hard at all:)!
I can’t wait for tomorrow because my bag will be done and I will be able to use it. Yea!!! I will definitely share a few pictures with you.
Until then I hope you have a SWEET evening. Thanks for dropping by!
–Tracy:)


This is a gorgeous bag. I love all the embellishments and the lining finishes it off perfectly. Thank you for your neat zipper tutorial 🙂
LikeLiked by 1 person
I’m glad you like the bag and tutorial. Easy zippers make sewing a dream. And the bag is so so pretty. Thank you for commenting. It has made my day SWEET!
LikeLike