

This quilt of love is almost done! I have really looked forward to and enjoyed making each chapter. My face would light up when I would see Sherri’s email filled with the templates and instructions for each months addition:). What a SWEET journey this has been.
Isn’t this section beautiful? Matching those points was a bear though. I could really use some advice on perfecting points. If you have any, let me know because I must have sewn and unsewn 3 or 4 times on some of these. Here is an example– you can see the gap even though I thought I was sewing to perfection.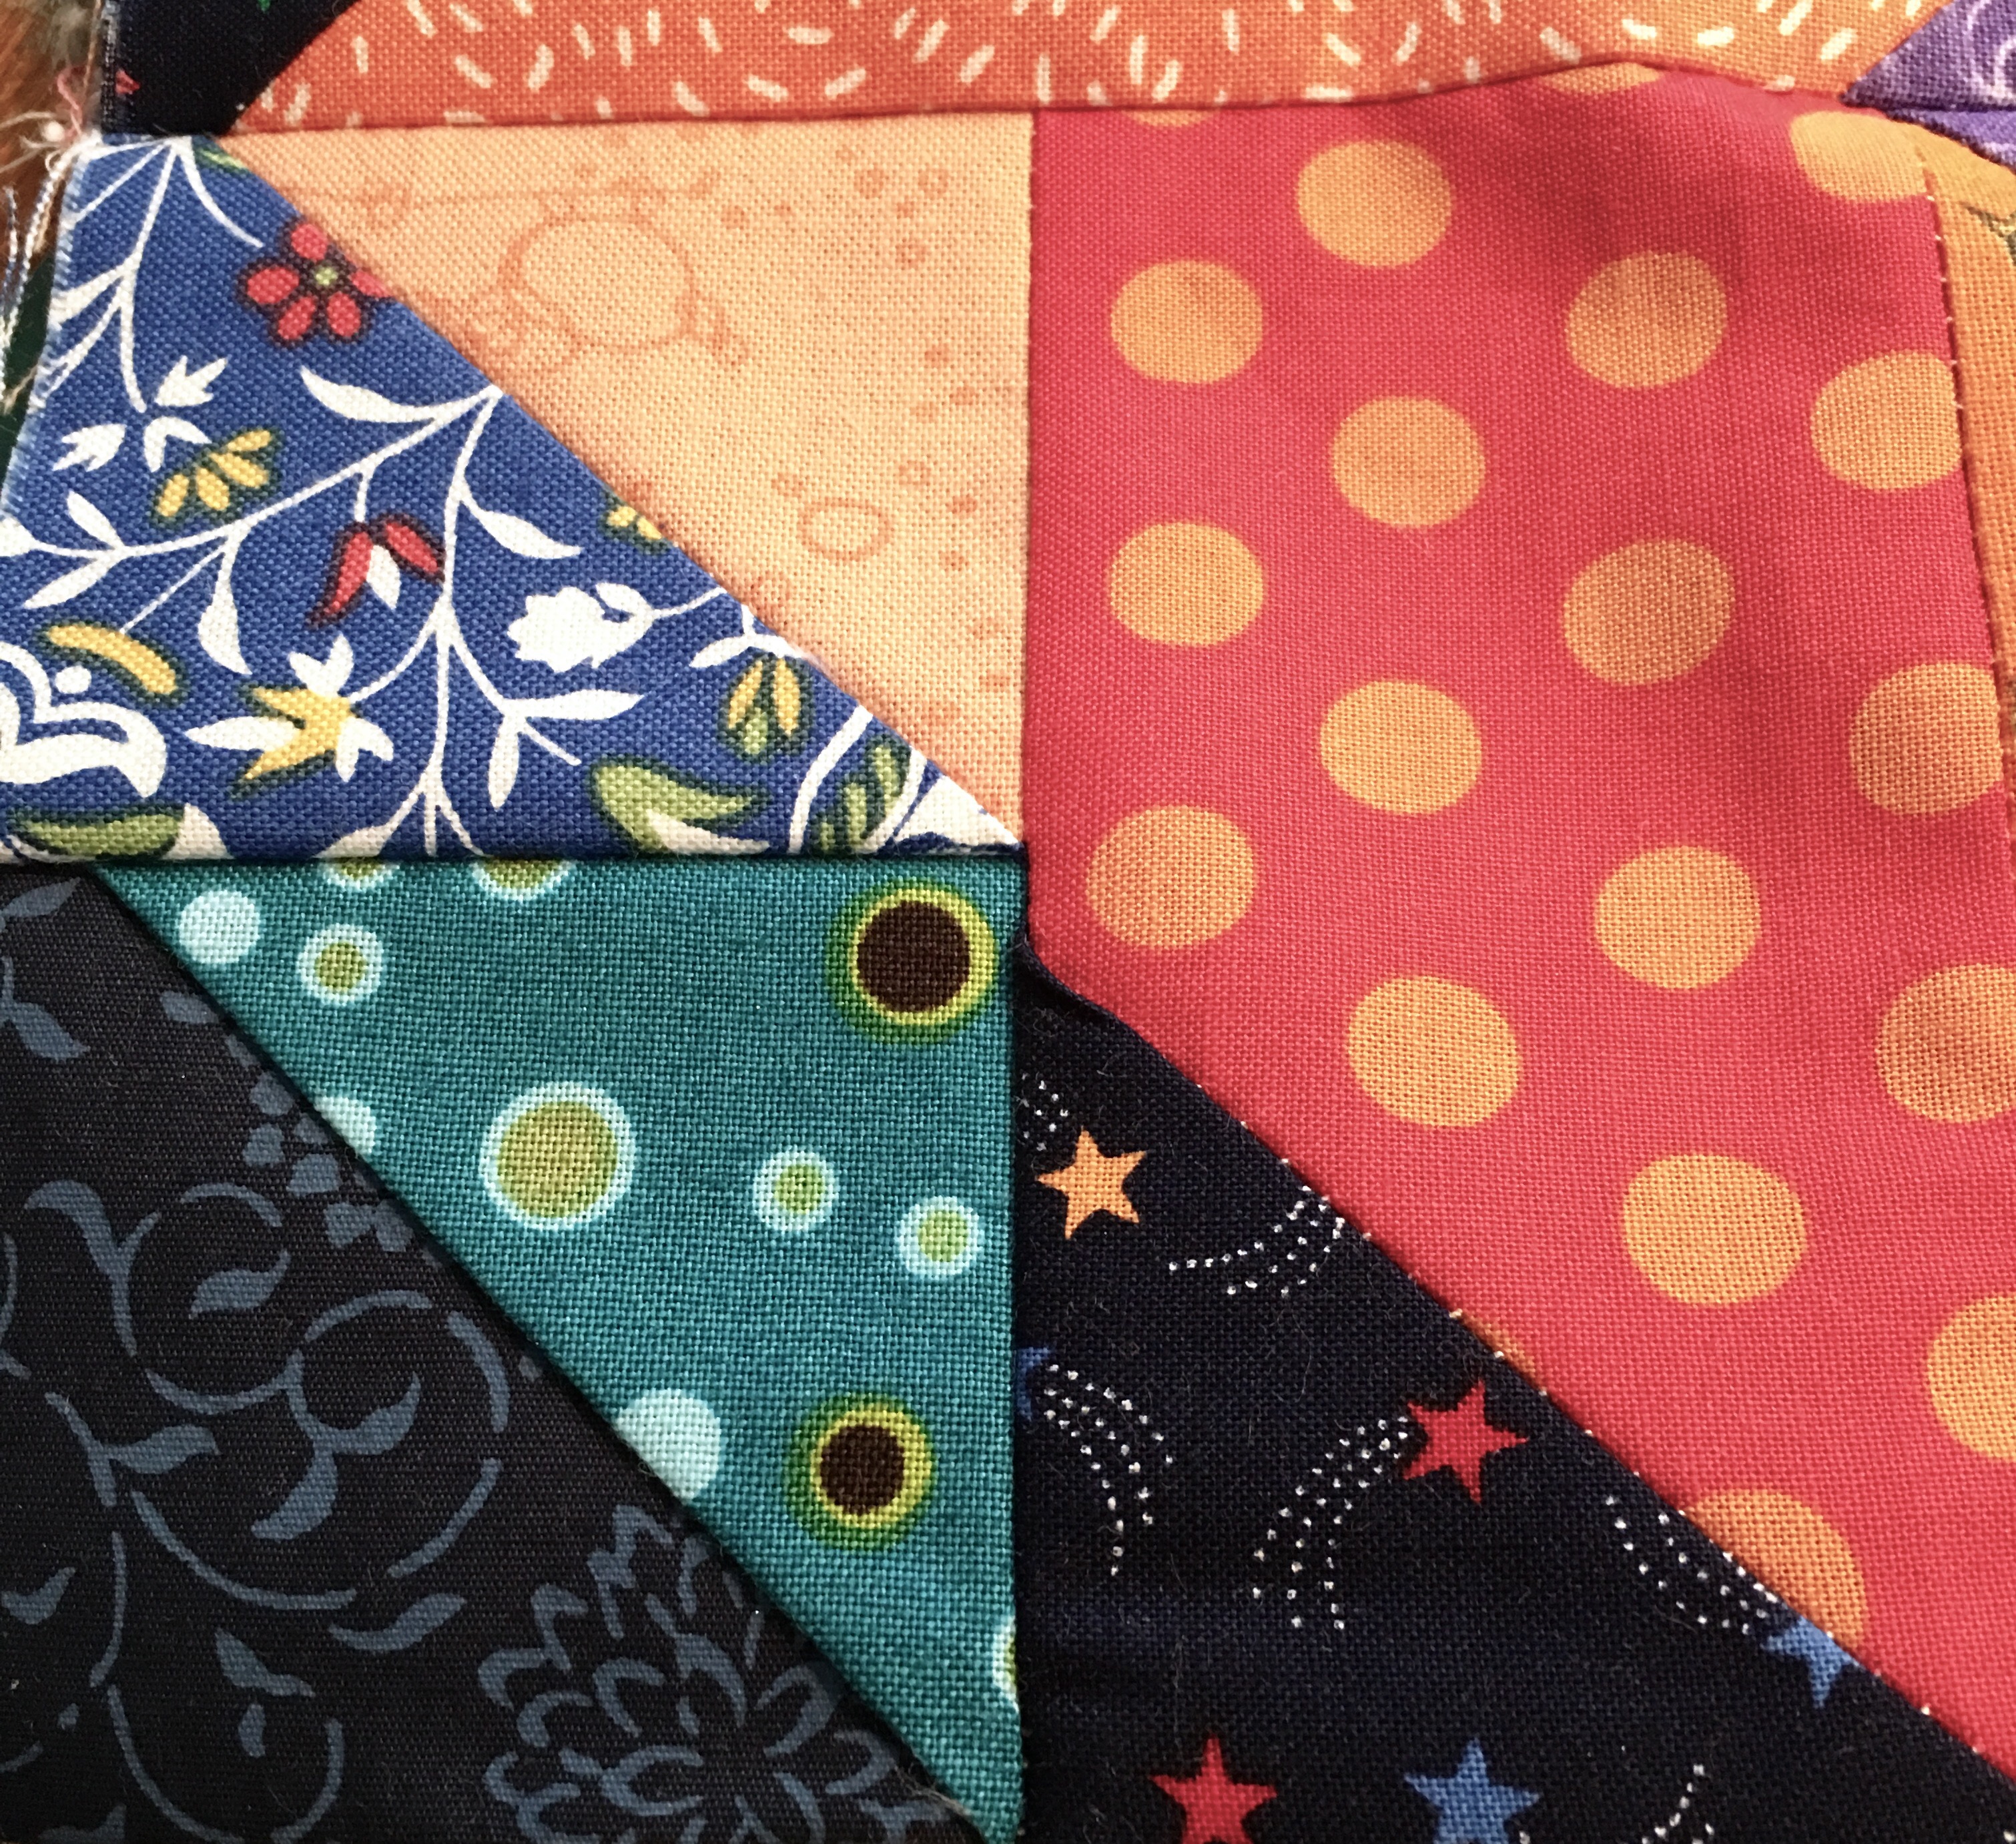 I gently removed the stitches and tried again with pins only to have it off again. So I unsewed again and only stitched a few stitches just over the point
 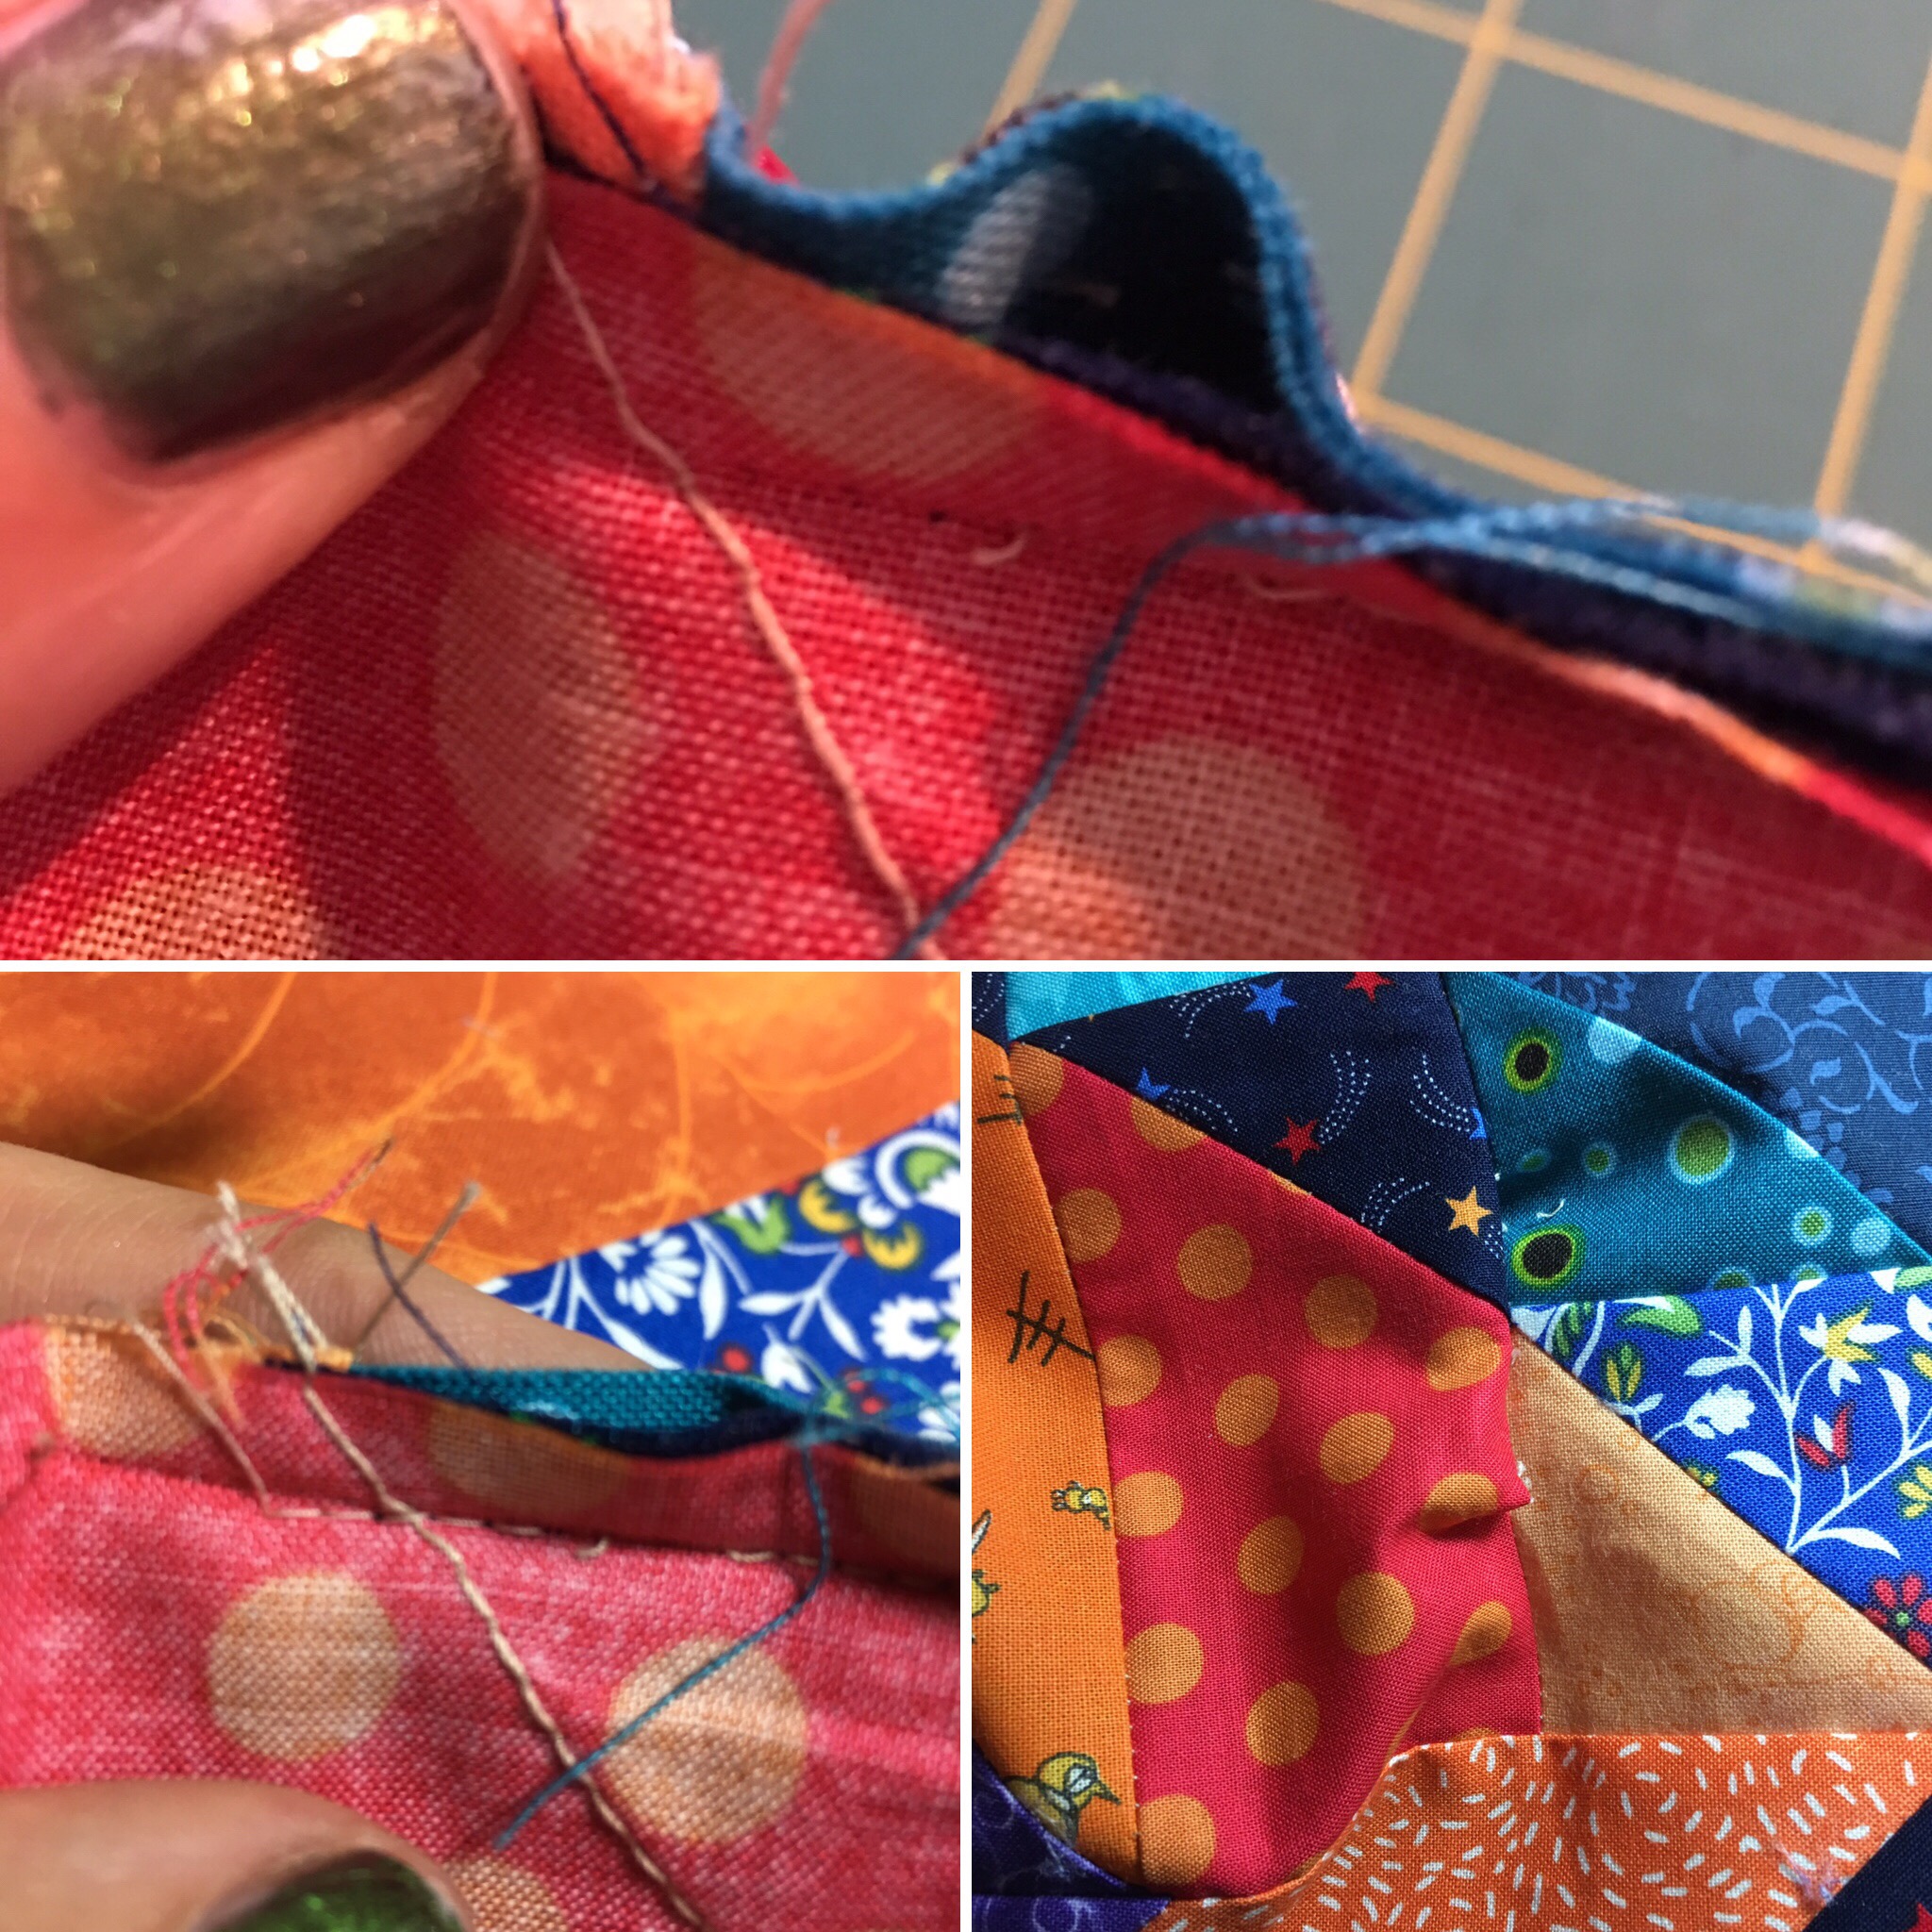 That helped quite a bit and the re-do matching was much easier if it still came out a bit off. I finally got the point to match, but the fabric is puckerey. Puckers don’t bother me as much because it is a quilt and quilts are by their nature, puckered.
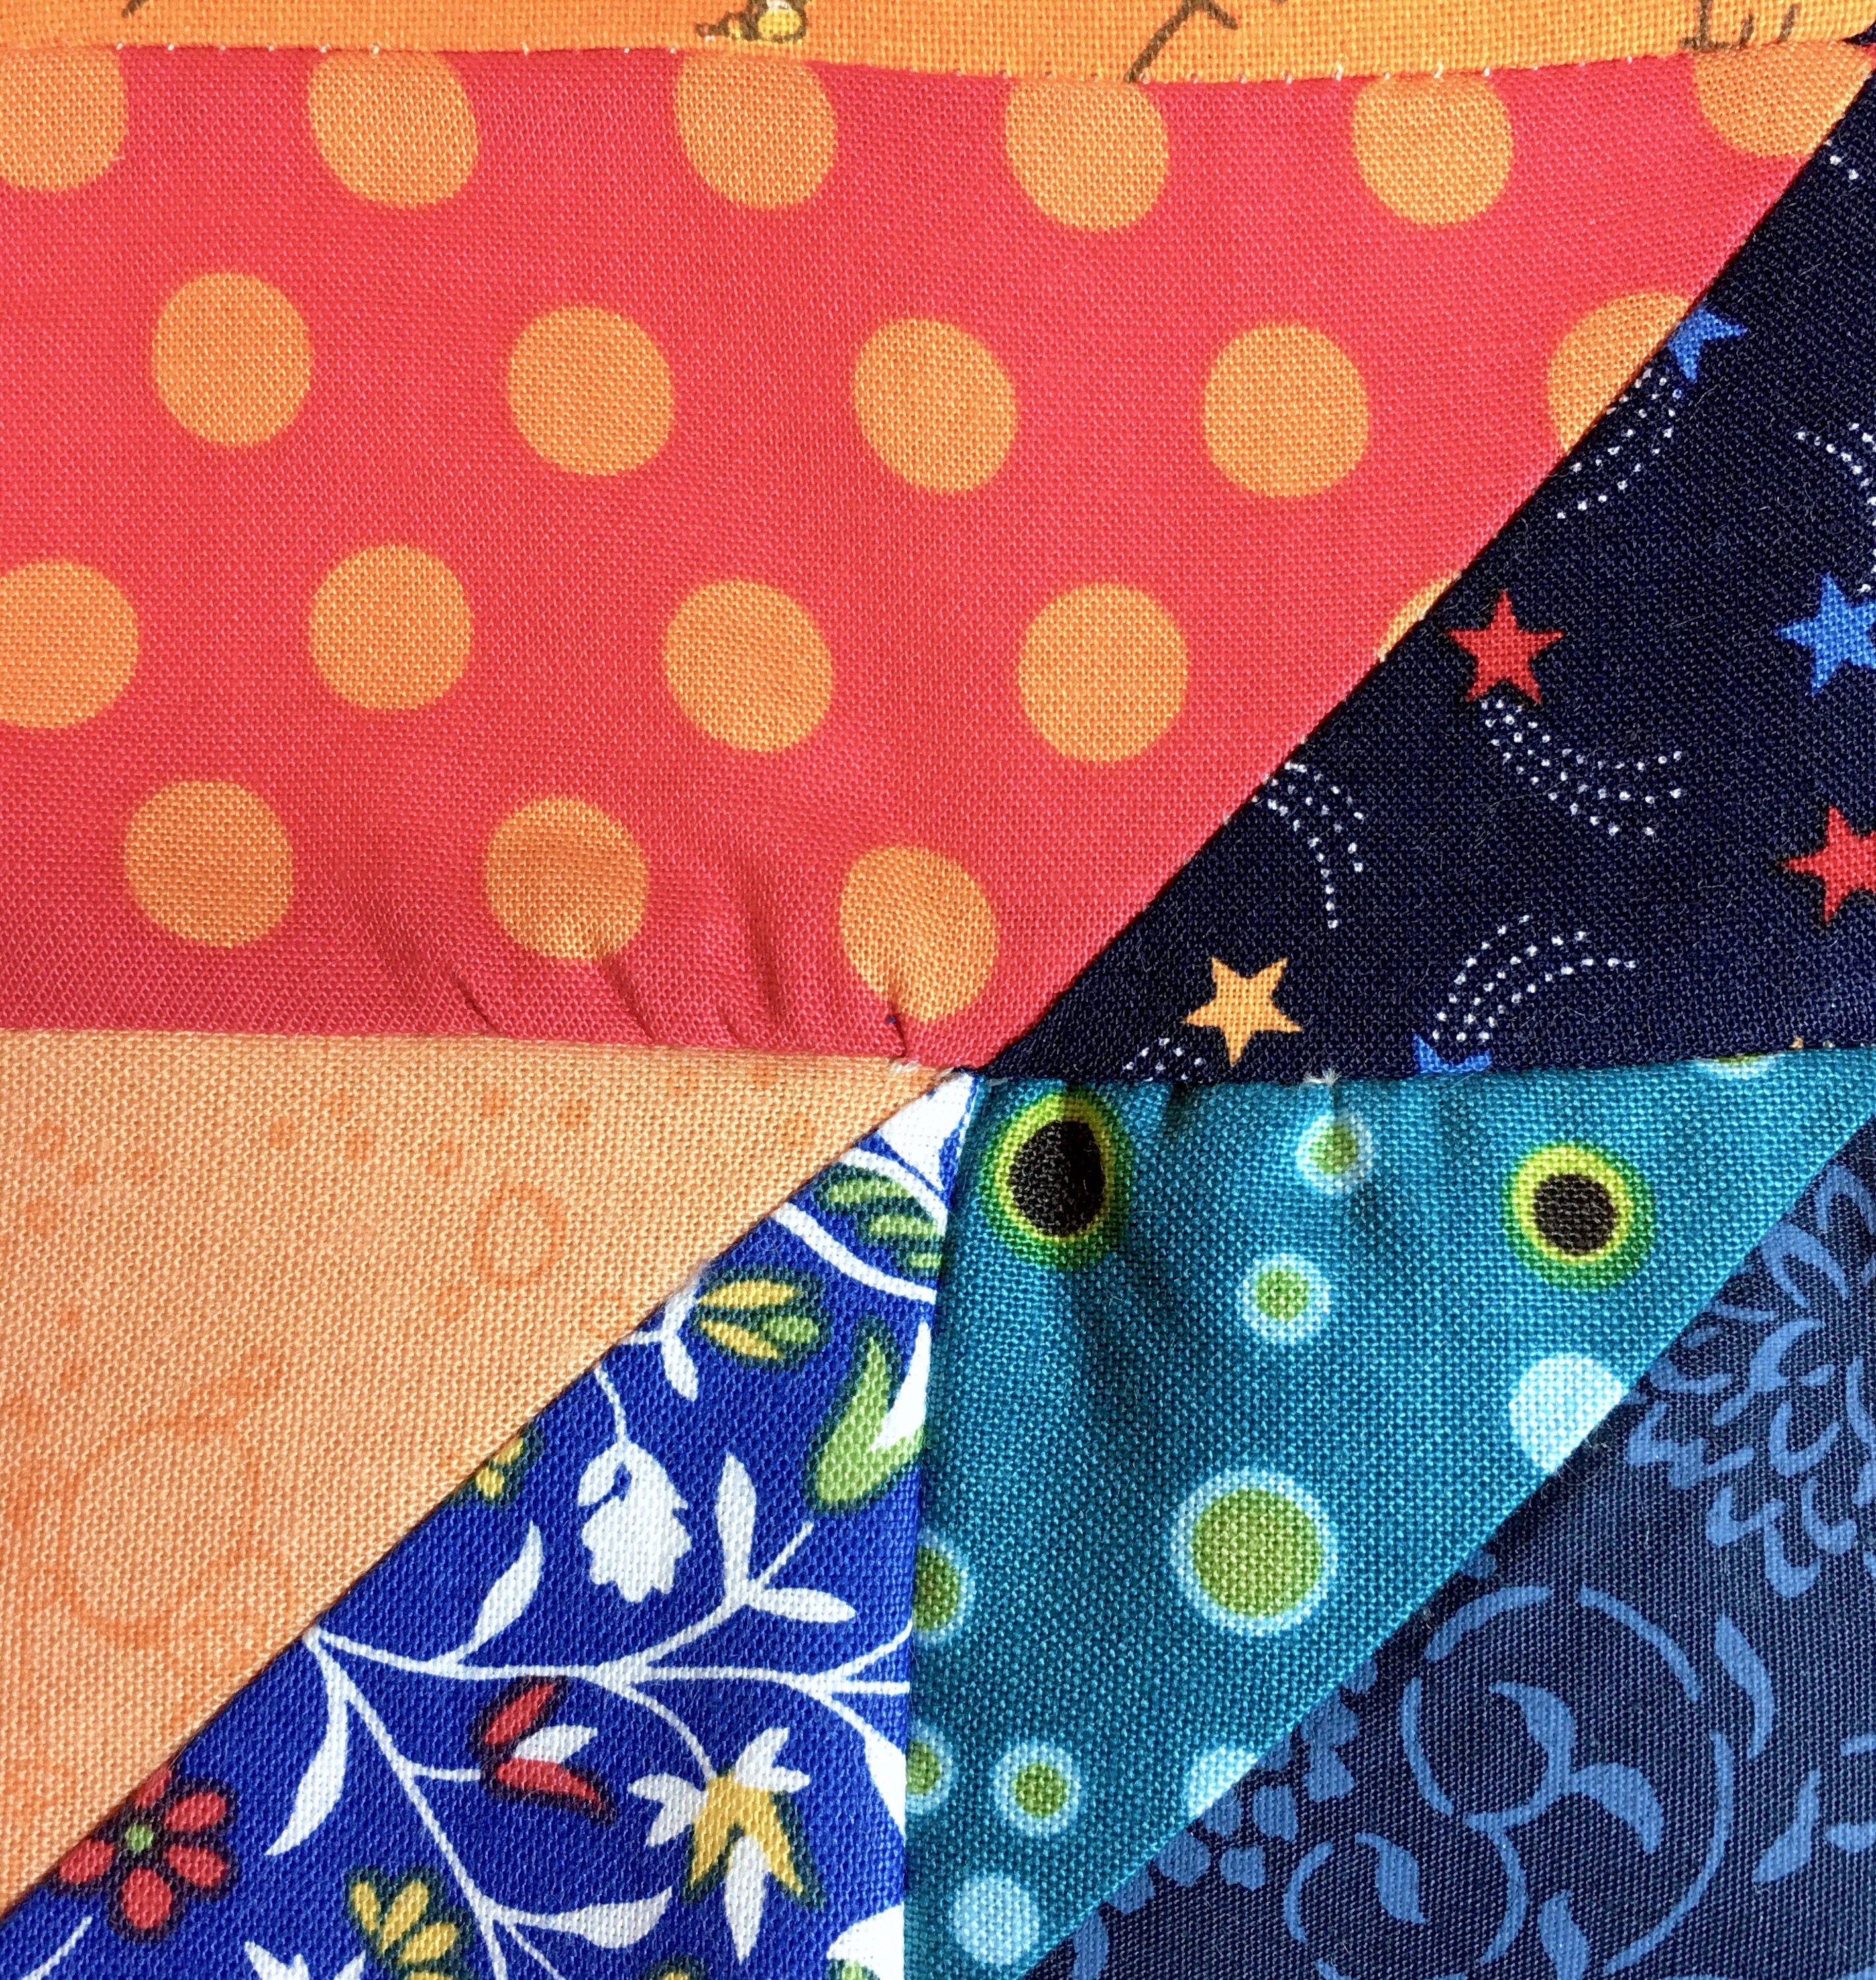 Dont get me wrong, I would prefer perfection, but hey, I’m not perfect.
Here are the two new blocks for this chapter: There were two beautiful bear claws in two corners and a Happy flower with a lovely saying on the inside.
I used my handy Perfect Circles templates to help with the circles by the stem.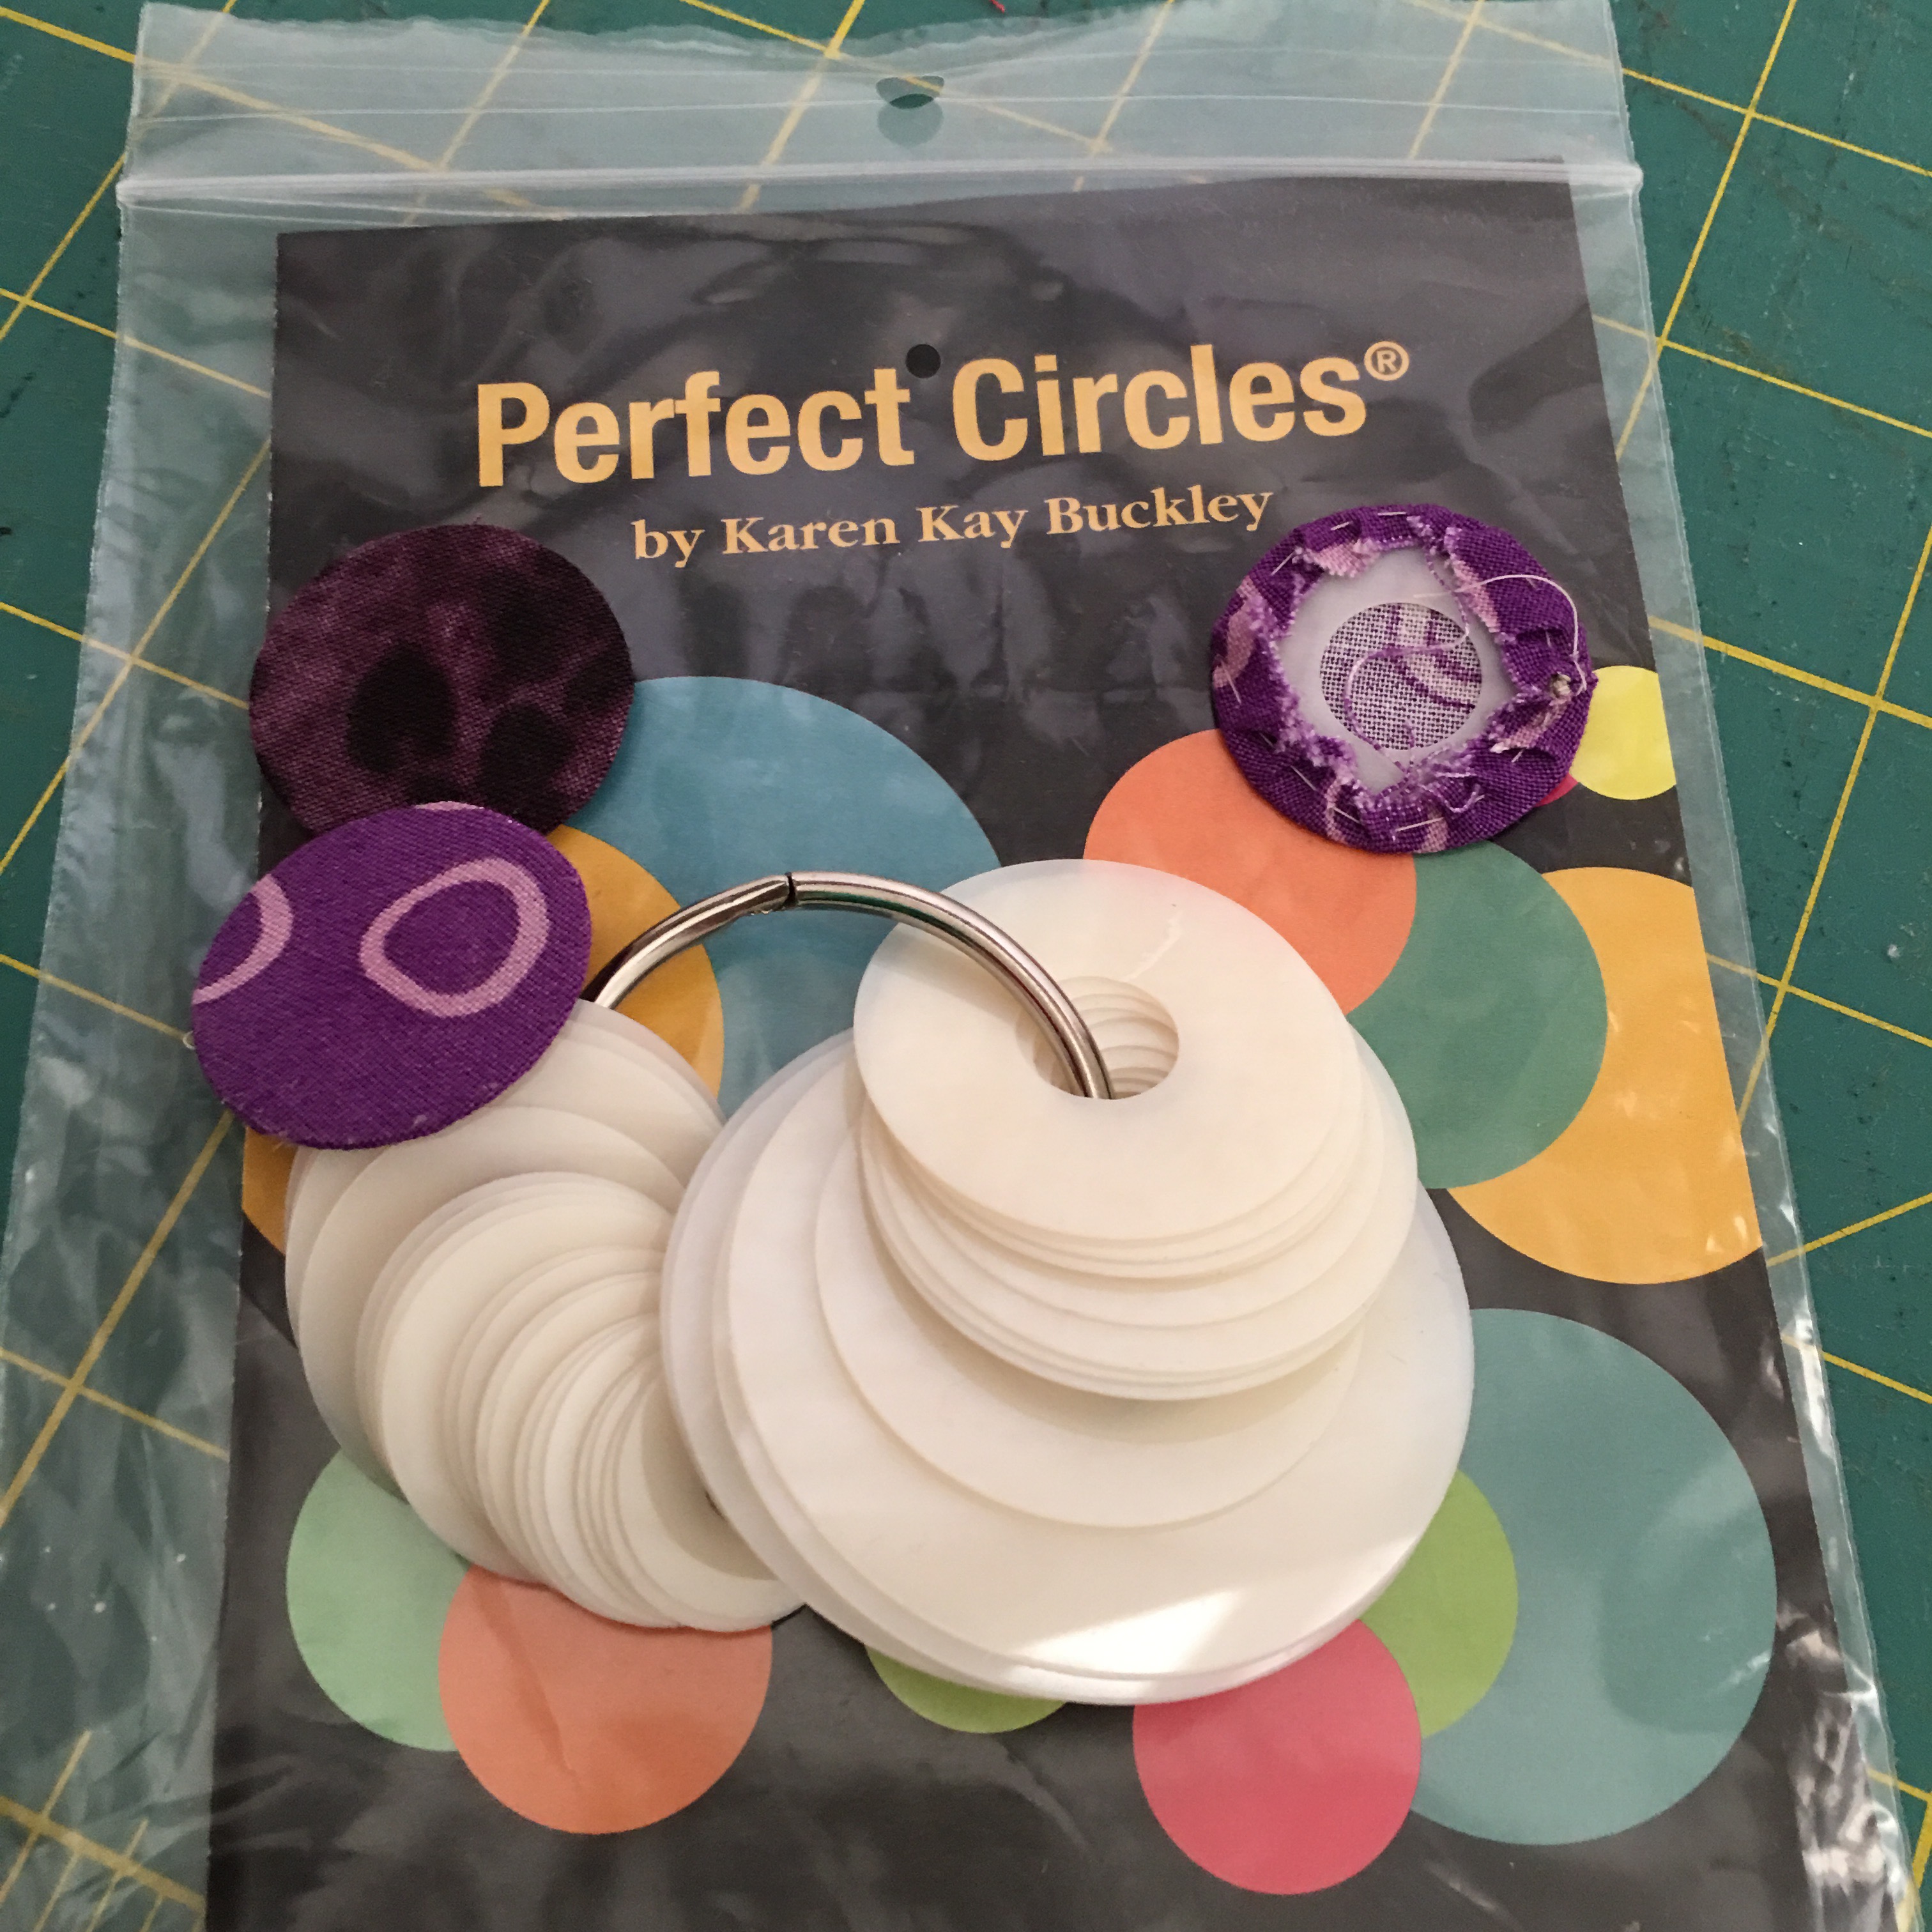
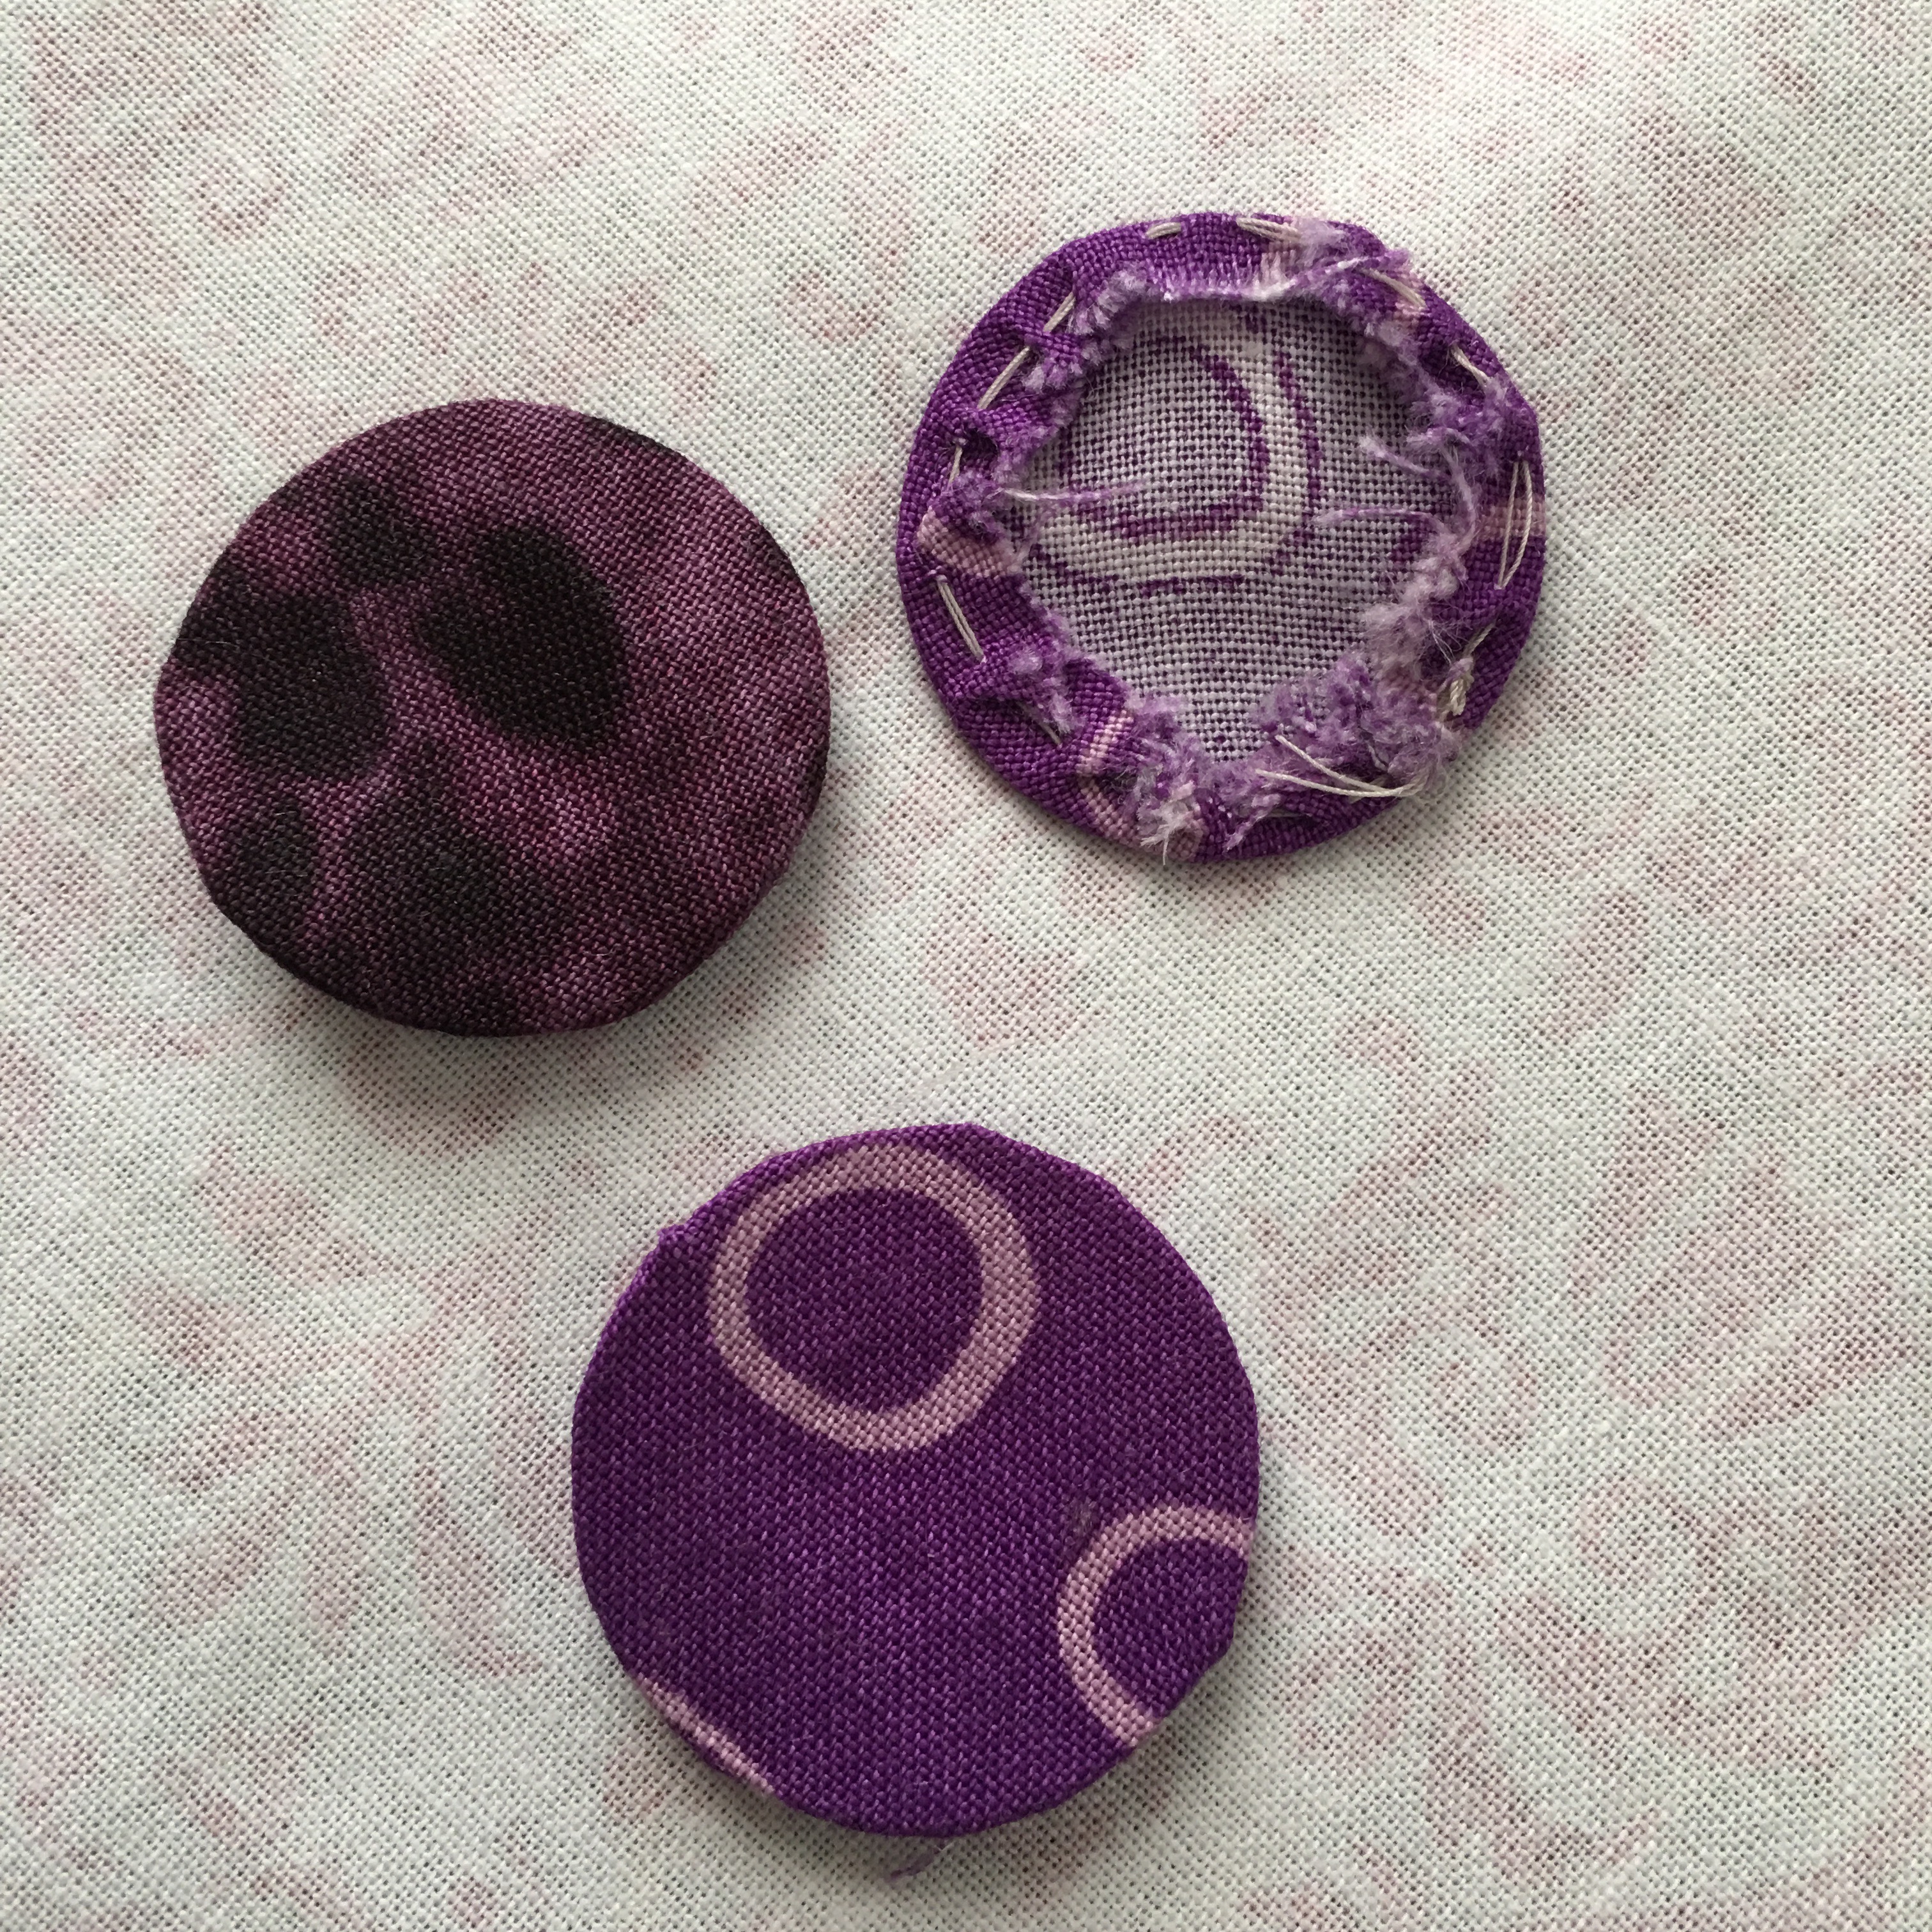 It was easy to get these perfect circles by whip stitching around the template and ironing right over the plastic. I sprayed them pretty heavily with starch as well. When the circle was dry and cool, I just had to snip one running stitch and pull the template out for these perfect circles!
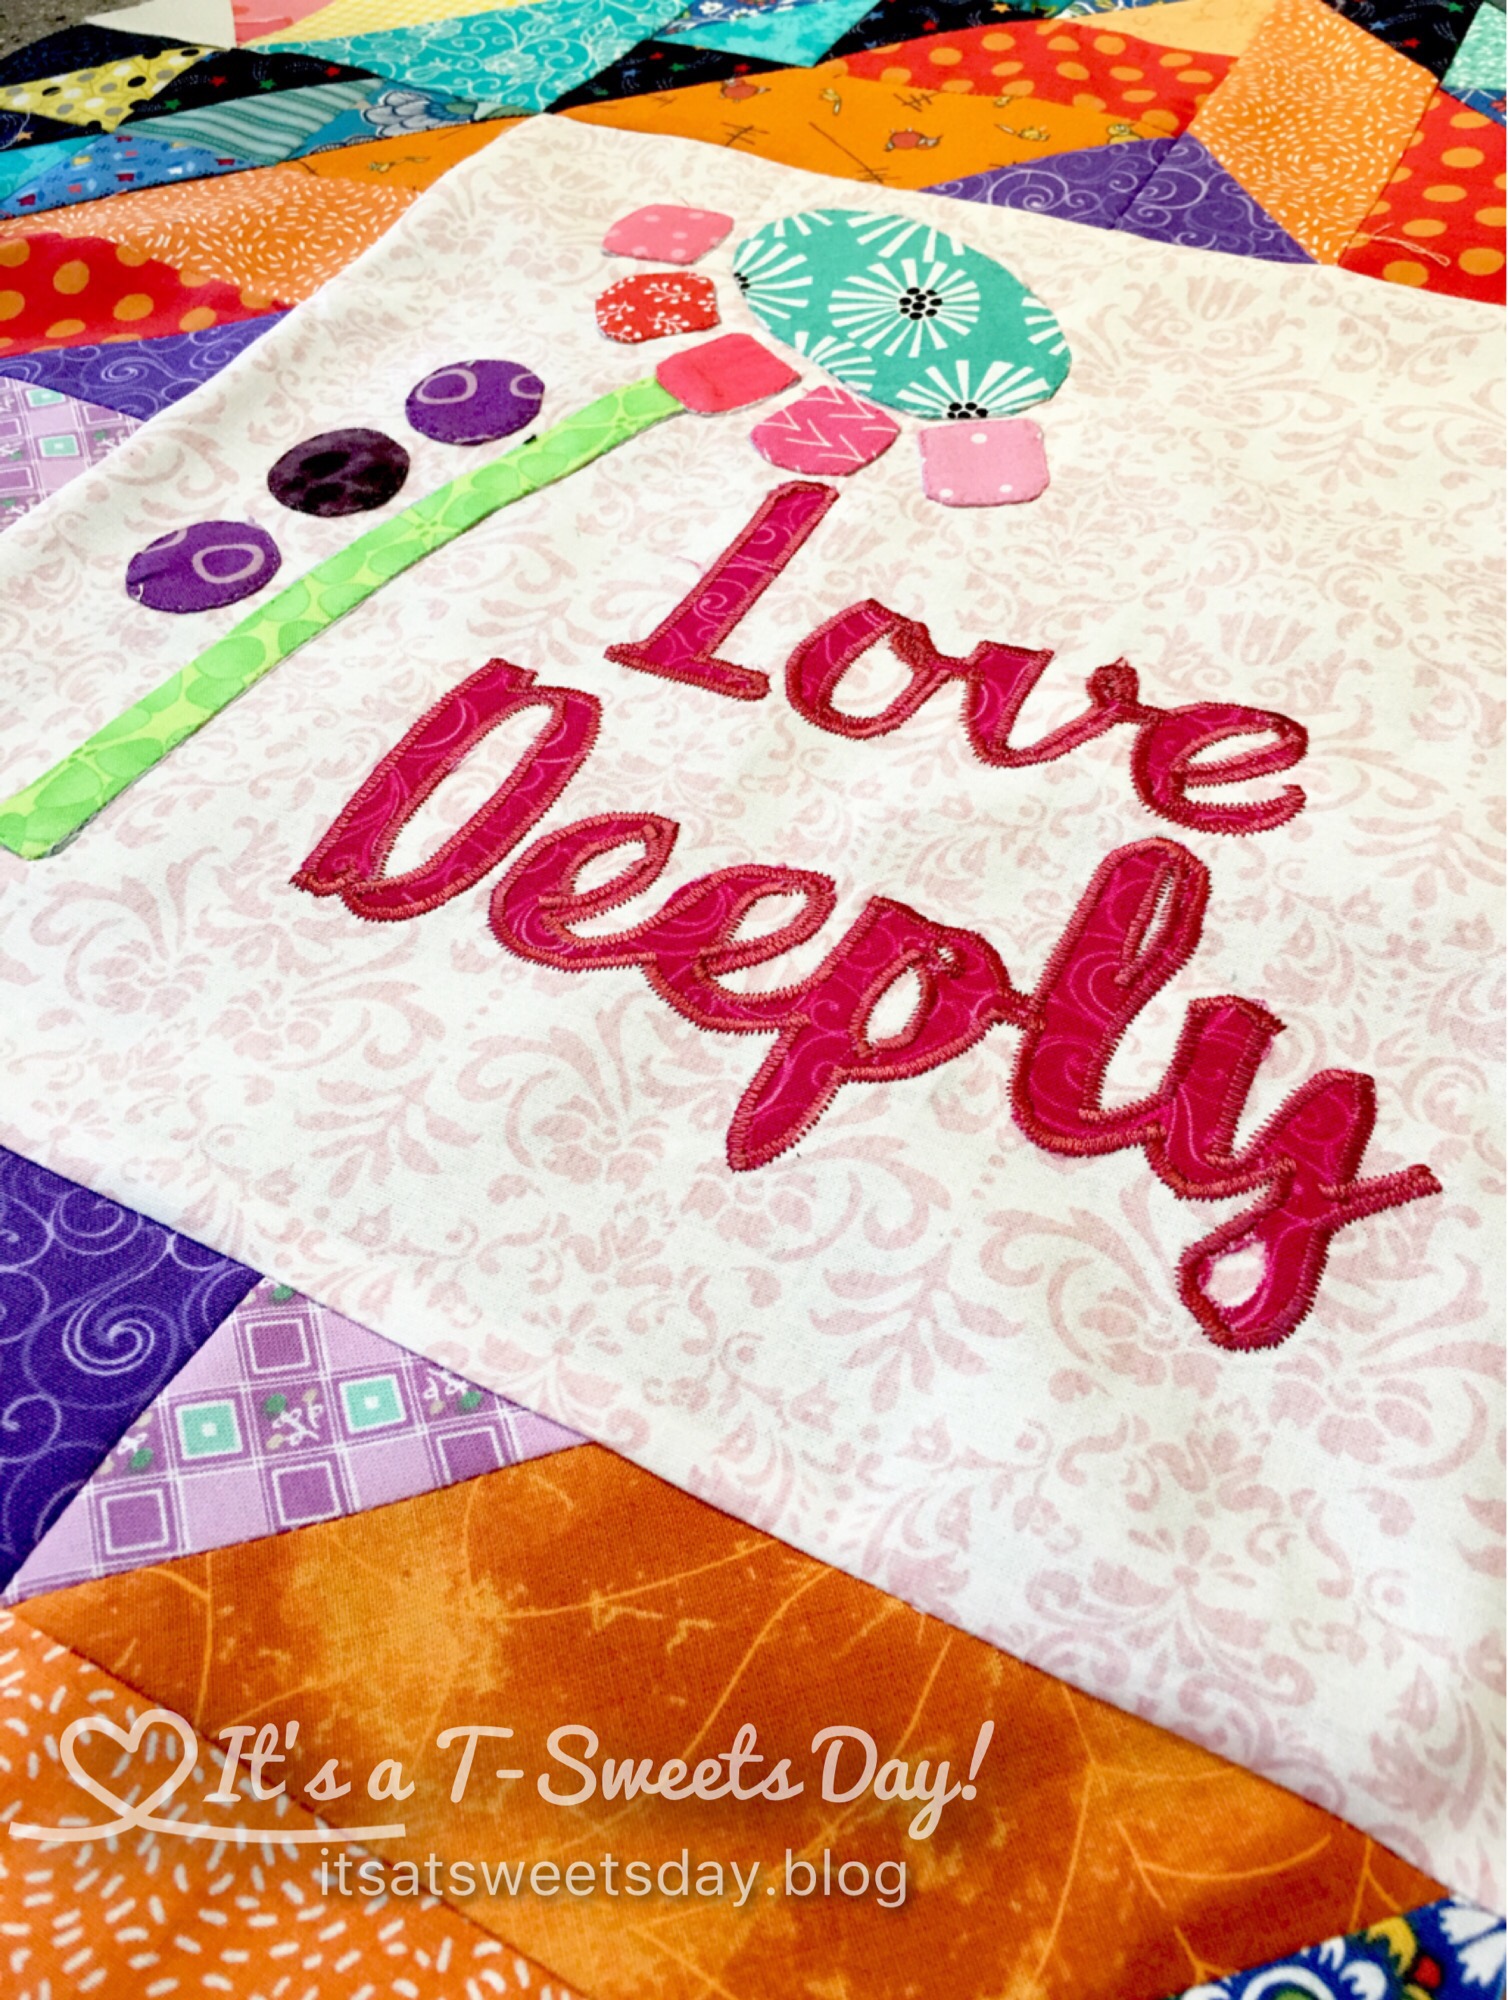
I absolutely LOVE this quilt and block. Thank you for reading about my journey. I hope you have a wonderful Tuesday:)!
If you have any tips on point matching other than sew more accurately, I would love to hear them:)


Not sure if this is new to you, but I iron my seam allowances to one side, so that where I need the sharp points the seam allowances nest against each other. If there are several, angles and whatnot, I baste. Always. Doesn’t take much time, I baste with machine, and it most definitely takes less time than redoing X times because it’s just not right.
LikeLiked by 1 person
Oh, and if I, while basting, find that I’ve either skimped on the seam allowance or been too generous, then I fix that before sewing it up. It’s amazing how little time those adjustments take, and it makes me very happy with myself when I see the result.
I’m looking forward to seeing the whole thing done, btw. I love all the parts.
LikeLiked by 1 person
Do you baste all of the intersections first?
LikeLike
If it’s an easy one I don’t, but definitely on more complex ones where several points meet.
LikeLike
I will definitely give it a try on my next point matching adventure:)!
LikeLiked by 1 person
Good ideas! I have always pressed on the long seam and pressed to the dark. But I might try pressing across the point first on these tricky point patterns. Pressing perpendicular to the seam… I wonder? Maybe even a few hand stitches of basting instead of a pin?…
LikeLiked by 1 person
Hand basting is the best…I’m just normally too lazy. 🙄
LikeLike
That is really beautiful! A couple of things I do to help get the perfect points (or at least as close as I can) – one is to paper piece. That will always make my work 90% better even if it takes a little longer. The second is disappearing glue stick to glue baste the seams first. I’ve found that helps on little and large blocks alike.
LikeLiked by 1 person
Great ideas! I have never tried the glue basting. I will definitely give it a try! I love the end result of paper piecing, but i don’t think. all designs lend themselves to that method. Right? I hope I’m wrong here because I thought of PPiecing this block but couldn’t figure out the way without getting a Y seam from the 1/2 square triangles…..thank you for your ideas:). I will definitely give them a try:)
LikeLiked by 1 person
I’m going to post a photo on my blog of my glue stash. You’re absolutely right that not all patterns work for paper piecing but if it has points or stars then it can very nearly always be paper pieced.
LikeLike
I am excited to see your glue stash! I will definitely give it a try!
LikeLiked by 1 person
Some people have a fabric stash – I have a glue stash. Haha!
LikeLike
Hi Tracy
I purchased the Dear Daughter quilt pattern this week and decided to start with Chapter 11.It’s looking great.I have decided I am going to follow your blog chapter by chapter while making the quilt..Your quilt looks great.I am making this for one of my granddaughters.
LikeLiked by 1 person
Hi Sharon! You are going to LOVE making this quilt! I thought of my daughter with each block. I’m sure your grand daughter will be so pleased and think of you each time she wraps up in it. If you have any questions, please feel free to comment. Thank you for following my blog. Its going to be a SWEET journey:)!
LikeLike