

Hello! Welcome back! Let’s talk about fabric and cutting today. For a long lasting, quality quilt, high quality fabrics are a must. The best fabrics come from reputable quilt shops either in your home town or online. The easiest way to choose fabric is by using a designers precut fabric line such as these.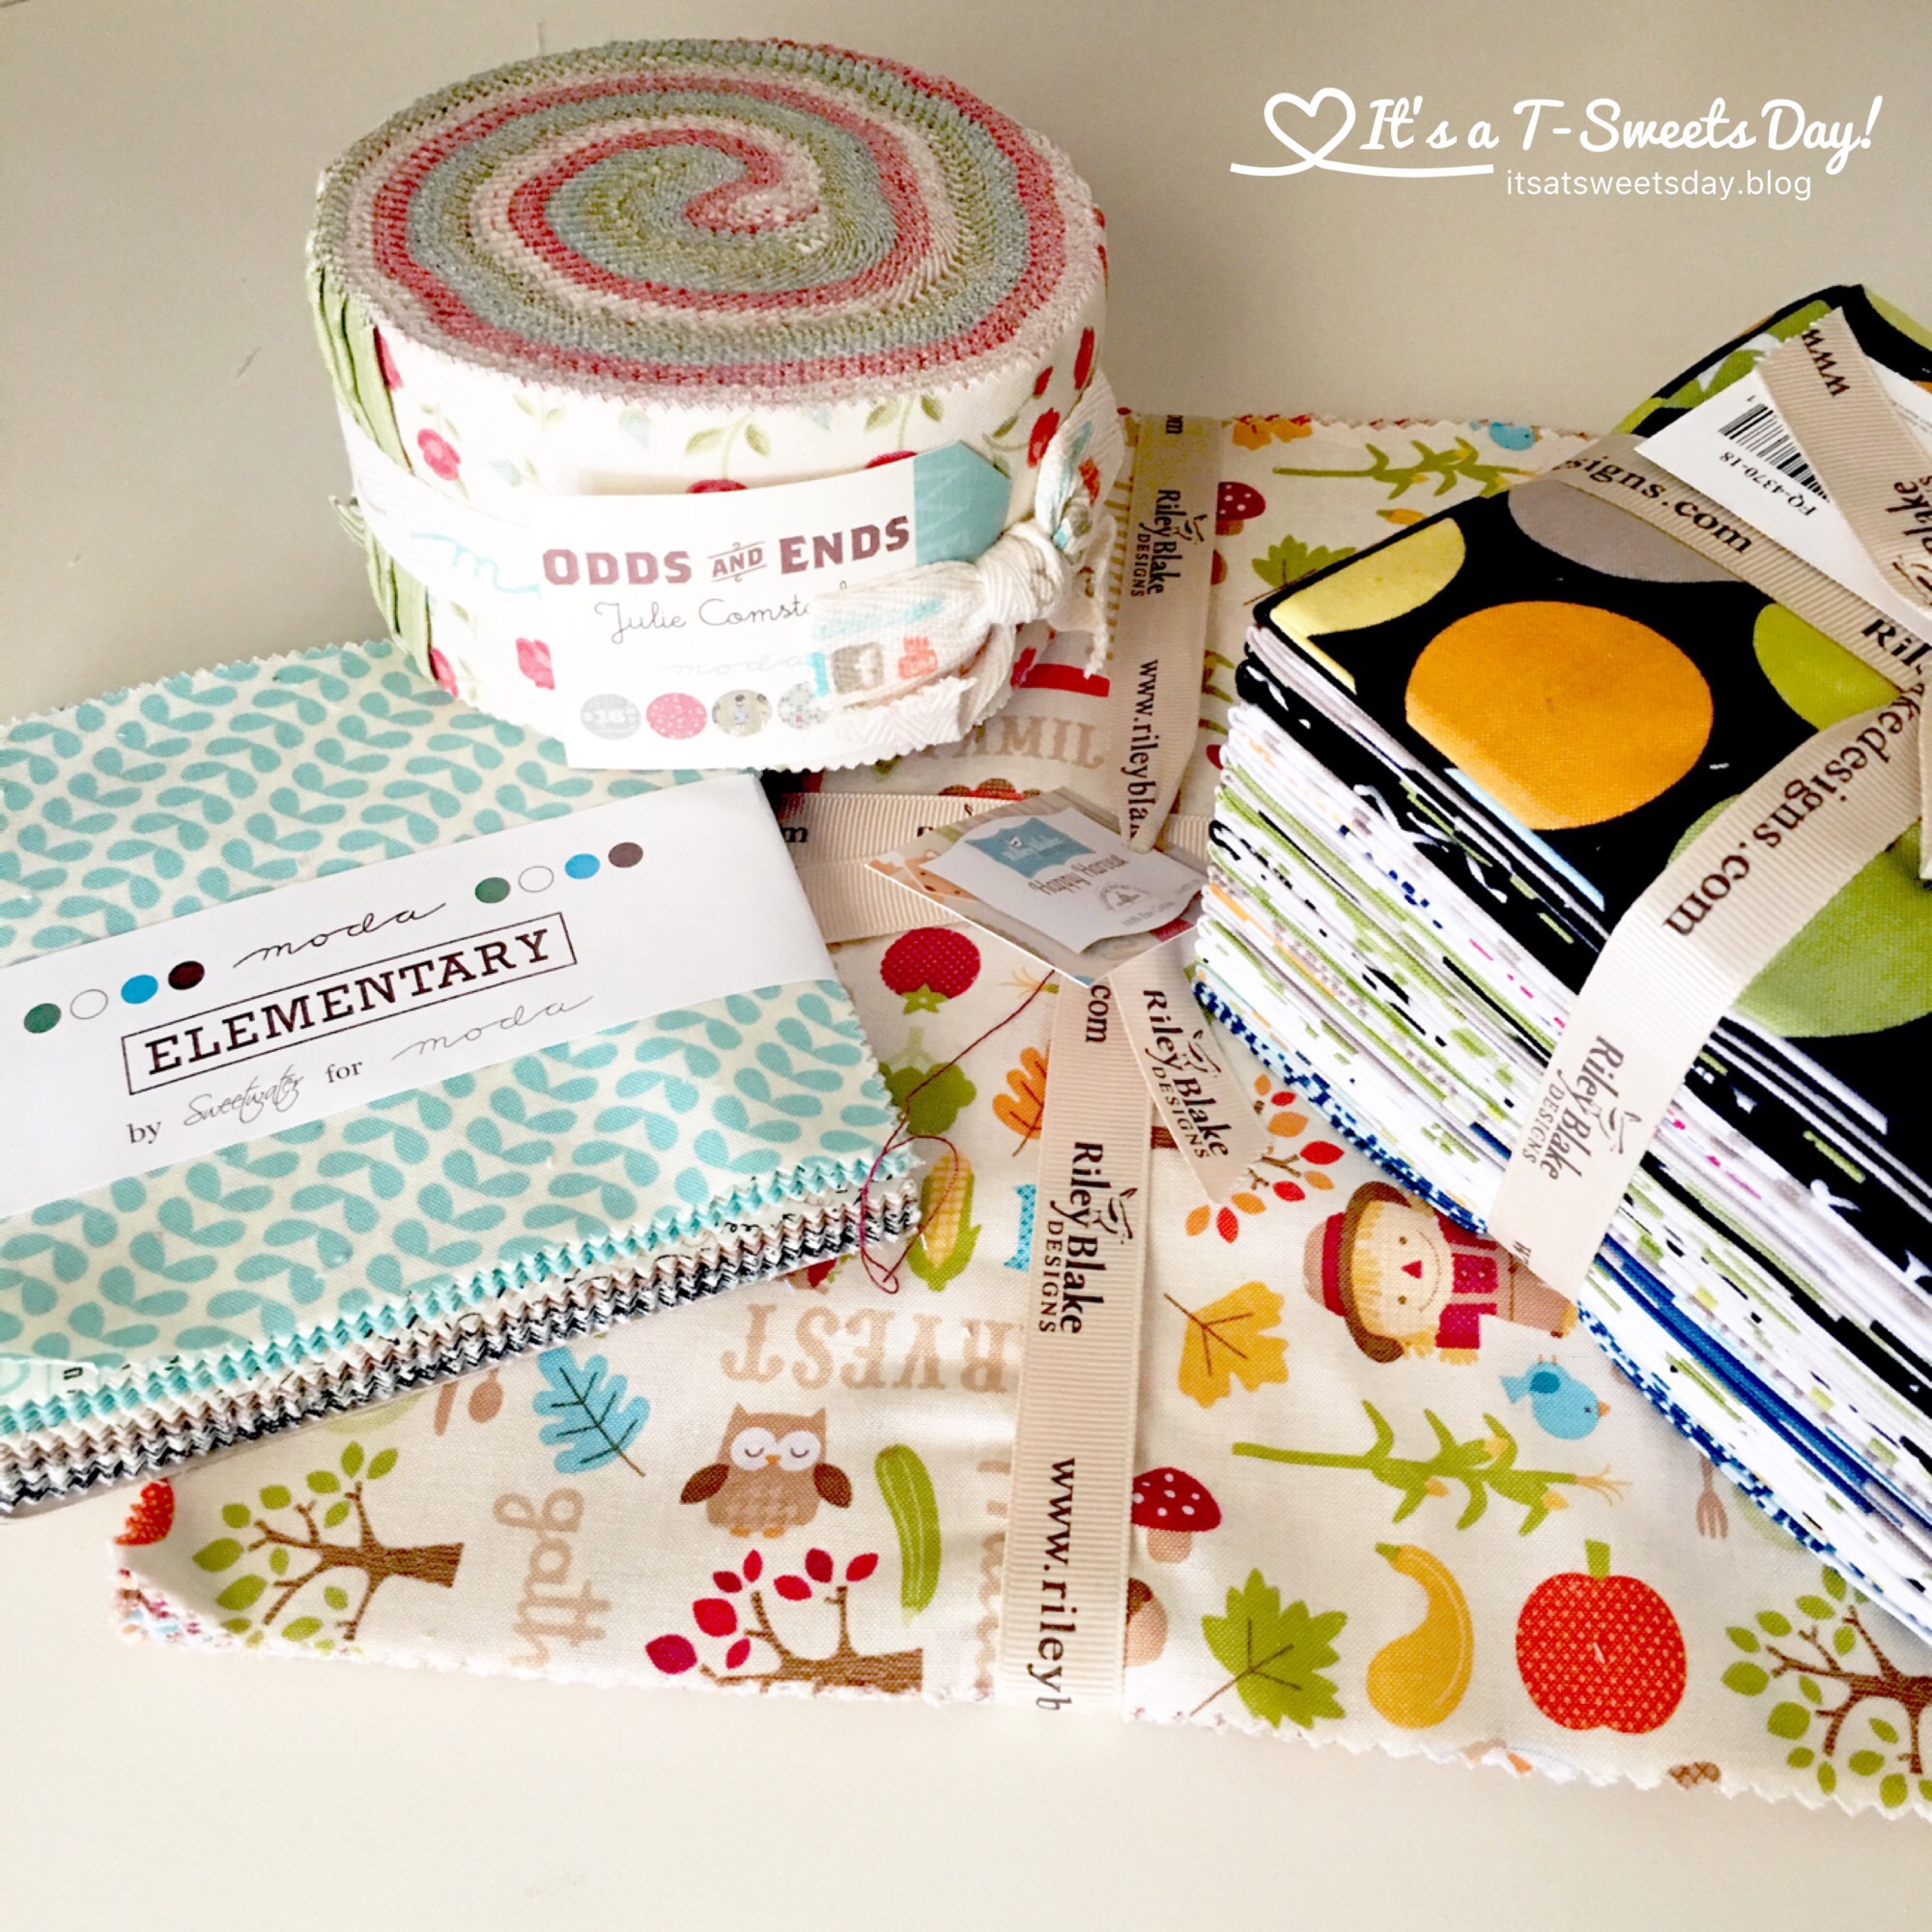
The nice thing about using a precut bundle is that you get high quality fabric with a nice mix of coordinating fabric. While these cuts aren’t inexpensive, they are worth buying for the ease of having all of the matching fabric in the line already there for you. If you had to buy yardage of all 42 pieces, it would cost much more.
Here are some of the common fabric cuts available:
- Jelly roll- This is a beautiful roll of 2.5″ fabric. There are usually 42 strips that have been cut the width of the fabric
- Fat Quarter Bundle- The fabrics in this bundle have been cut by opening a yard of fabric and cutting it in half and in half again going the other direction. In the shape of the above picture. This creates four pieces or fat quarters. Working with fat quarters instead of just 1/4 yard of fabric is nice because you get a big block of fabric to work with instead of a small strip.
- Layer Cake-– Layer cakes are squares of 10″ fabric
- Charm Packs-– These are 5″ squares of fabric. We will be using these in our next project in this series.
Now that you know what is out there, feel free to use a fat quarter bundle for our Pins and Stripes Quilt project.

But I know that many of you want to start quilting because you have a lot of fabric that your mother gave you, or you have a lot of scraps that you want to use up from old sewing projects.
I feel you. I have been, and still am there quite often. So for that reason, I will be making my quilt from scraps and some yardage. Not all quilts are heirlooms. Most quilts do not make it to a quilting show or a competition. There are no quilt police. Use what you have. It’s ok.
Some of my pieces look like this. I bet some of yours do too.
We need to get our scraps ready for cutting into strips.
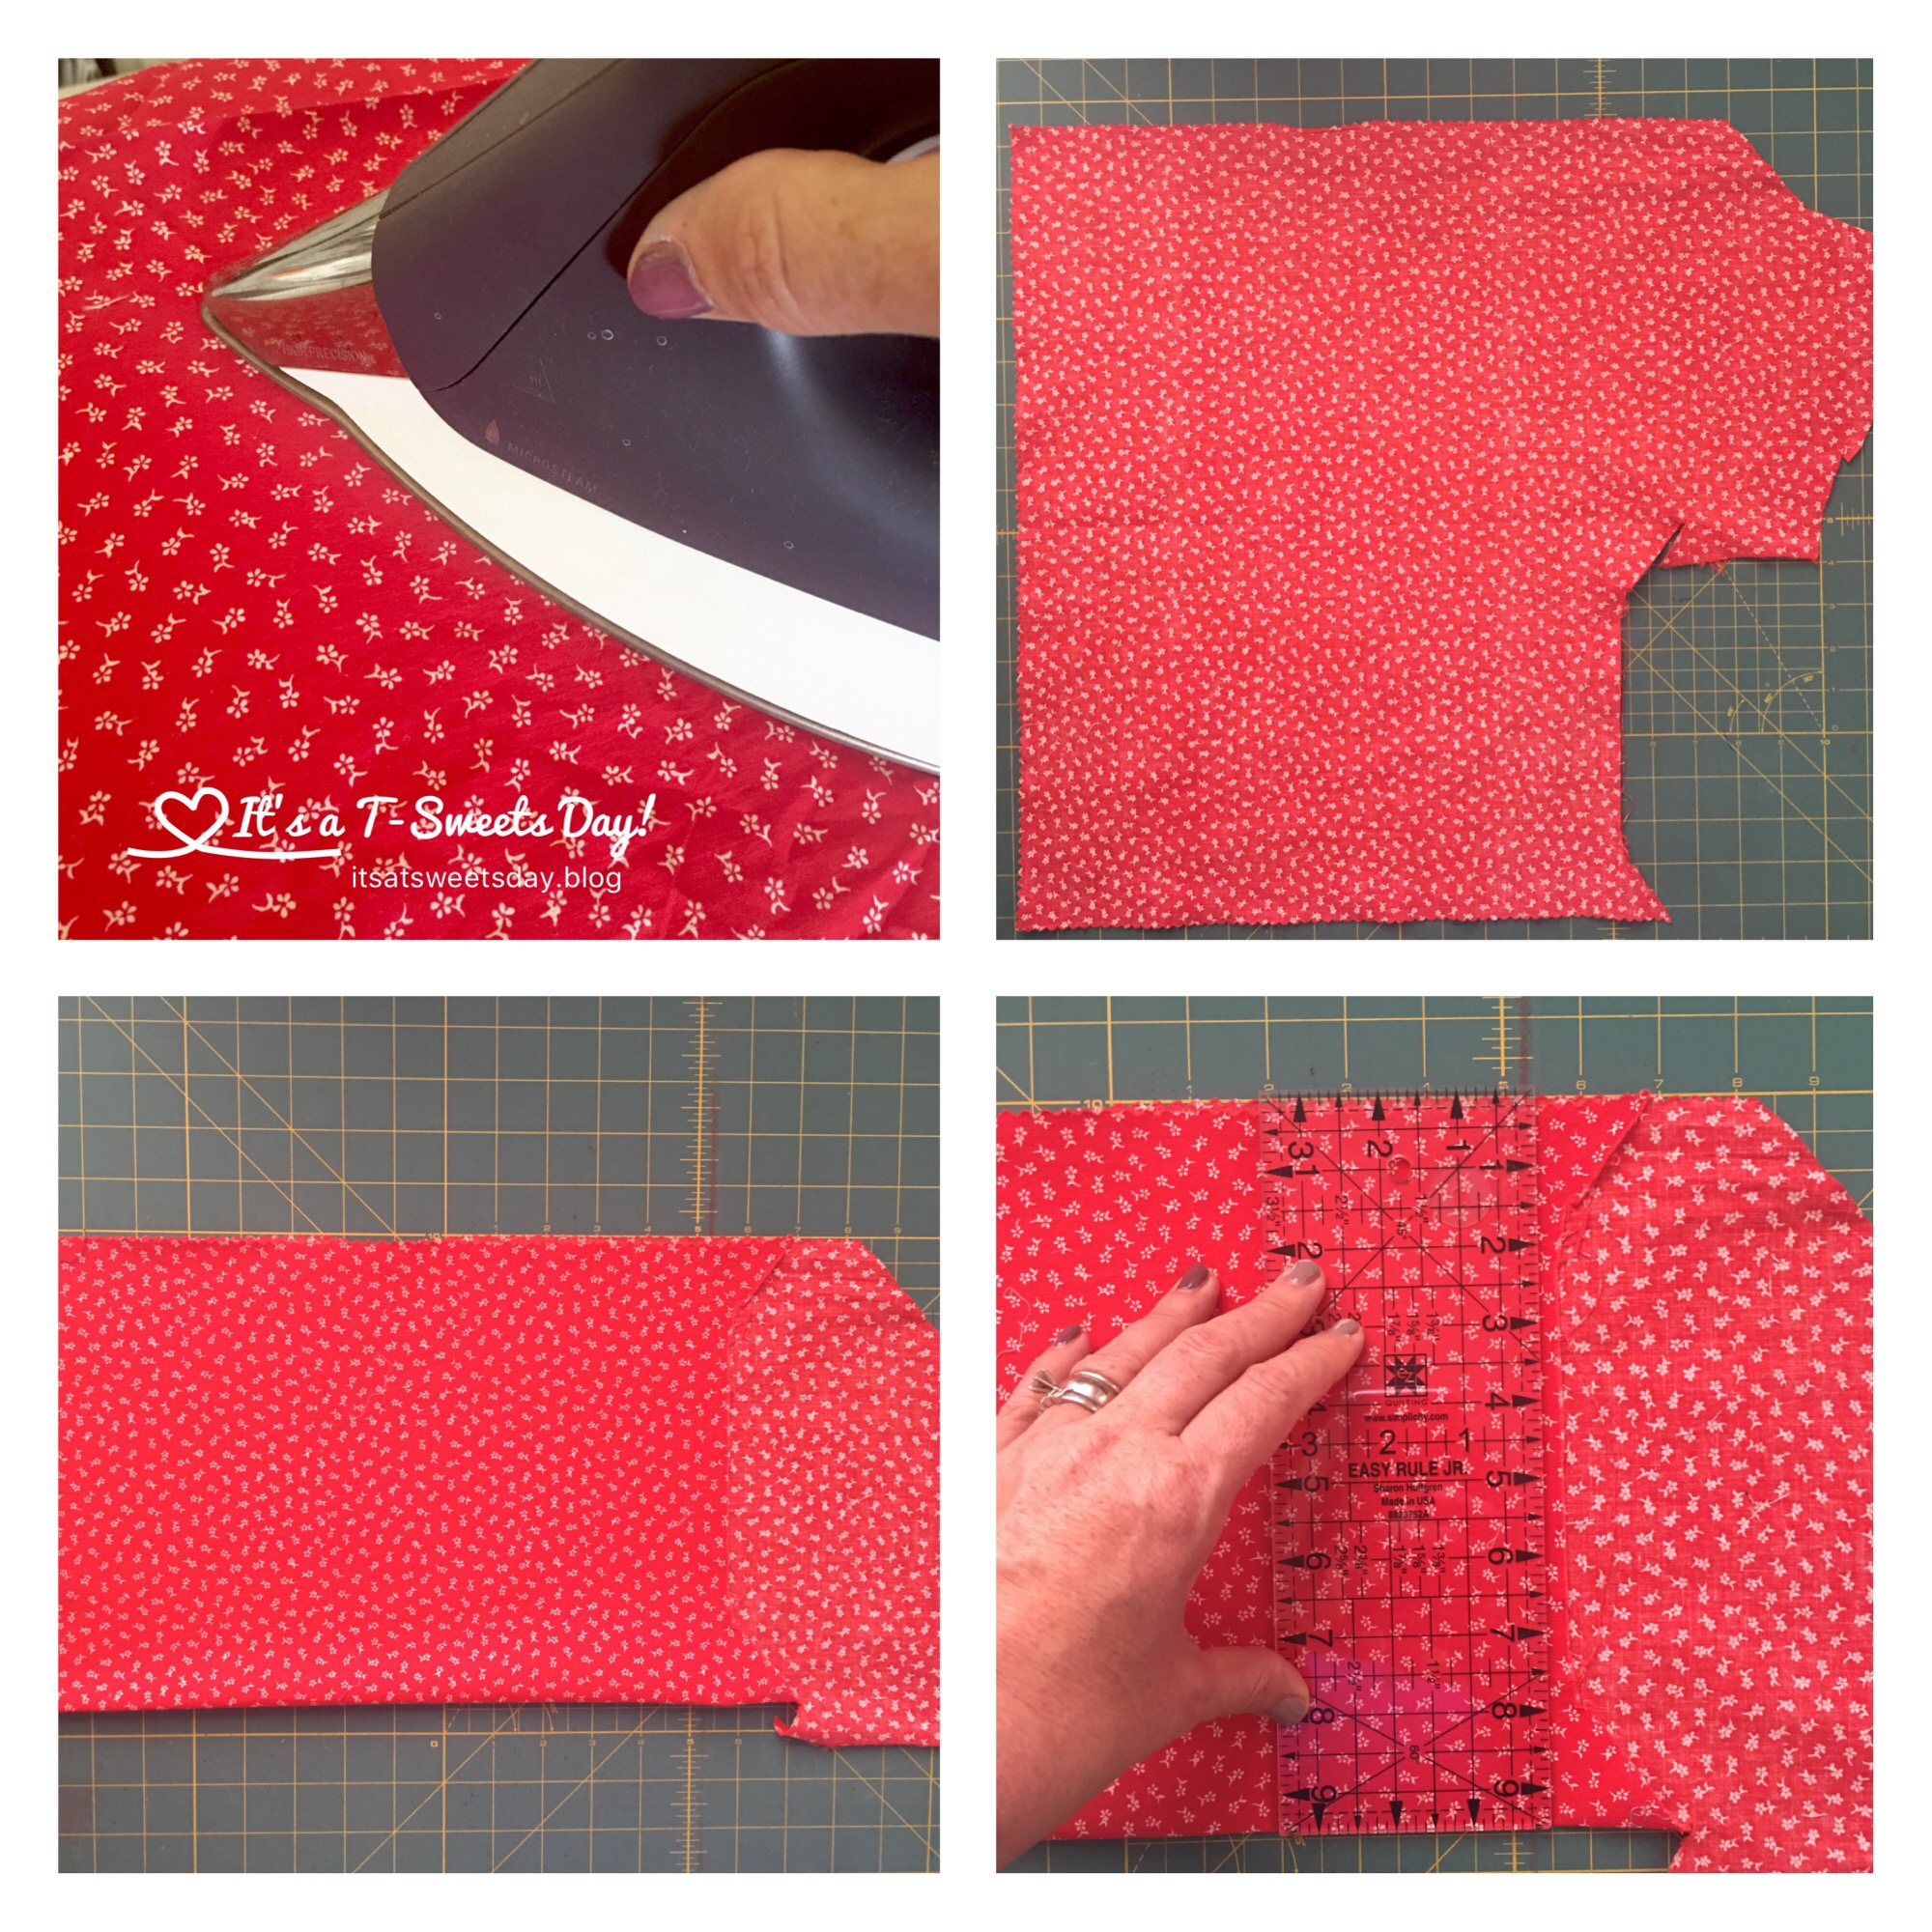
- Iron your fabric
- Lay it out
- Fold it small enough for your ruler to go from top to bottom
- Stand up. Hold your ruler tightly on top of the fabric with the part you want to cut to the right of the ruler. If you are left handed, it goes to the left.

- Open your Rotary Cutter and place it right against the ruler while still pressing the ruler down tightly with your left hand. Start at the bottom of your fabric and using quite a bit of pressure, roll your cutter against the edge of the ruler to make a nice, straight cut. Don’t worry, you will get the hang of it by the end of today’s lesson:)

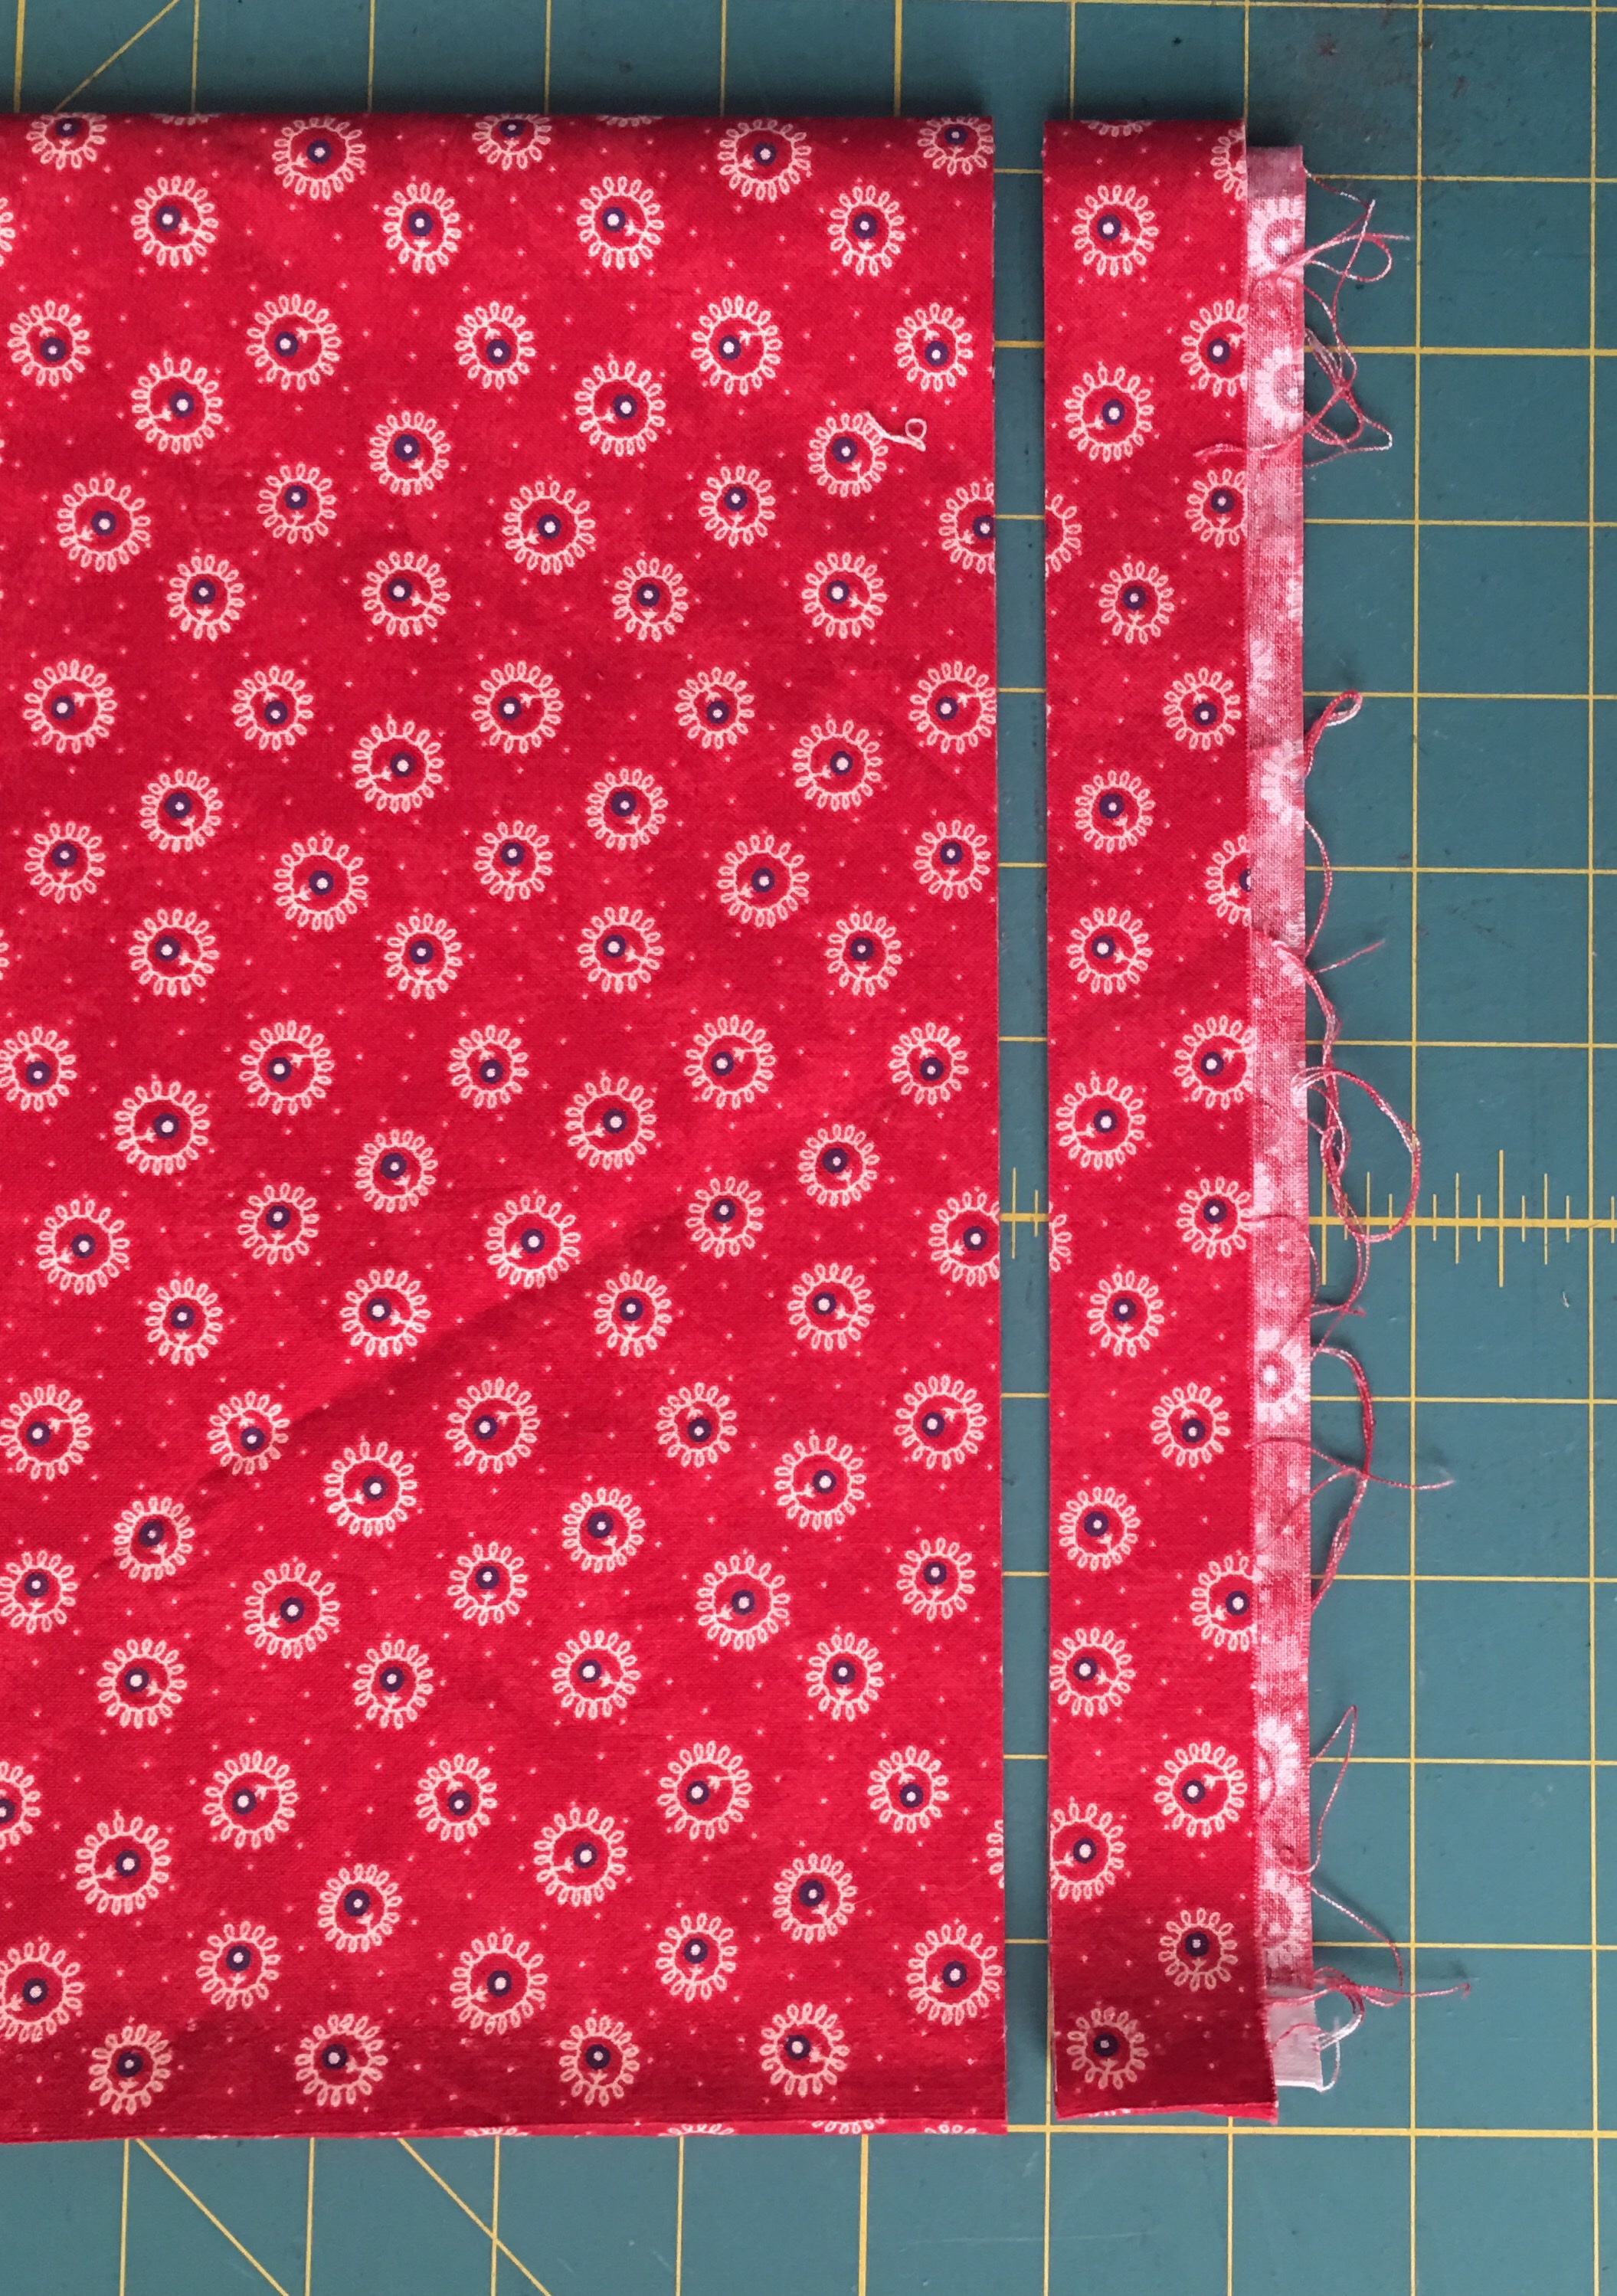
Just a note on cutting strips– it is very important to make sure the grain is straight before you cut a folded piece of fabric. Here are a couple of exaggerated pictures of fabric that is crooked or not on the grain
Make sure the bottom edges line up with no wrinkling or waving along the top. A good way to check is to lift your fabric up, fold it, and look to see if it is hanging nicely and the bottom edges line up.
Ok. Now that our fabric is ready, off we go!!
Color #1 fabric cutting requirements:
- Cut 240 rectangles that measure 2″x6.5″
- Cut 120 rectangles that measure 1.5×6.5″
- Fold your fabric if needed and square it up by cutting a small amount off of the right edge.

- Holding it neatly together, flip it the opposite direction so the fabric is going to the right of the cut you just made.
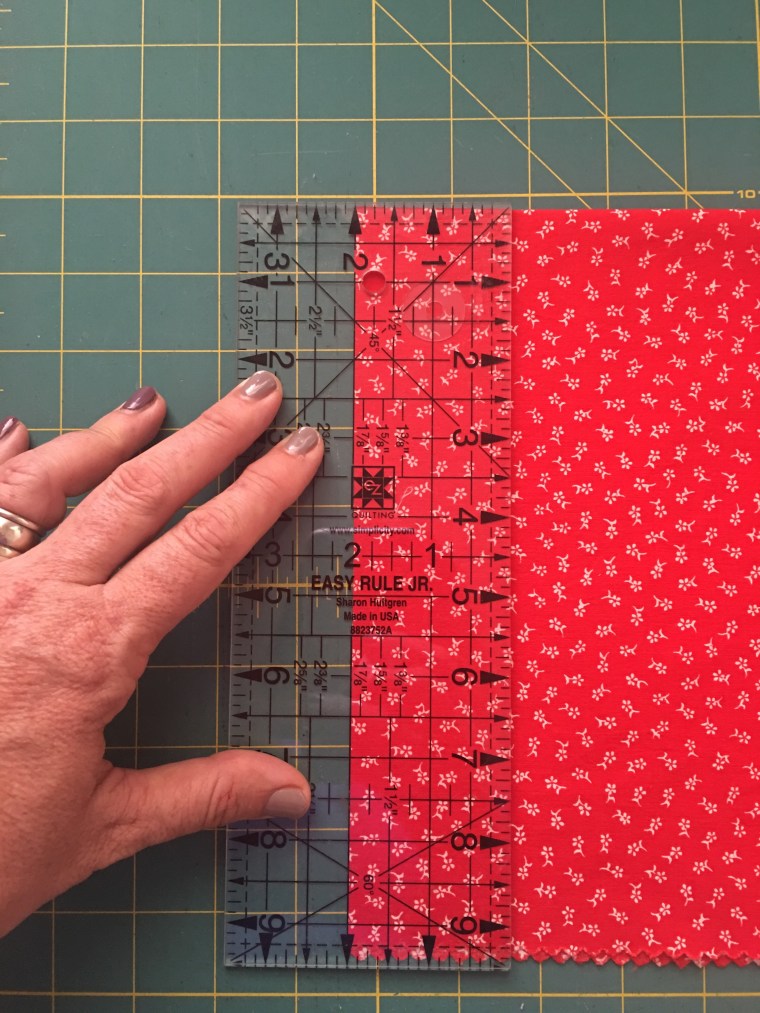
- Cut the fabric into 2″ strips. Be sure to check that the edge and the top or bottom of the ruler are lined up neatly with the edges of the fabric. Sometimes after cutting a few strips, the cuts can get a little bit off. Square the fabric again. And keep cutting.
- If you are cutting full width of fabric strips, you will need to cut 40 strips. You will need to cut more if you strip is less than 42″ long.

- Once your strips are cut, you can cut them individually or stack them in groups of three or four like I have done.
- Align your stacks of fabric strips in groups of three with no more than four strips of fabric per stack.
- Cut the selvedge and uneven edges off.
- Use the width of your 6.5″ ruler to cut the strips into 6.5″ lengths. Make sure the left edge perfectly lines up with your cut edge. Remember to press the ruler tightly with your left hand.
- Cut 240 rectangles 2″x6.5″


Repeat this process for the 1.5″ strips of color #1. Make 120 rectangles that measure 1.5″x6.5″
Fabric requirements color #2–
- Cut 240 rectangles that measure 1.5″x6.5″
Cut this fabric the same way as color #1.

- Square up your fabric
- Flip it the opposite direction

- Cut strips 1.5″ wide.

- Cut these strips into 6.5″ length


Requirements for fabric #3 or Cream Stars:
- Cut 240 squares that measure 2″x2″
- Cut 12- 2″ strips if you are cutting the width of the fabric
- Cut the same as above except instead of cutting the strips to 6.5″ rectangles, you will cut them into 2″ squares.
So that is it for today. Whew! Look at all we have done:)! These strips and squares look fantastic!

Learning how and where to measure and cut takes patience and practice. Don’t worry if you have to cut a few extra strips as you are learning the technique. It will come, just keep trying:). It’s all good!
Please don’t hesitate to comment if you have any questions. In fact, I love comments so just comment to to let me know you are having a SWEET time along the journey:).
Don’t forget to post pictures of your fabric and progress on Instagram #pinsandstripesqal I will be giving away this jelly roll to someone who posts a picture from all seven lessons and a picture of themselves with their new quilt by the end of July 2017!!
I look forward to starting the sewing part of our journey next time.:) Until then, happy cutting!
Here are the link to the lessons if you are wanting to join along:

Good instructions. I’ll be reading along to see if I’ve been doing things the right way. I am a do it myself type person and have been quilting “my way” for several years. I am not a traditional quilter, just a do what I want type quilter.
LikeLiked by 1 person
So glad to have you following along! There are no wrongs or “rights”. If it works for you, then go for it:)! It’s all good:)
LikeLike
I’m so excited! I started cutting my fabric tonight but I still have quite a bit to go!
LikeLiked by 1 person
Wonderful! I’m excited for you too:)
LikeLiked by 1 person
That’s a lot of cutting! =) Your pictures make everything very understandable.
LikeLiked by 1 person
Thank you! Quilters are a crazy bunch. We cut fabric into little pieces just to them back again:)
LikeLike