
Good Afternoon! It is my #1 son’s birthday today:). Happy Birthday!! A few months ago, as I was cleaning out his room making space for my quilting machine, I came across his old counselor shirts from working at our church’s youth camp. He had quite a bright collection of them.:)

I knew immediately that these could not be thrown out or given away. It was T-shirt Quilt time to be sure:)!

I fussy cut around the embroidery by placing a small cutting mat inside of the shirt and rotary cutting around it. I used my Quilt in a Day 4.5″ fussy cut ruler. A fussy cut ruler makes the cutting easy!
I cut the logo, saved the buttons, cut the inside logo, and cut the shirt. The shirt I cut into strips to use as the logs for the square.
Now, the problem with T-shirt quilts is that the fabric is very stretchy so it needs to be stabilized. This part takes time and a lot of iron on interfacing. If you decide to make a t-shirt quilt, please please don’t forget this step. You will be sorry if you do. You will have a wonky quilt in the end.
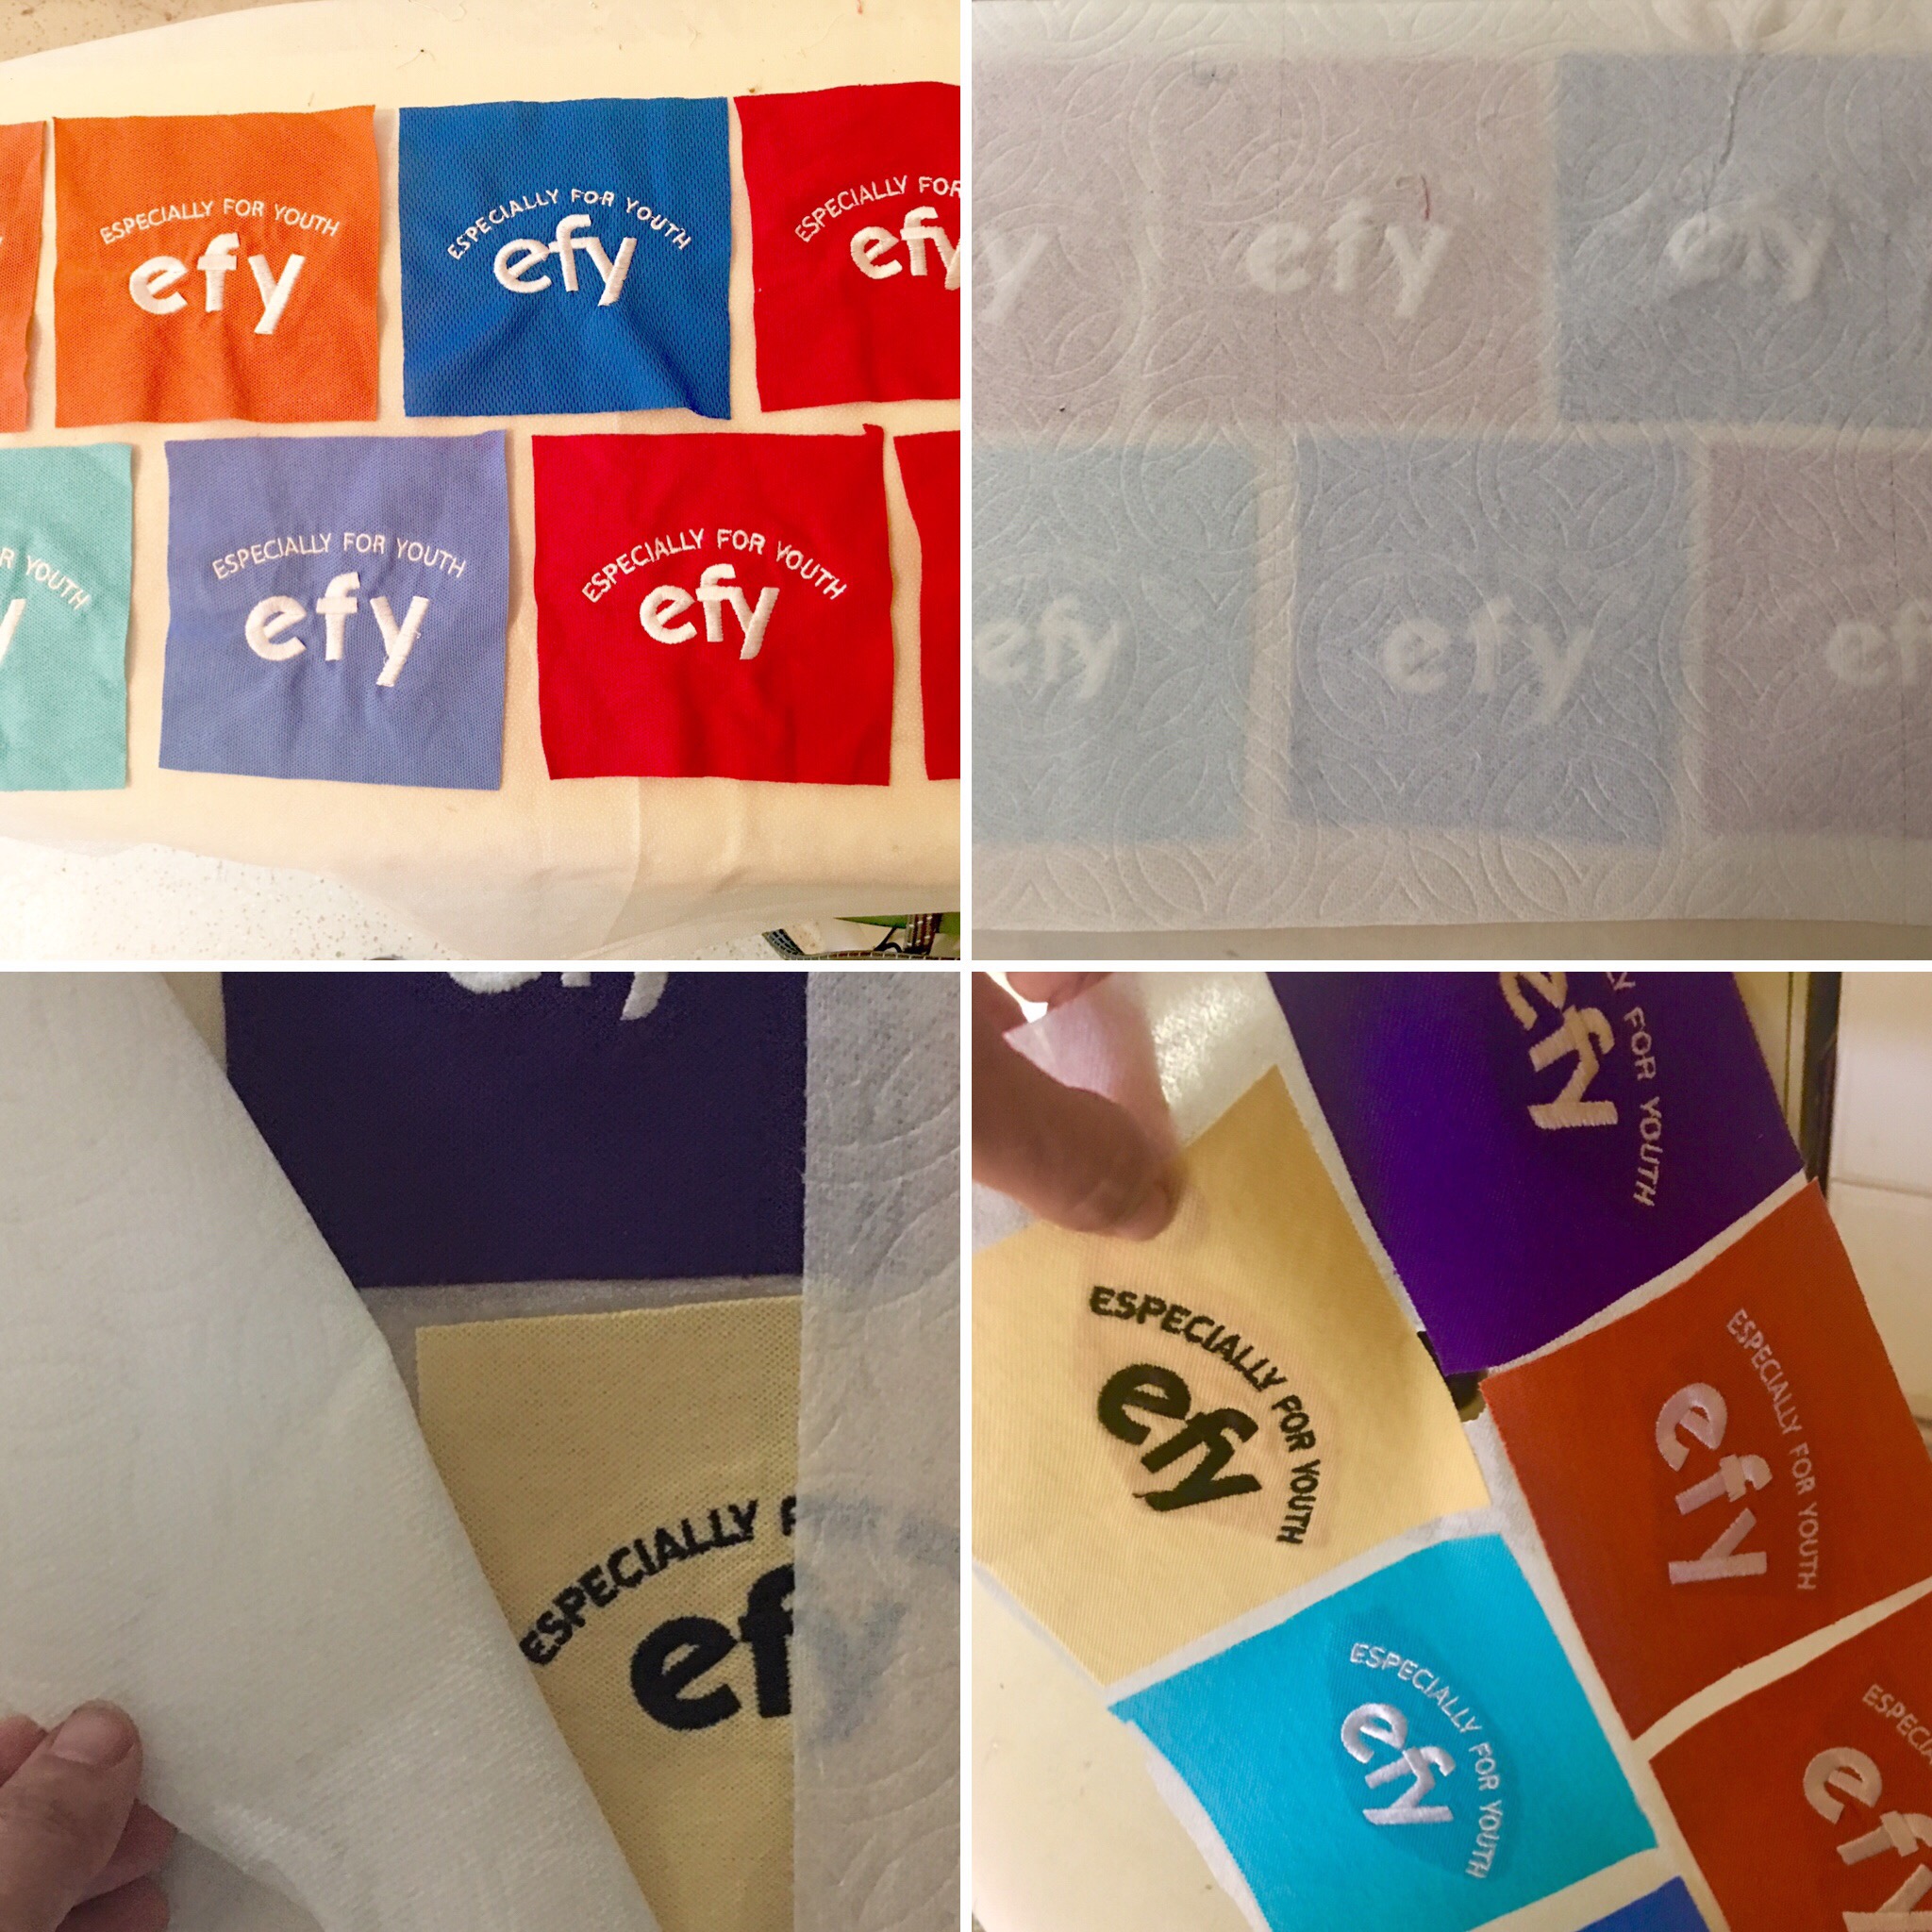
- I find it easy to lay my interfacing with the sticky side up on my ironing board and then lay my pieces right side up on top of it.
- Place a paper towel over all of the piece and iron away.
- Peel the paper towel off
- Magic! All of my pieces are stabilized!
To make things even stronger, I cut some old, scratchy fabric that I save just for backing stabilizer into 14.5″ squares. I wish I would have cut them into 16″ squares because no mater how straight and centered I get the center square, in the end they seem to be a bit off and hang off the end. So next time I will remember to cut my square bigger and trim down in the end.
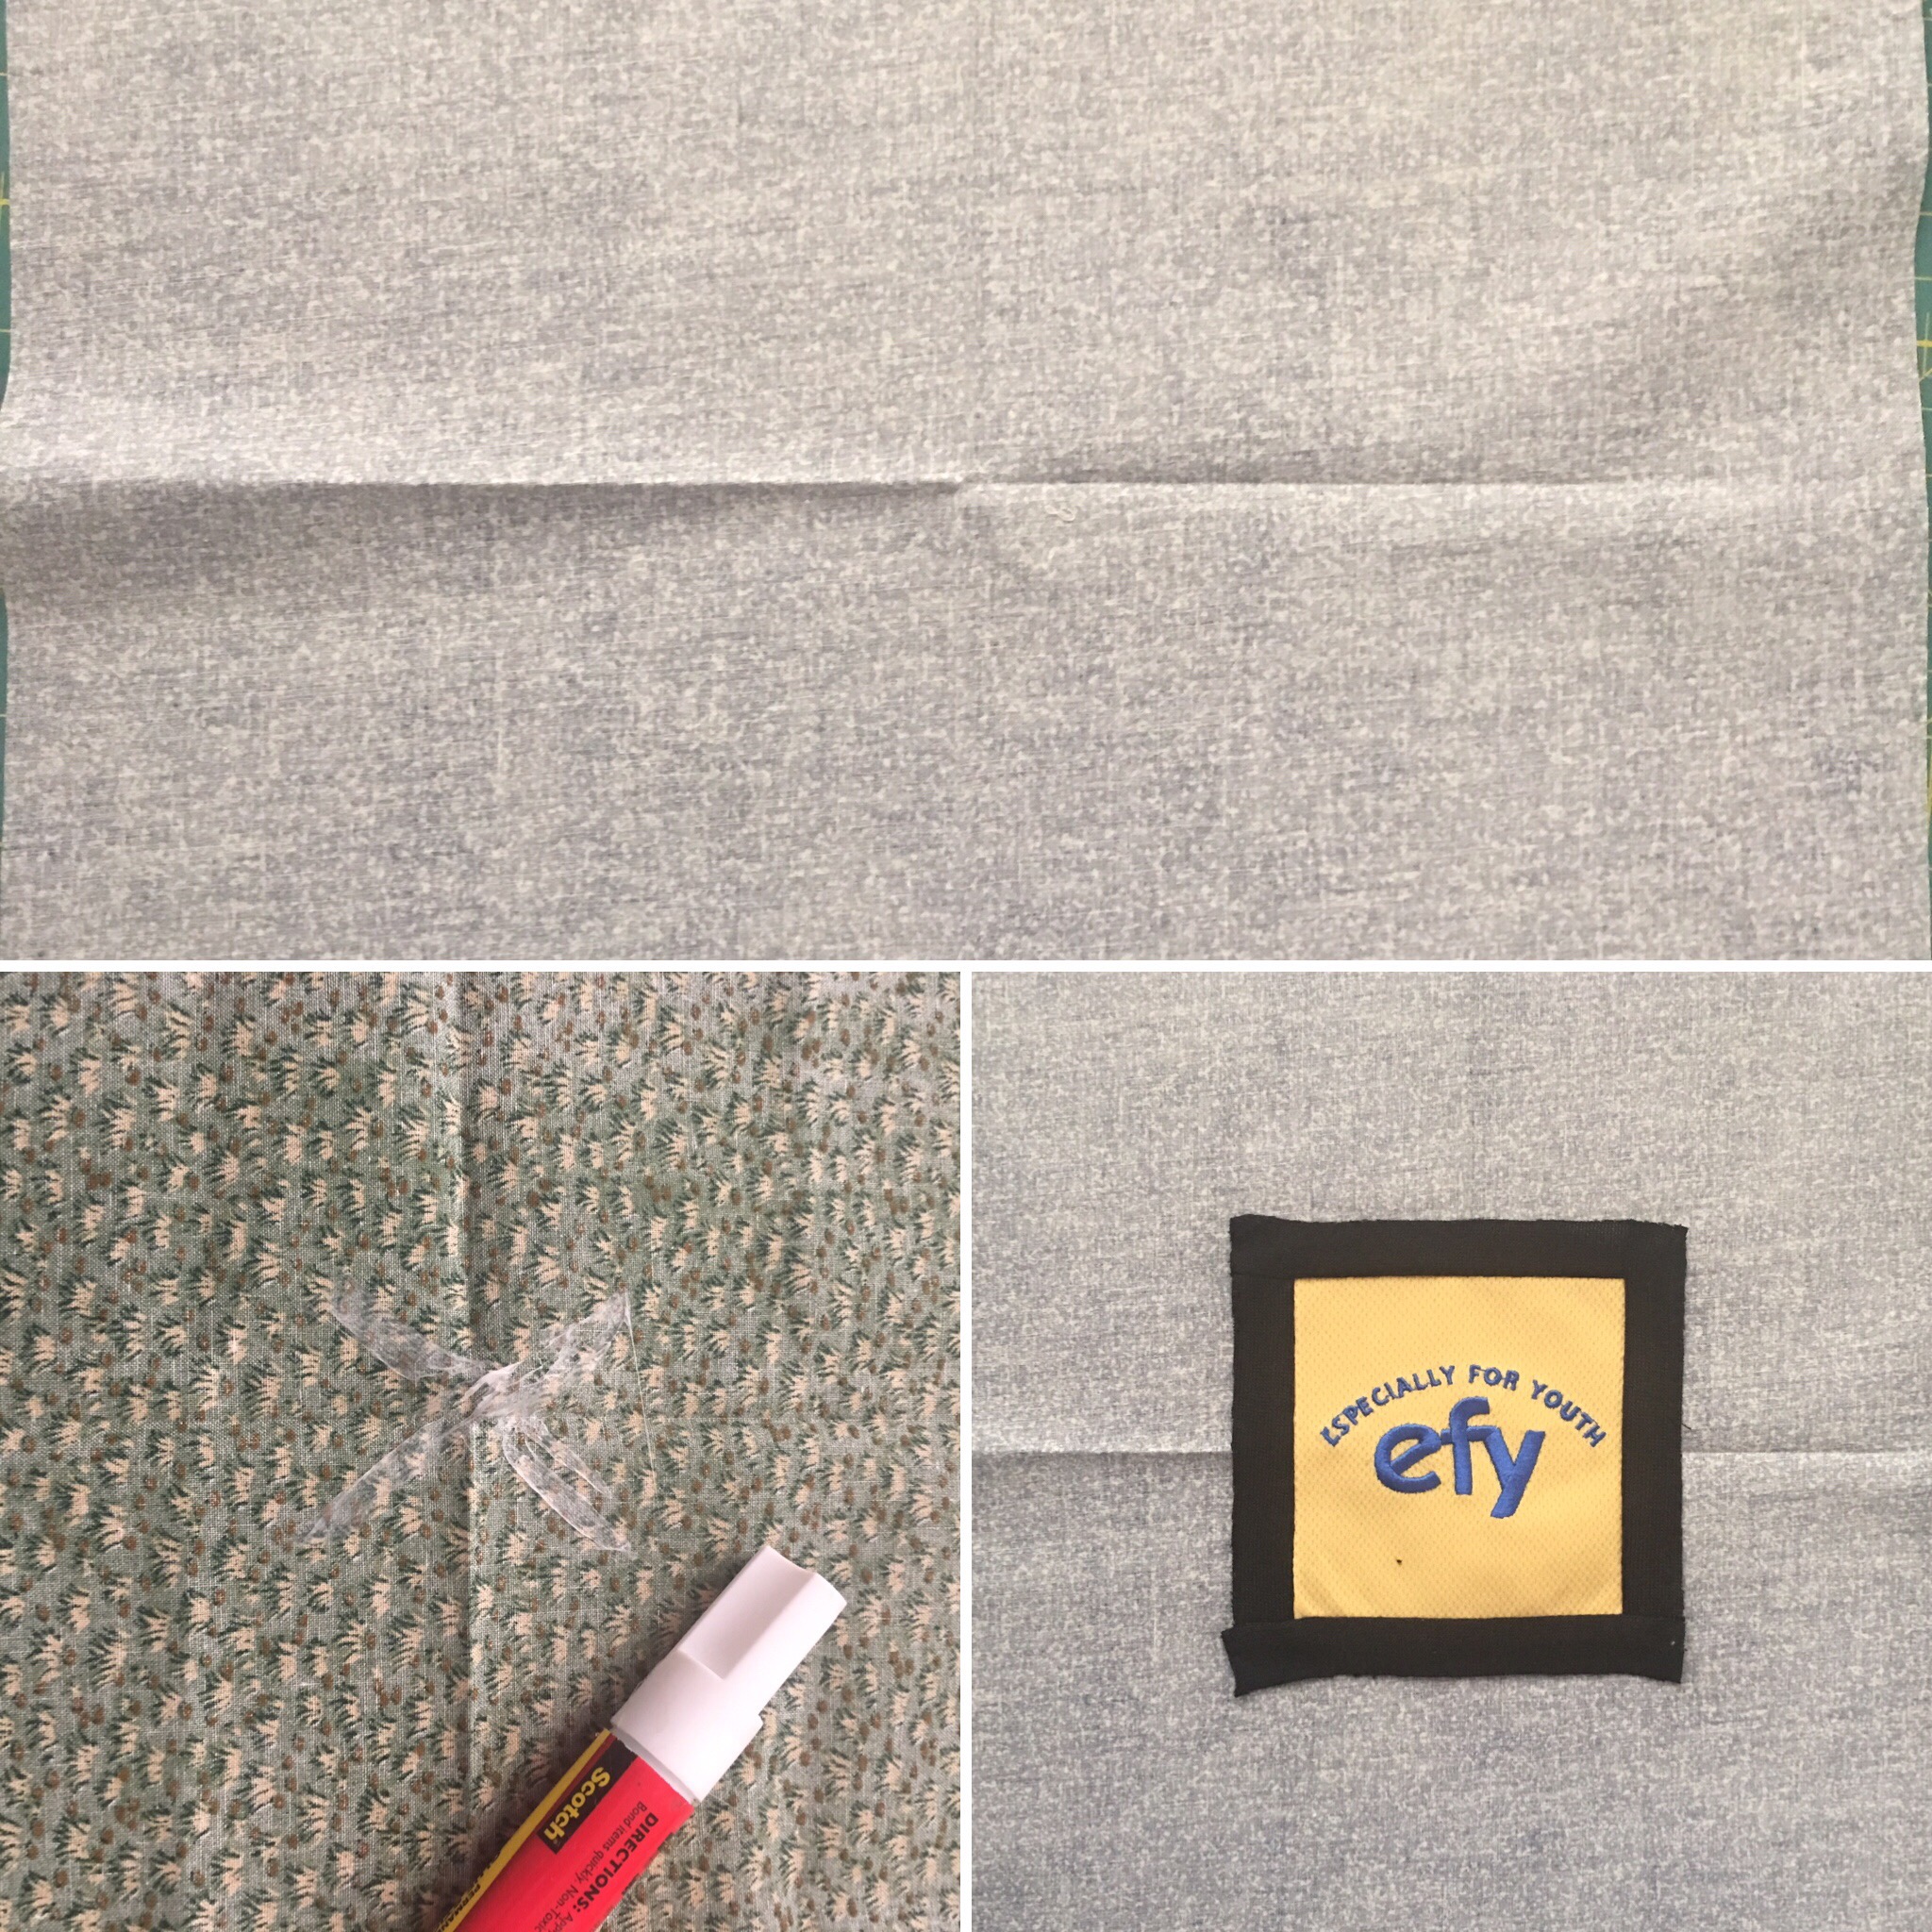
- I pressed the center mark of my fabric,
- Put some glue in the center
- Placed the center square on top.
As you can see in the photo, I went around the embroidery square with a 1″ black strip to add an accent to it. I used a knit here, but wish I would have used a quilting cotton. Live and learn, right?
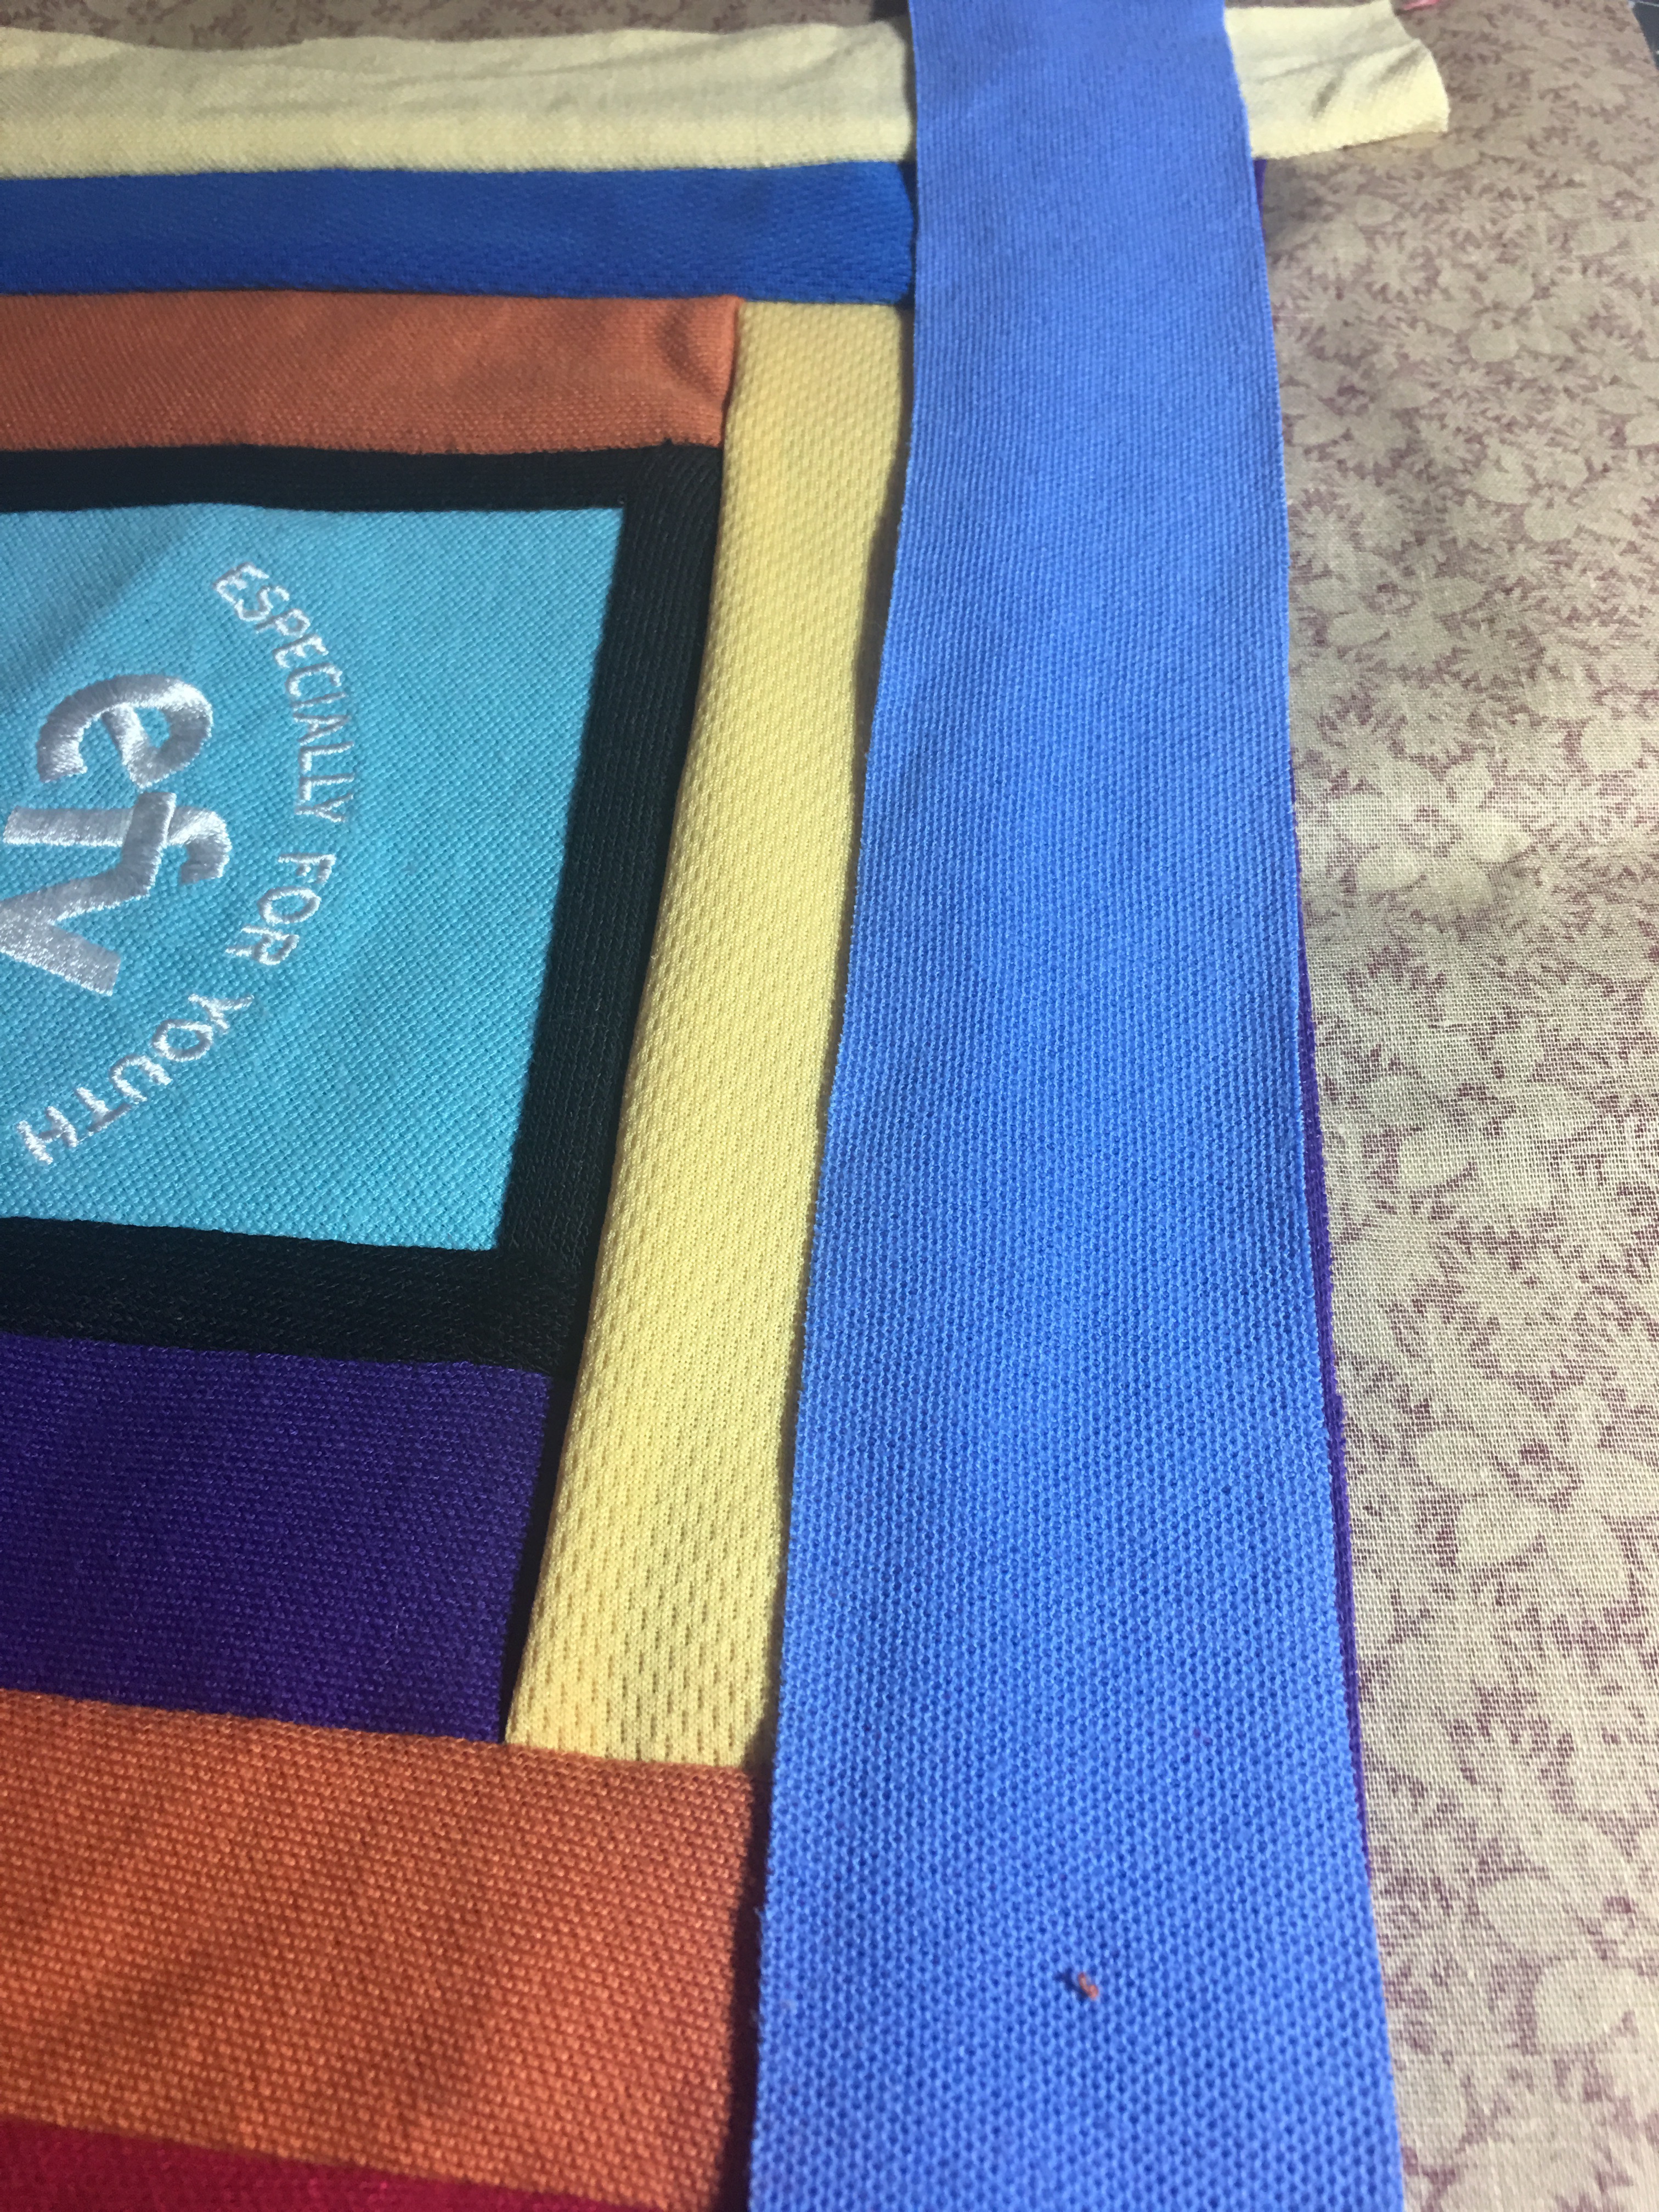
I stitched and flipped my log strips around my center square. Every now and then I added another 1″ black round to give an added dimension and a bit of wonkiness to this fun, active quilt. I moved this round to different places on the different squares.
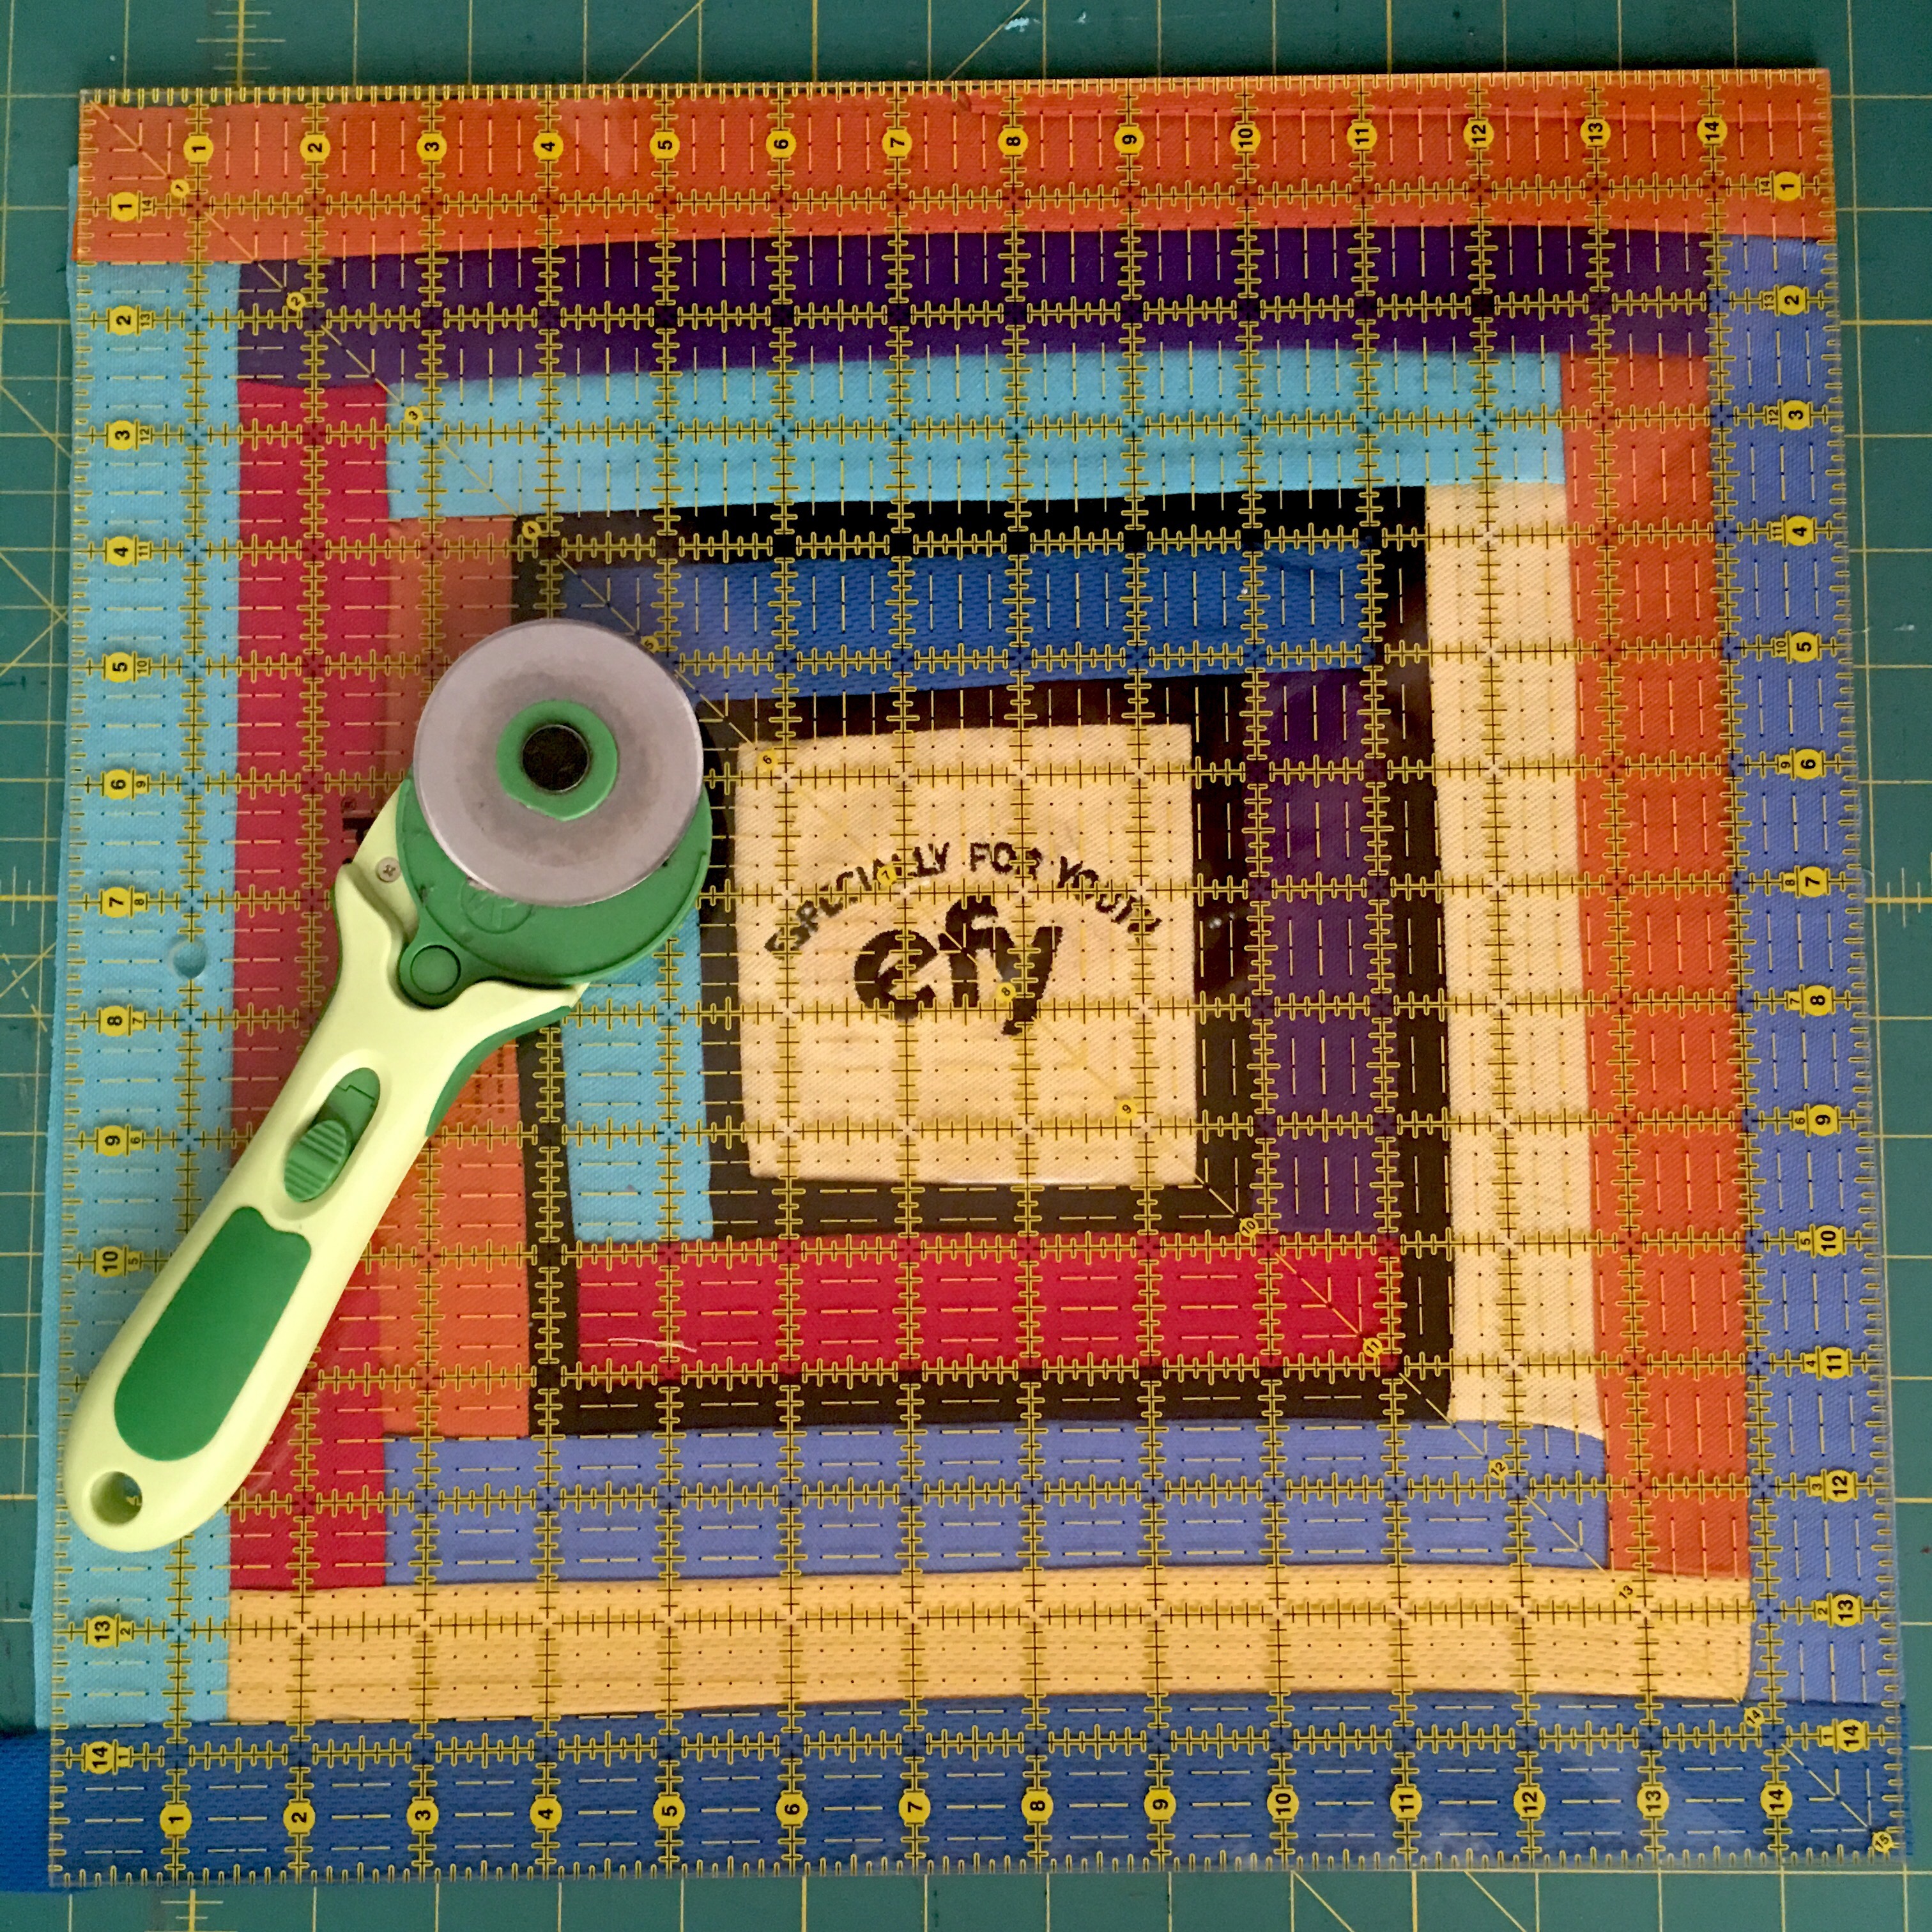
I always love the squaring up part of a stitch and flip stabilized block. Pretty!!
I sashed the blocks with black and a colored corner stone. 
I love all of the bright colors! I even stitched the buttons on!

He had 12 shirts, so there are twelve sets of buttons. Yep, it must be love because I had sewed 36 buttons on a quilt in the Arizona summer!

It was worth it though. I really like how they look, how they add another dimension to the quilt, and how I used every part of the shirts.. These are some really cute buttons!

I used the inside logo as an accent on the back. How cute is that?!

I really like how this quilt turned out. And while my son does not NEED another quilt, I know he is going to love it:)❤️.

Thank you so much for stopping by and sharing in my creative journeys. I hope you have a SWEET rest of your day:)!


That quilt is a great reminder of the great and crazy times at camp! That was A LOT of interfacing!!!!
LikeLiked by 1 person
Yes it was!:). A camp Quilt made of camp shirts. The best memories all wrapped up in one:)!!
LikeLiked by 1 person
What a wonderful keepsake! 😍 This one will bring back great memories for years to come 😀
🎈Happy Birthday, 🎂Tracy’s son 🙂
LikeLiked by 1 person
Ah Tina! How SWEET:). I will have to pass it on to him:)
LikeLiked by 1 person
😍
LikeLike
This is really nice. Instead of a load of tshirts cluttering up the place, never to be worn , you have created an heirloom to be used and cherished. Super.
LikeLiked by 1 person
Thank you! T shirts do tend to take up the space:). I hope he loves it❤️
LikeLike
This turned out great! Thanks for the tip with paper towel. I somehow always get my iron sticky but will have to remember to do this! 🙂
LikeLiked by 1 person
I agree! Until I tried paper towels, mine did too:). I probably should make one of my “Totally Tipster ” posts about this!❤️❤️
LikeLiked by 1 person
And if he moves to Flag, it’ll come in really handy on those cold nights! =) That’s a great memory quilt! Maybe you can find camp pictures to collage in a frame to go with it.
LikeLiked by 1 person
Great idea!! He would love that❤️😊! Memory quilts are so fun!
LikeLike
That”s very cool. I’ve heard a lot of people suggest making one, but I’ve never seen a t-shirt quilt completed. What a great way to treasure the memories attached to them.
LikeLiked by 1 person
Thanks Kate! It was super easy. as long as everything is stabilized, it just sees right up:)
LikeLiked by 1 person
You are so incredibly creative Tracy!!! I love this! 😀
LikeLike
Thank you Tami! He loves it:)❤️
LikeLiked by 1 person
What type of interfacing did you use on the polo type shirts? I am making a memory quilt of a friend’s husband’s shirts. Your quilt is beautiful!
LikeLiked by 1 person
Hi Debra! Any iron on interfacing will work. The shirts need the stability especially for the actual quilting so they do not move around under the machine. It will lay much nicer that way. Thank you for stopping by and good luck with your friend’s quilt! You are going to have a great time!❤️❤️
LikeLike
I’m so glad I came across your quilt post. My husband taught with EFY for 20 years and he and I were session directors together for 12 years. I saved the polos and tshirts from all of them to make a quilt someday. He passed away in 2023 and I’m finally getting around to making the quilt. I’m just sad he won’t get to see it, he would have loved it. How wide did you cut the log strips and did you stabilize them too?
LikeLike
Hi Stephanie! – I’m so sorry about the loss of your husband. EFY leaders are the most enthusiastic fun people ever❤️. This quilt turned out great and my son loves it. Be sure to stabilize each shirt with a medium to heavy weight stabilizer. You will be very sad if you don’t. – Don’t ask me how I know, lol! —. It has been a long time since I made this quilt, I don’t remember the exact width of the strips, I think I wrote them down in the post, but if not, I wouldn’t go any wider than 2”. Good luck and have fun! Also, enjoy the memories. The Lord gives us many tender mercies and this quilt may be one of yours. ❤️❤️ — Tracy
LikeLike