

 My beautiful daughter-in-law said she wanted a hang-up bag. Since her birthday was this month, I knew exactly what I would be giving her!
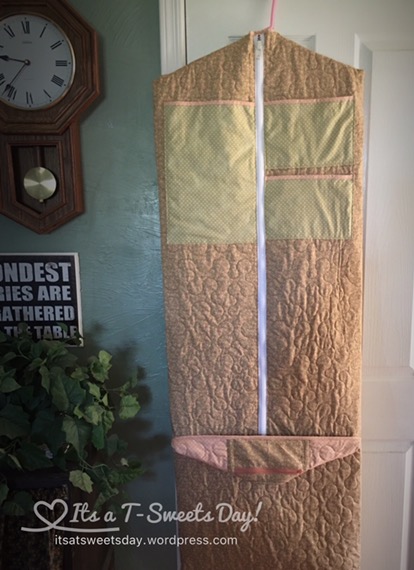
This bag is perfect for storing and carrying a small wedding, prom, or temple dress. It hangs long so the dress is covered and will not wrinkle, but it travels small so that it is easy to carry. There are pockets for shoes, slips, papers, and make-up.
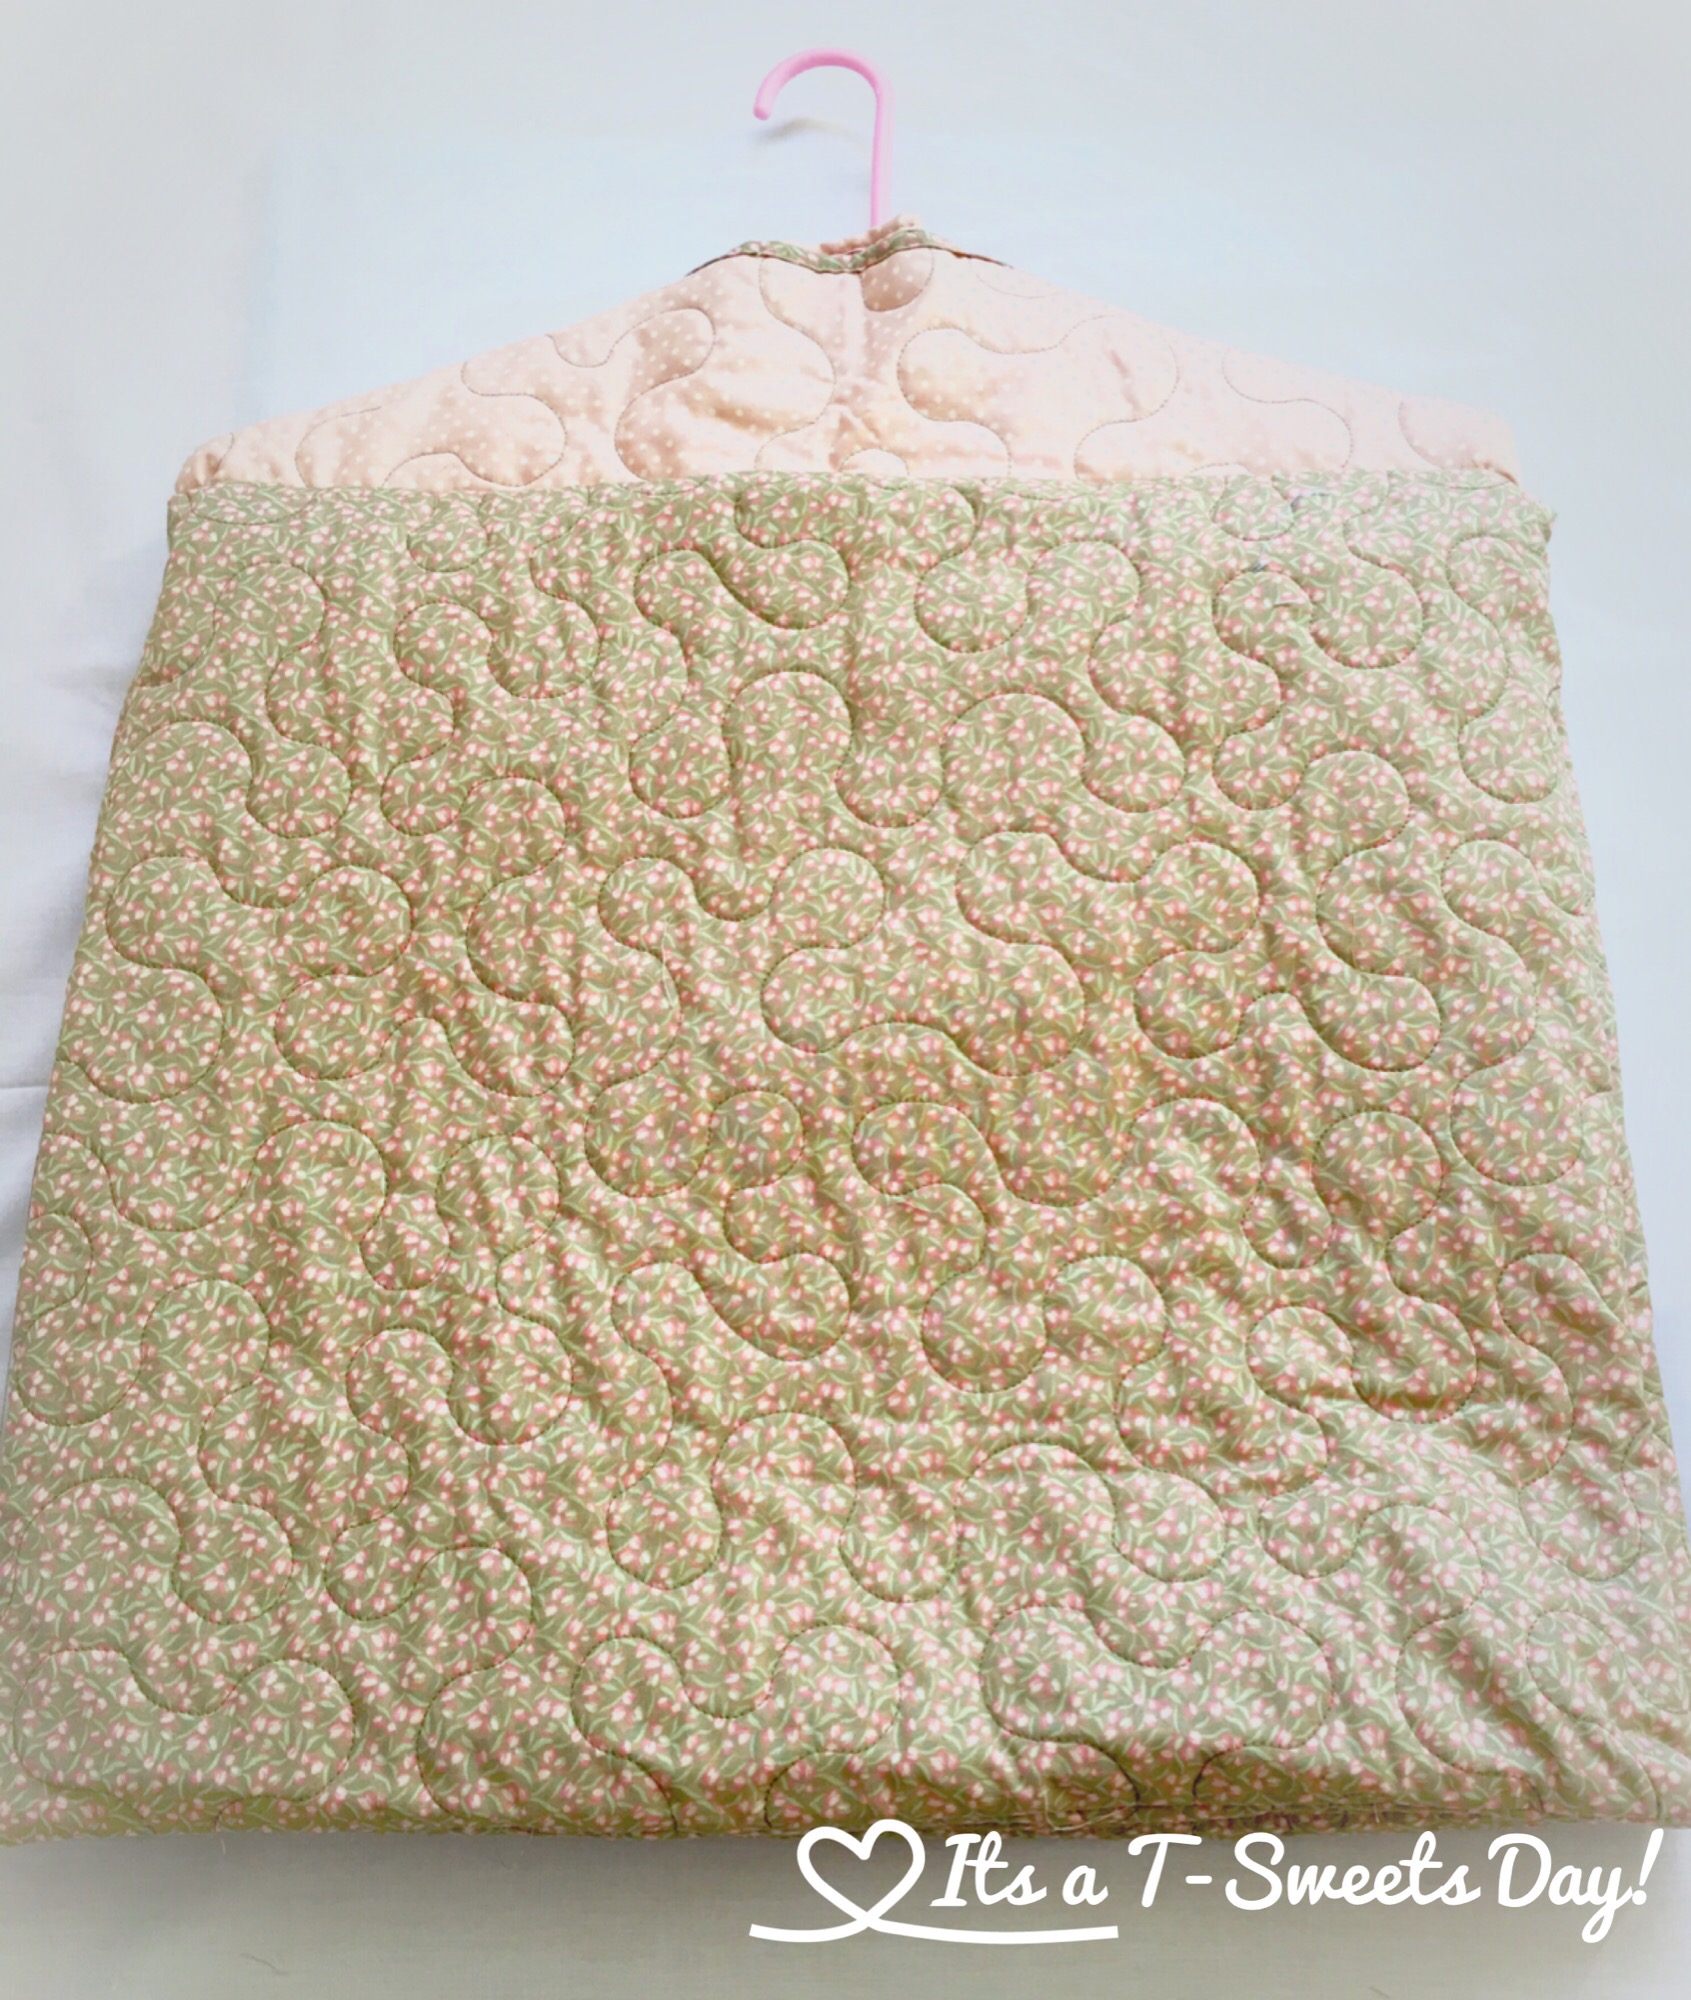
In short, this is the perfect clothes bag. With just a few yards of fabric and a few zippers you can make one of these up in no time:)
Materials—
- 2 1/2 yards each of coordinating fabric
- Batting ( or buy pre-quilted fabric)
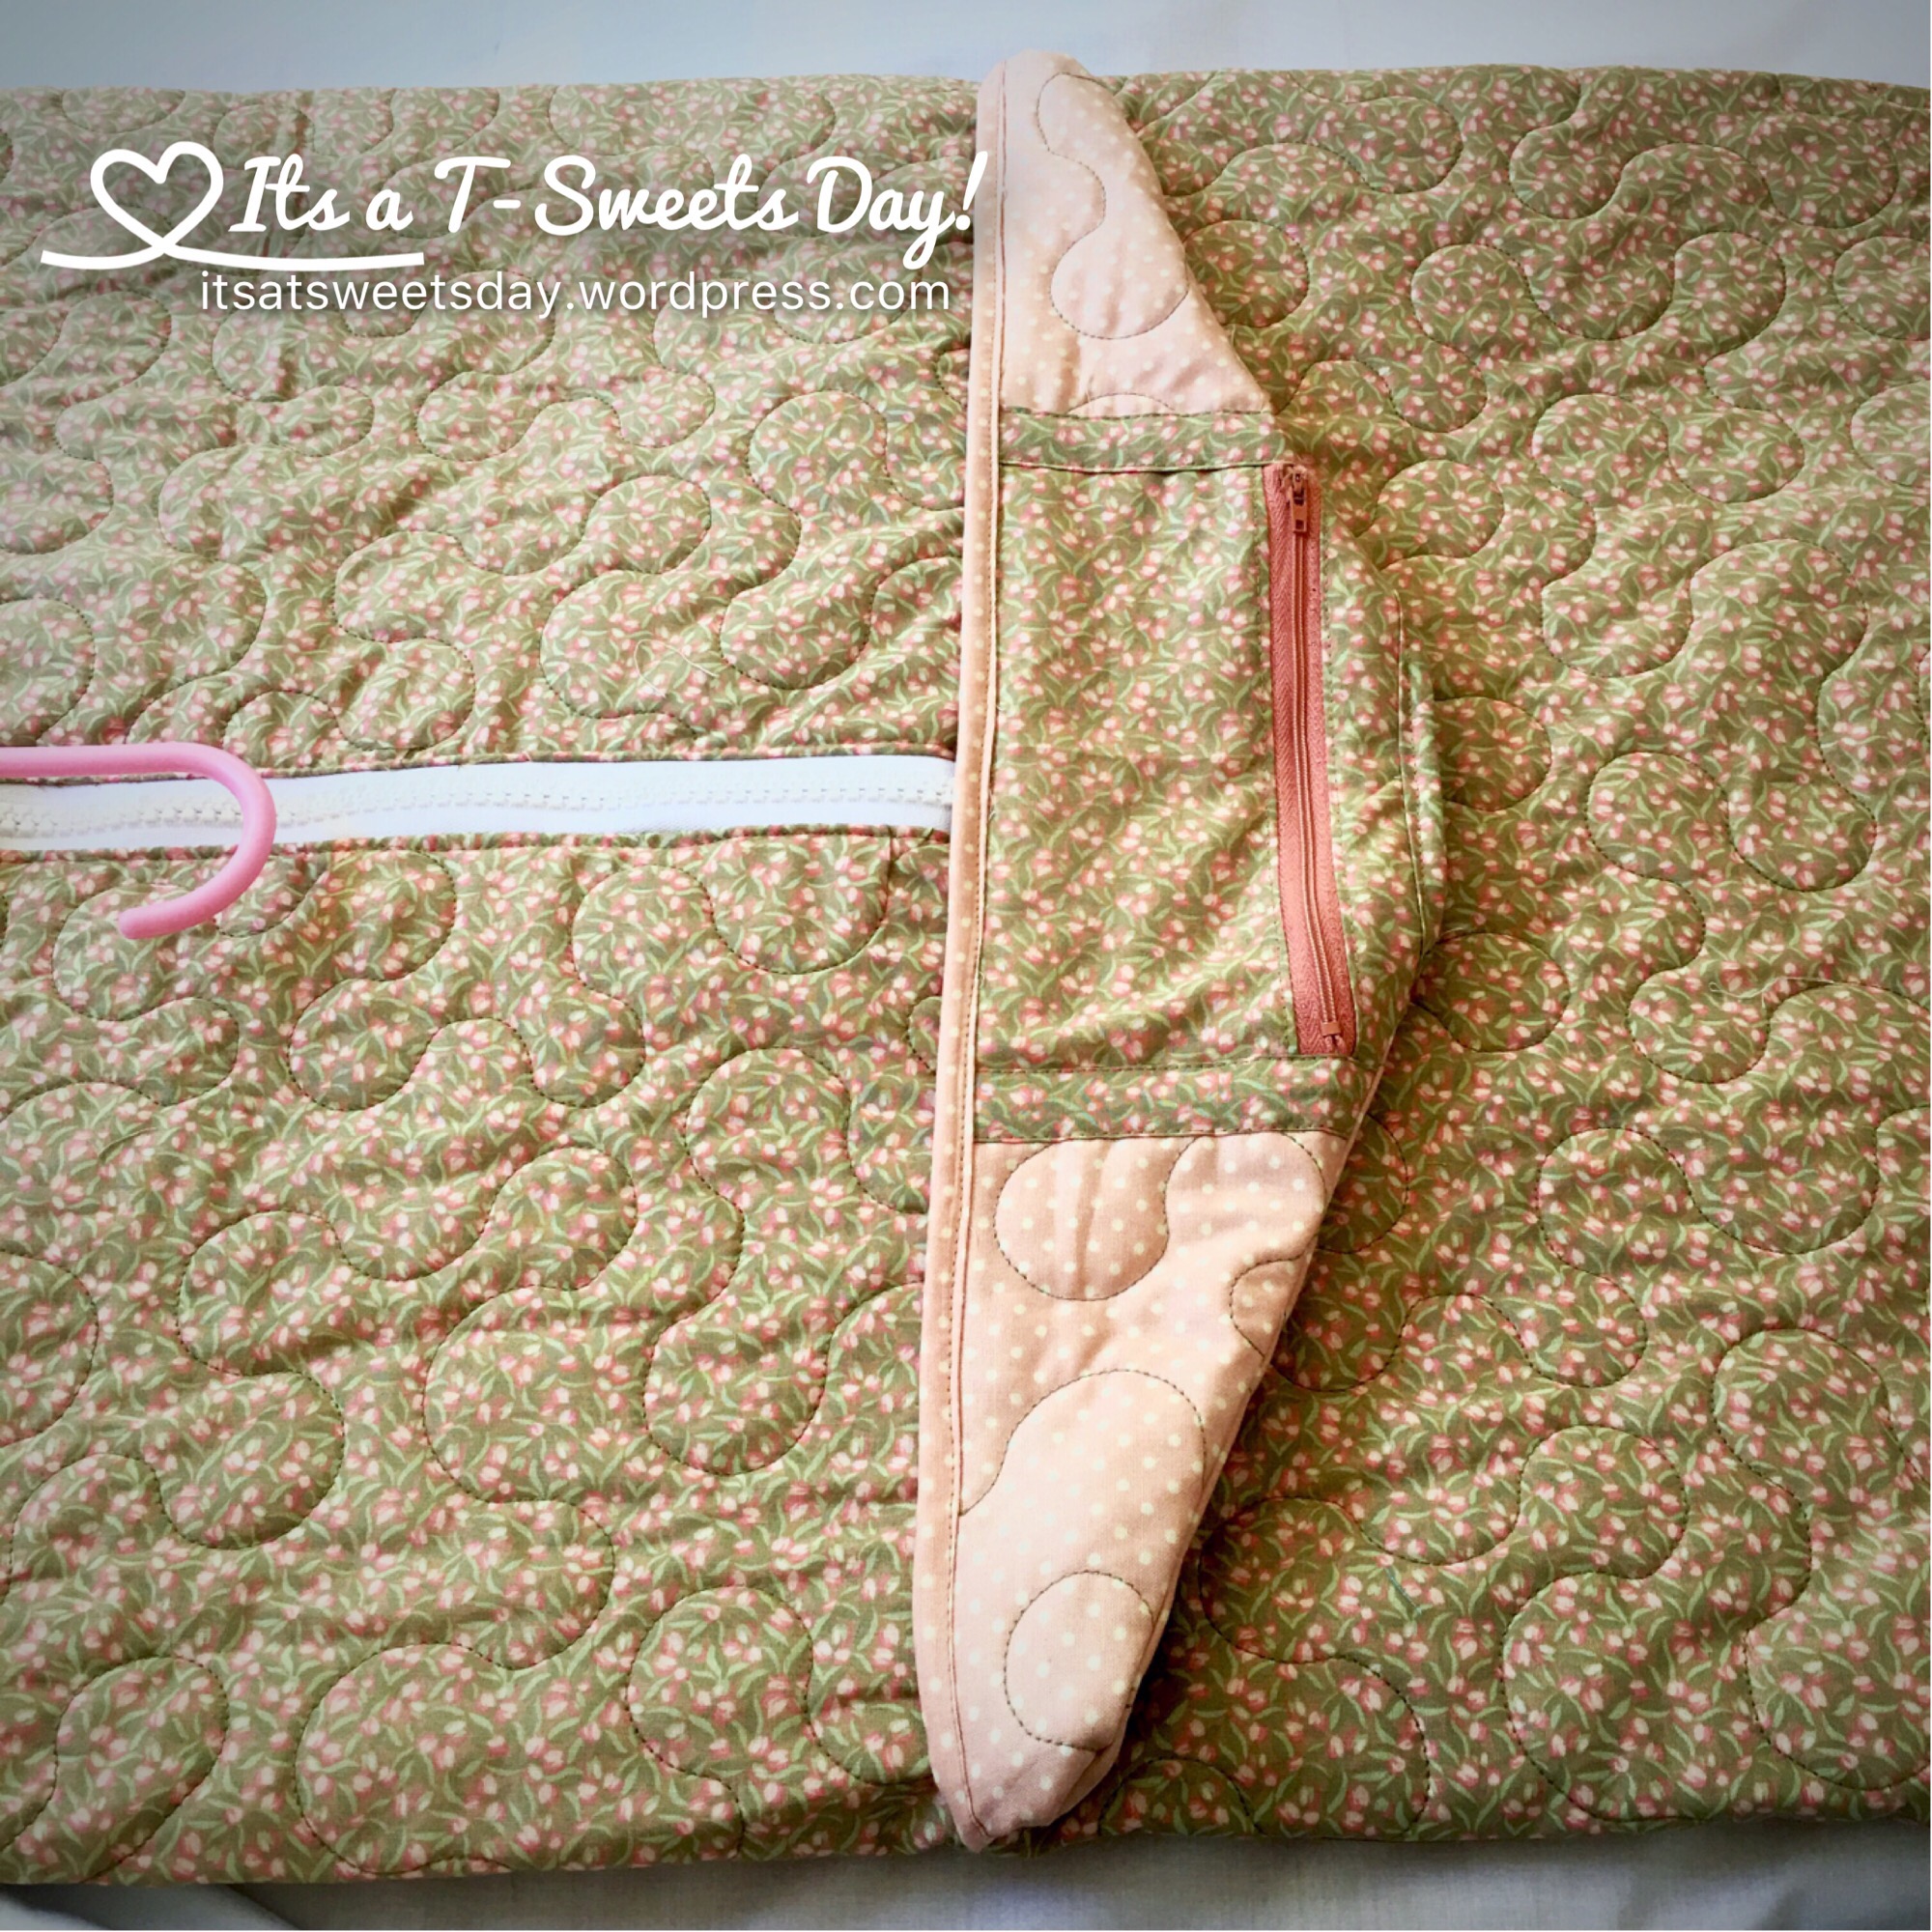
- 1 – 20″ zipper
- 1 – 45″ or longer zipper ( check an upholstery shop. They gave me mine for free because it was a left over scrap!)
- 1 – 8″ zipper
- Sew in hook and loop tape
- 3/4″ binding tape maker (optional)
- Strong hanger
Cutting:
From accent fabric cut–
- 1 – 10 x 14.5″ rectangle
- 2 – 1.5 x width of fabric strips
- 2 – 7 x 10″ rectangles
From main fabric cut–
- 1 -13.5 x 20″ rectangle
- 1 – 3.5 x 8.5″ rectangle
- 1 – 1.5 x 8.5″ rectangle
- 2- 1.5 x with of fabric strips
Sewing Directions:
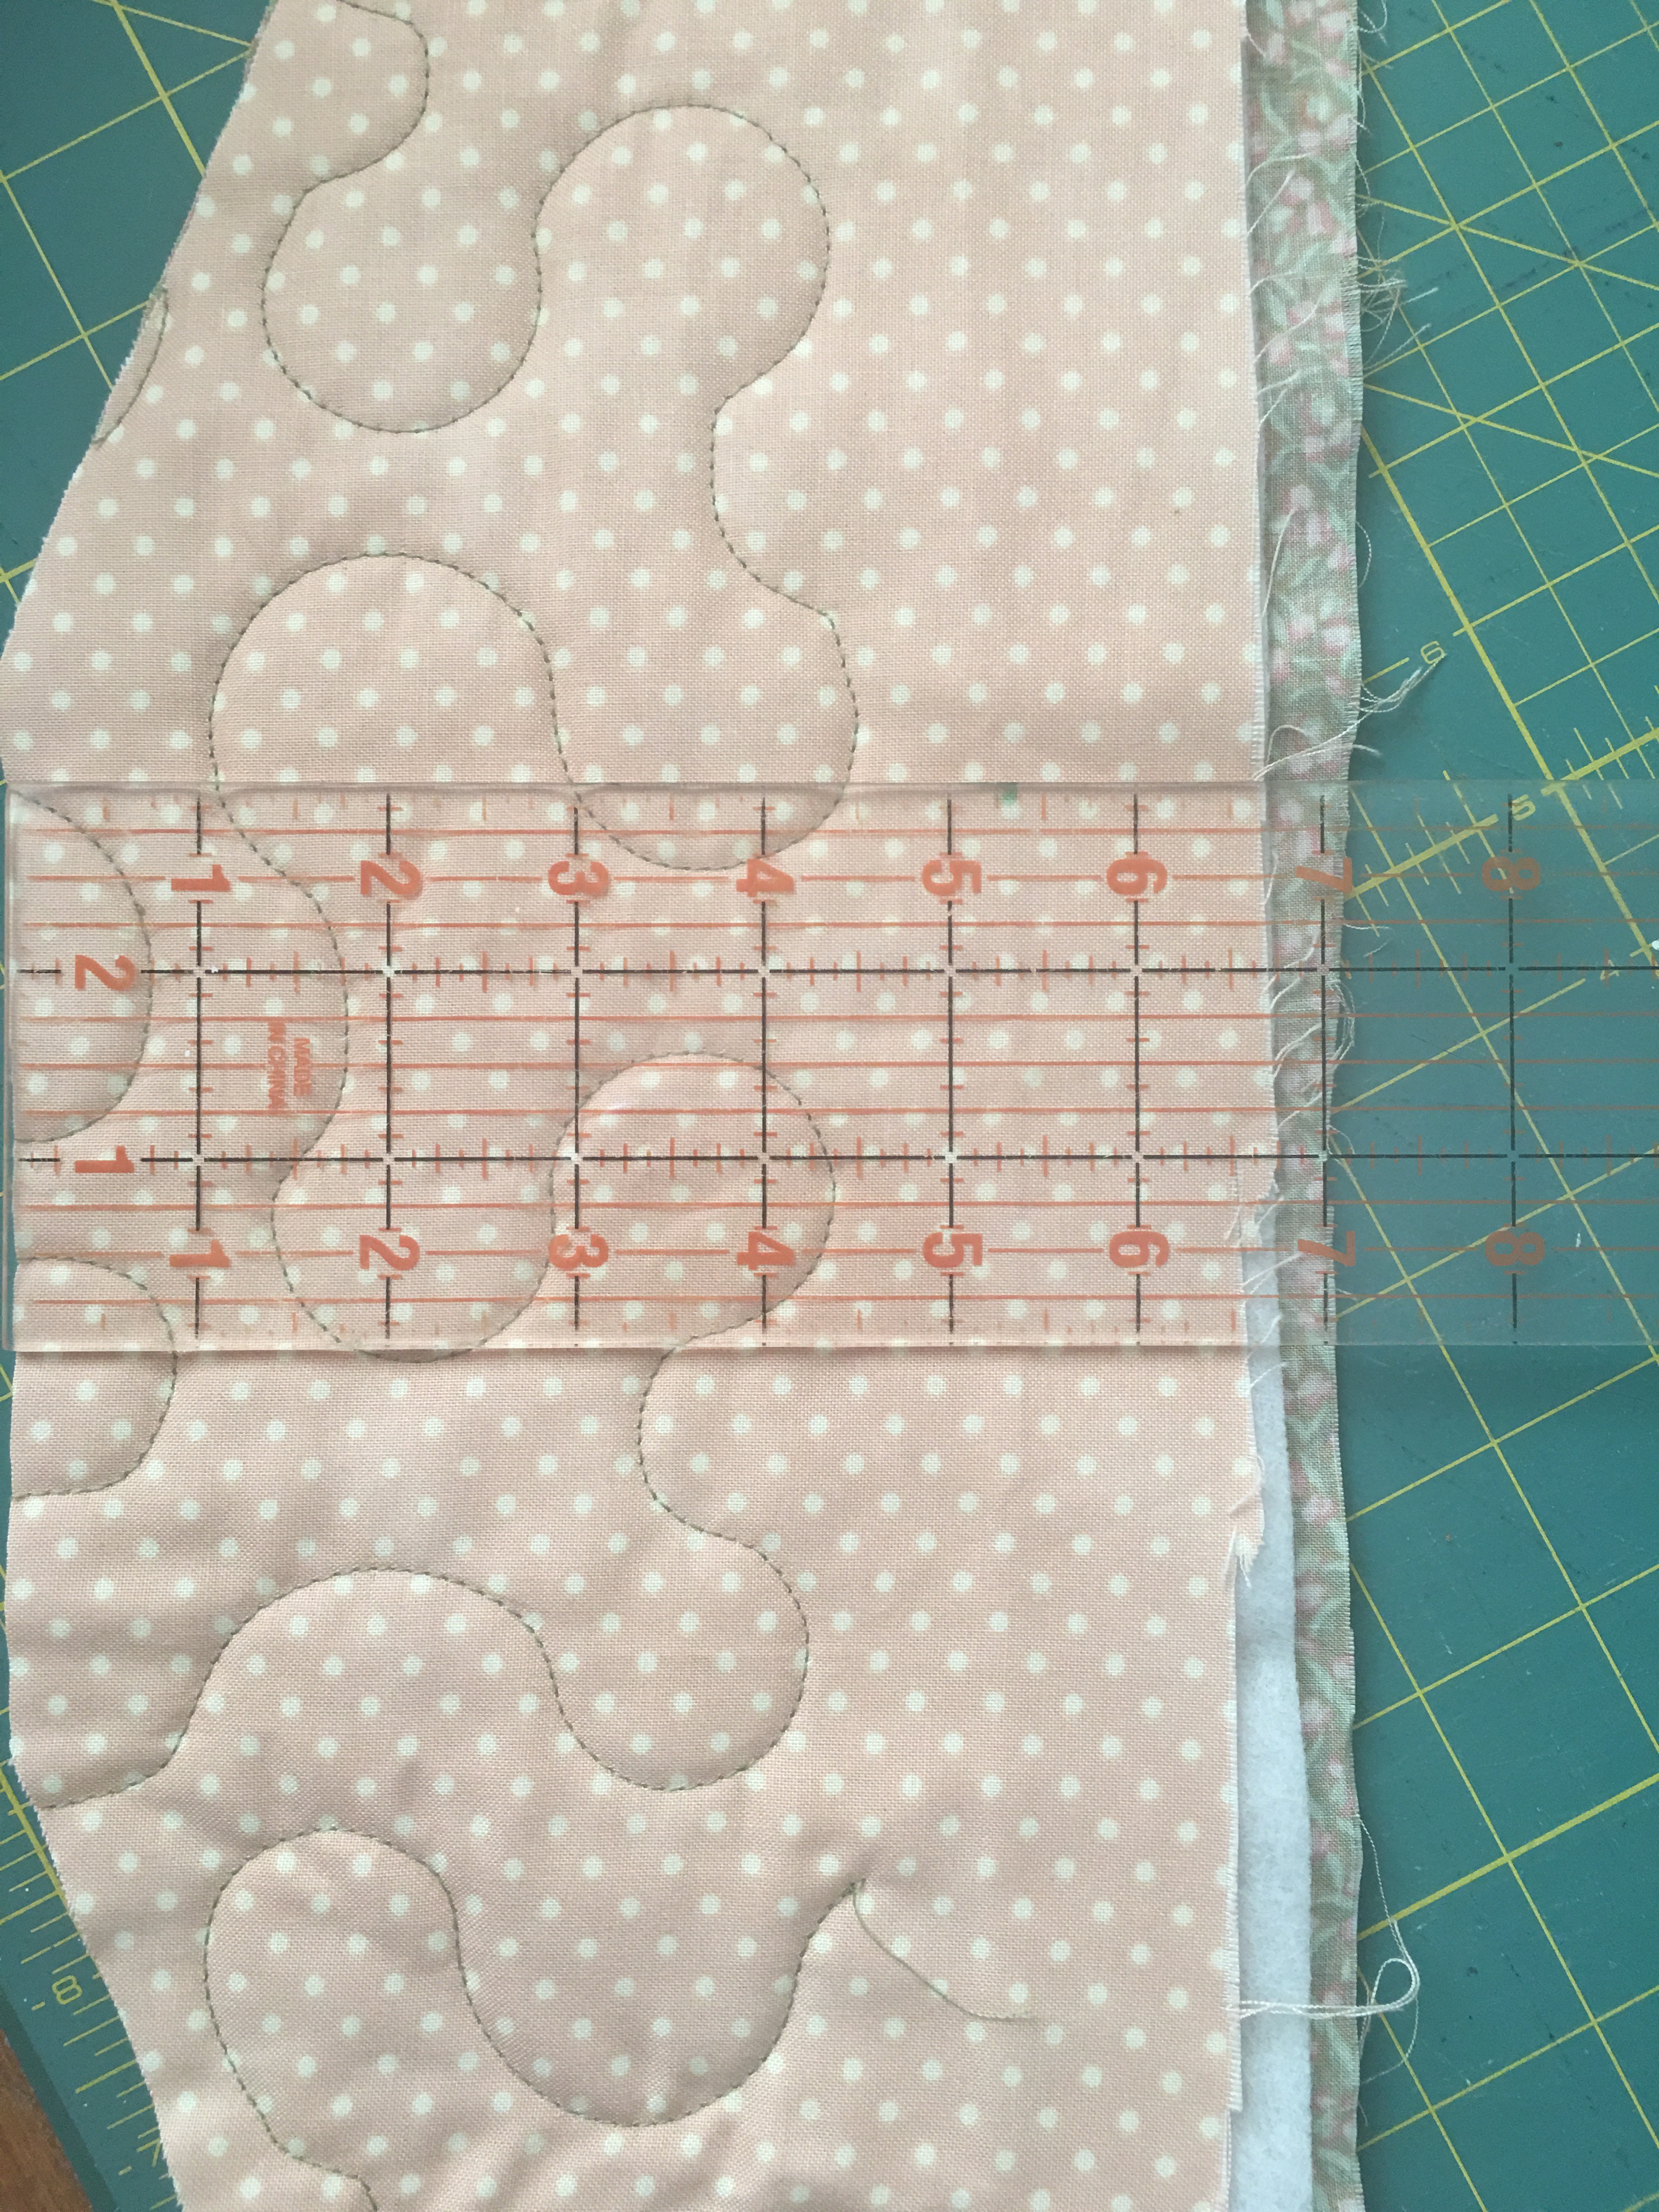
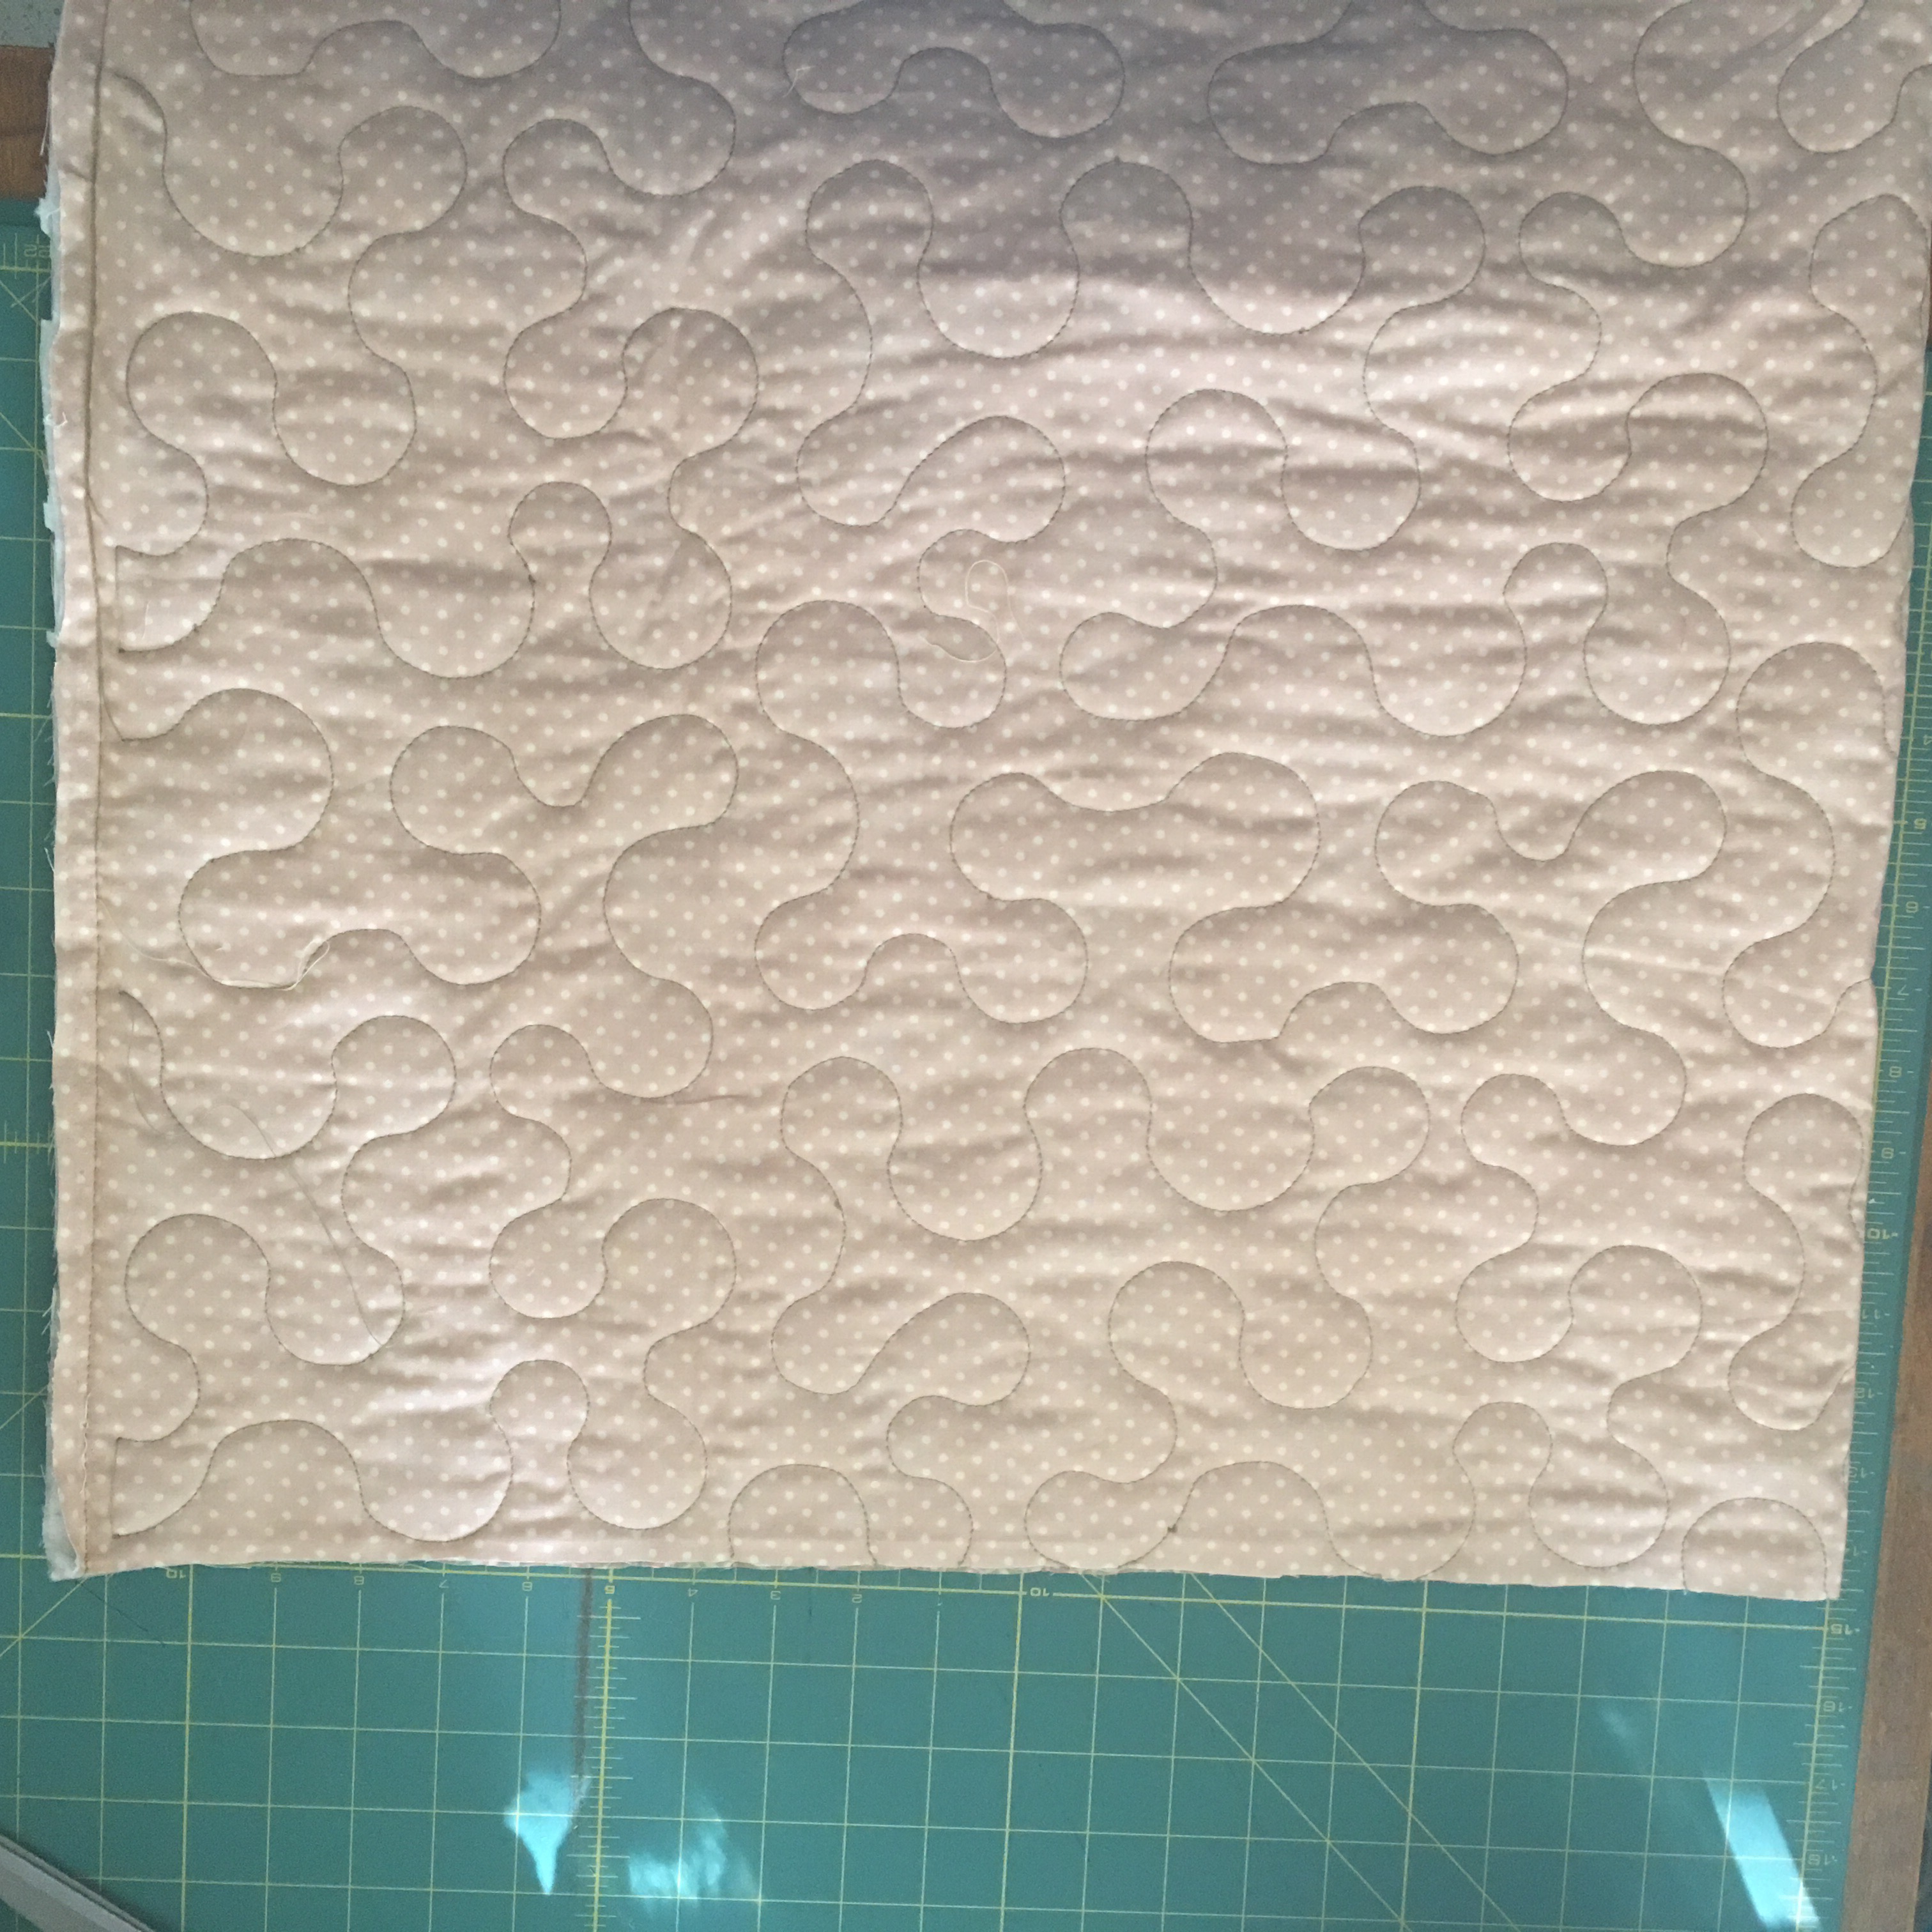
- Sandwich batting between 2 yards of coordinating fabric and quilt. This can easily be done with straight lines or meandering stitches. Or use pre-quilted fabric.
- Cut this quilted fabric to 45″. Cut the extra to 20″ and save for later.

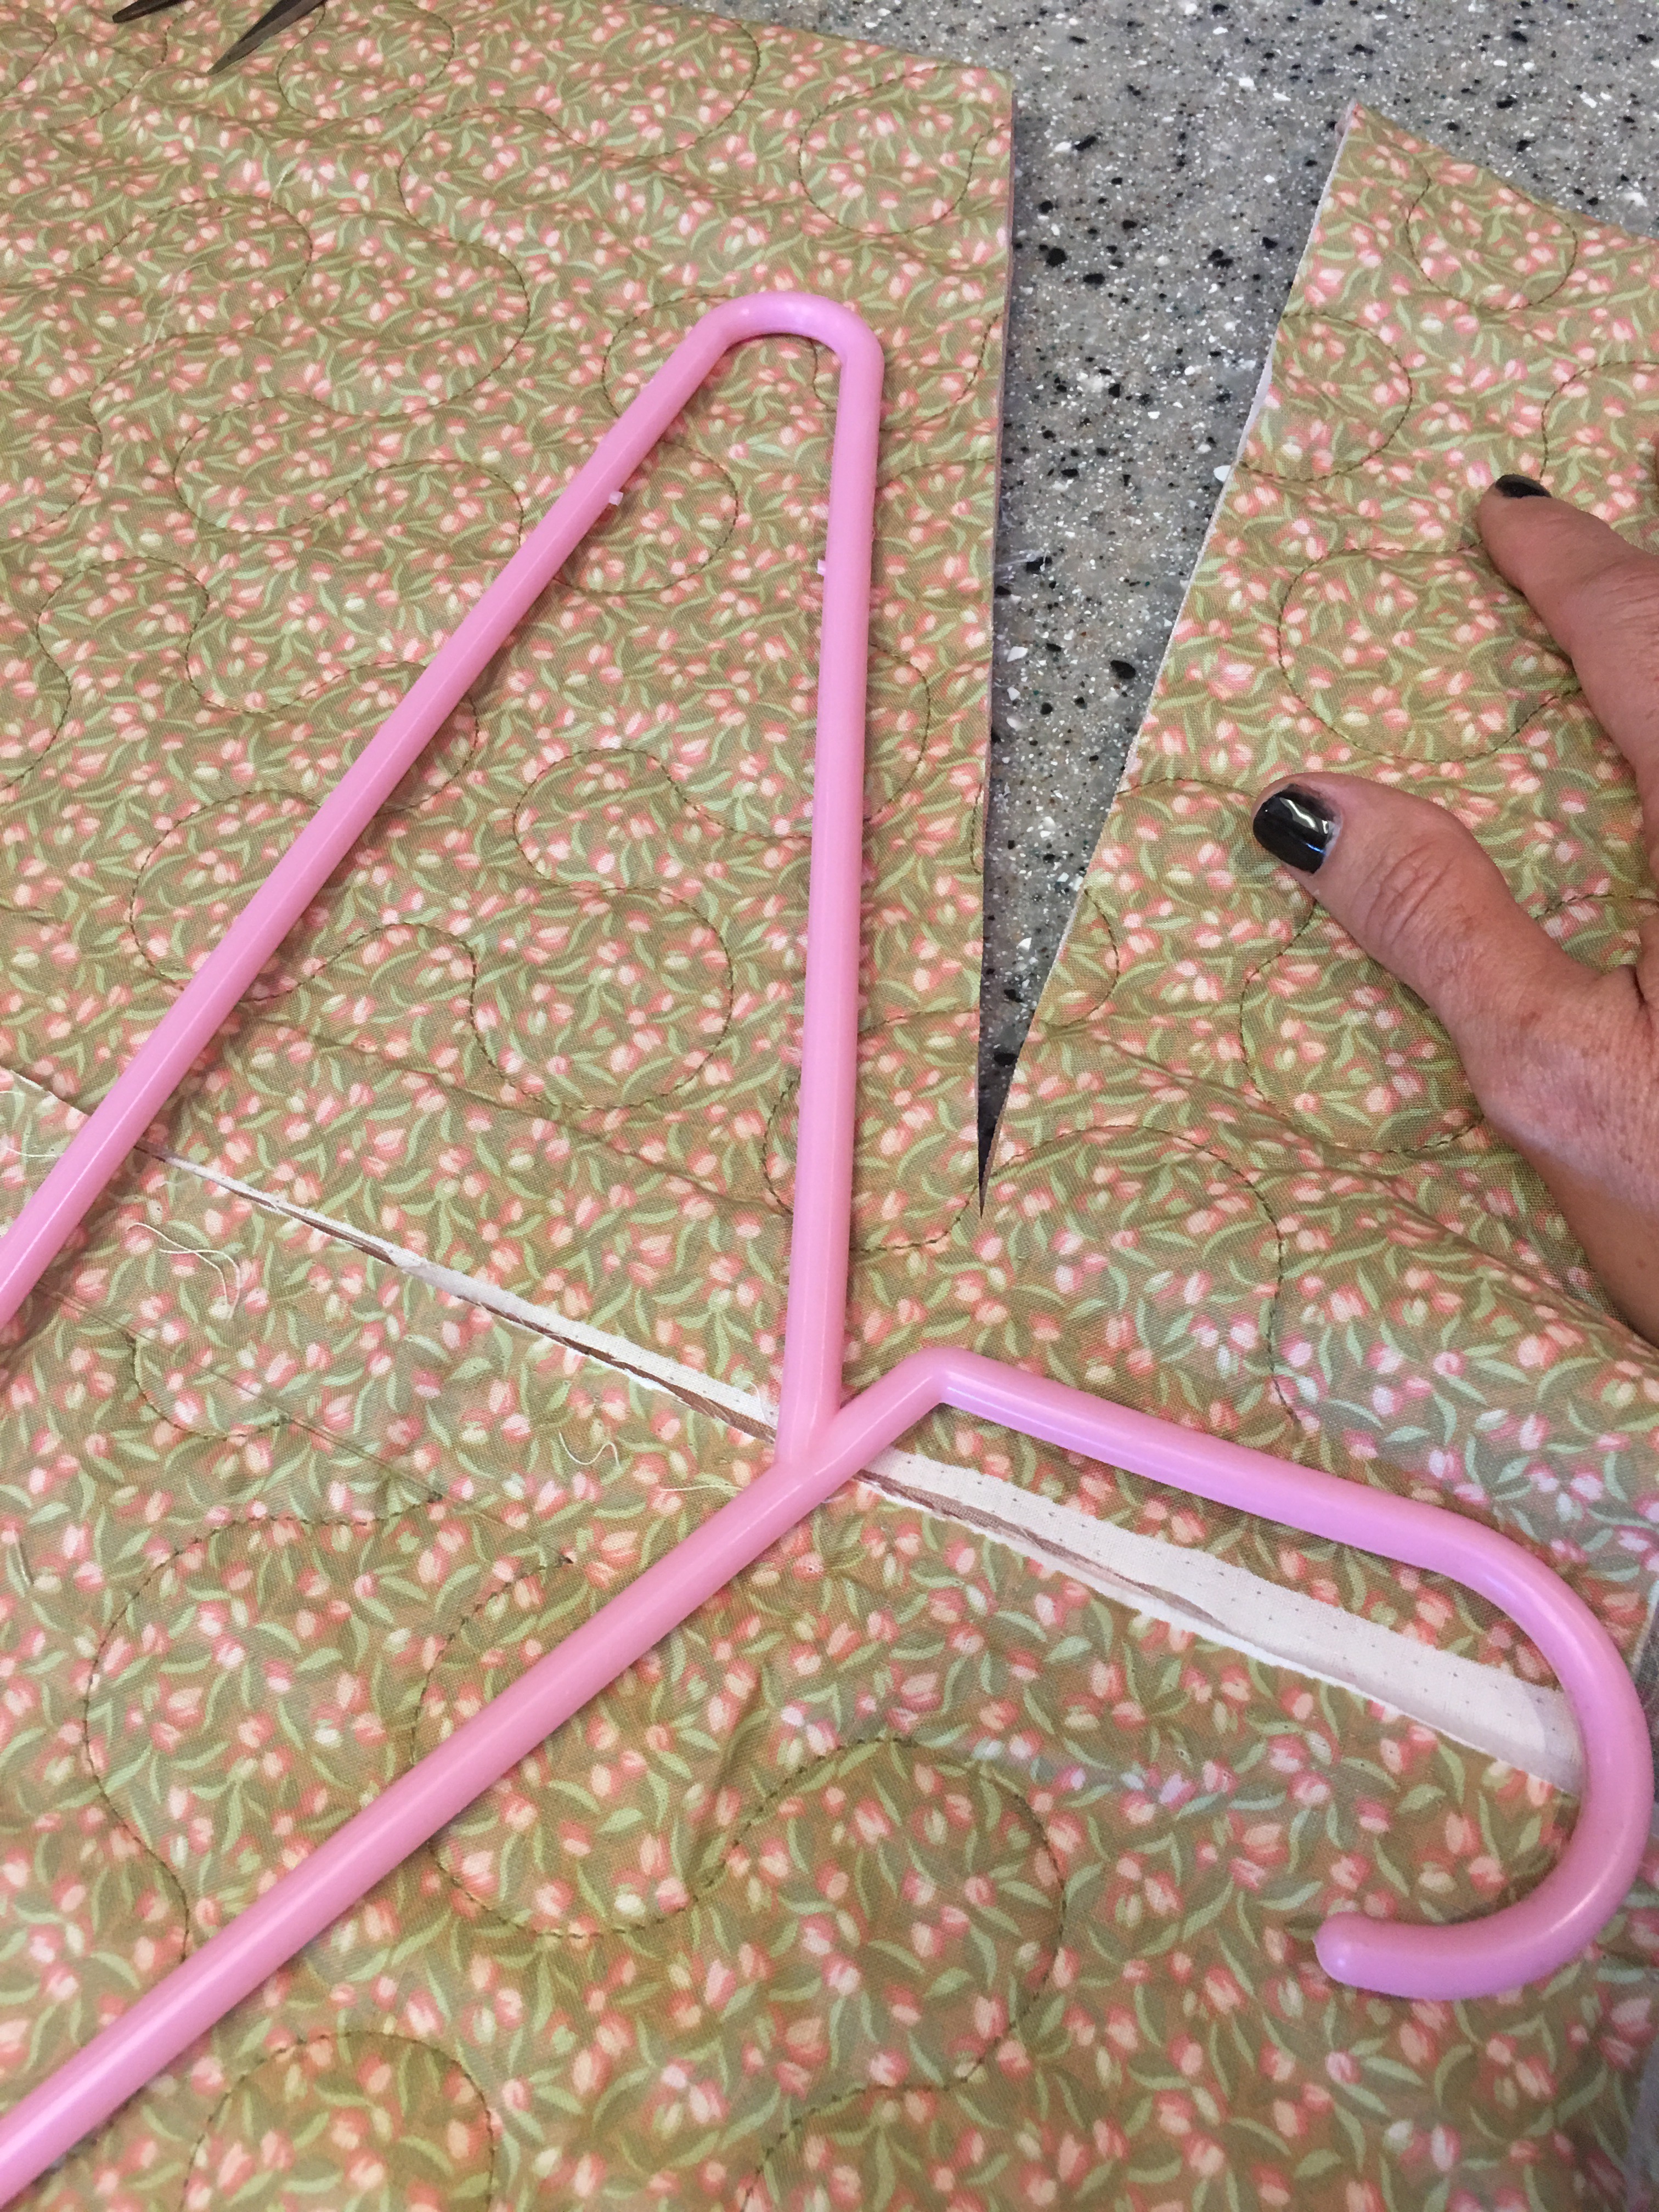
- Fold the fabric with the edges matching in the middle.

- Place your hanger on top and cut the fabric to this shape. Cut one side and then fold in half and cut the other side to match. Save the scrap for later.
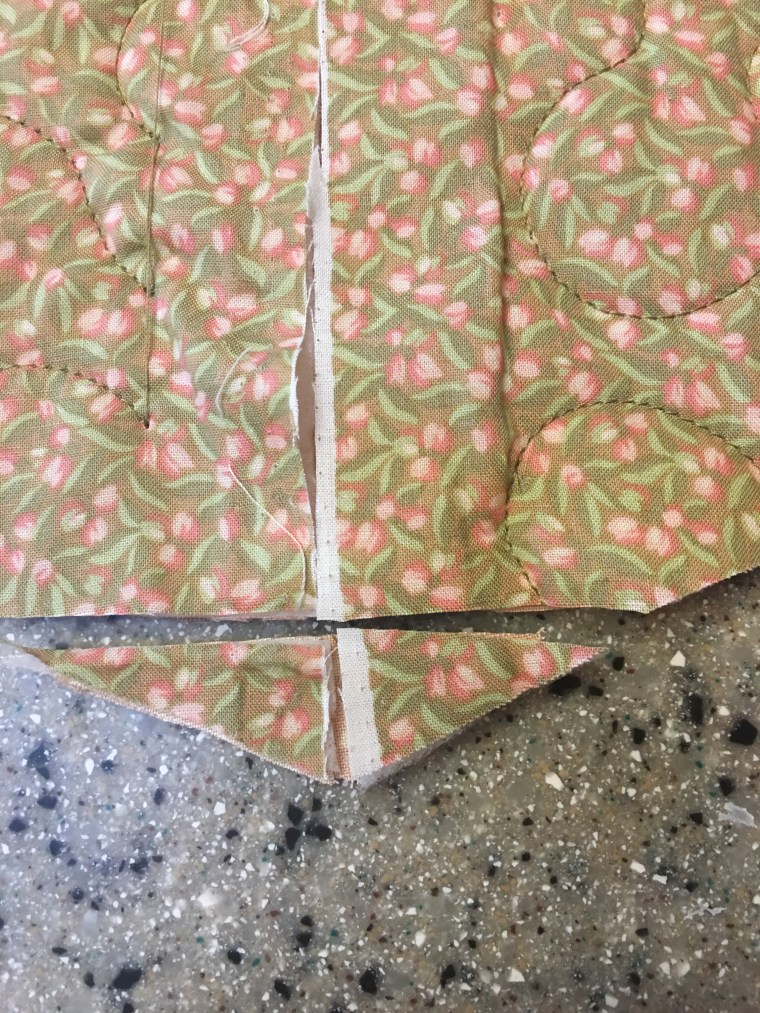
- Cut 1/2″ off of the point
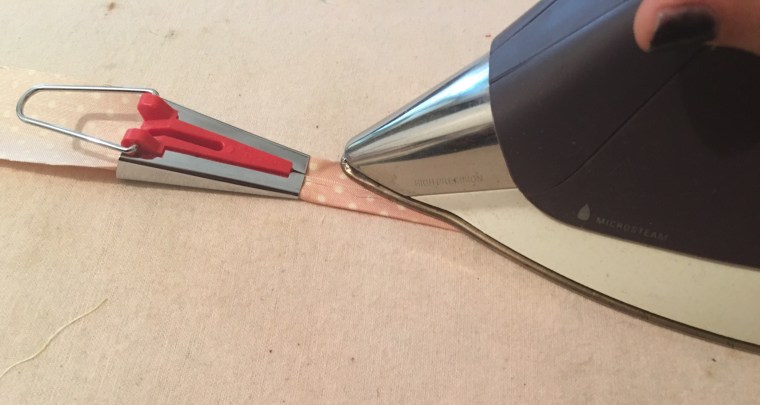
- From the long strips, fold and press the edges to the middle making a type of bias tape. A 3/4″ bias tape maker comes in handy here.

- Fold over and sew the binding to the long edge of the two 10 x 7″ accent pieces and the short edge of the 10 x 14,5″ piece.
- Finish the right side and bottom of the small pieces by folding under 1/4″ and stitching down.
- Finish the left side and bottom of the large piece in the same way.
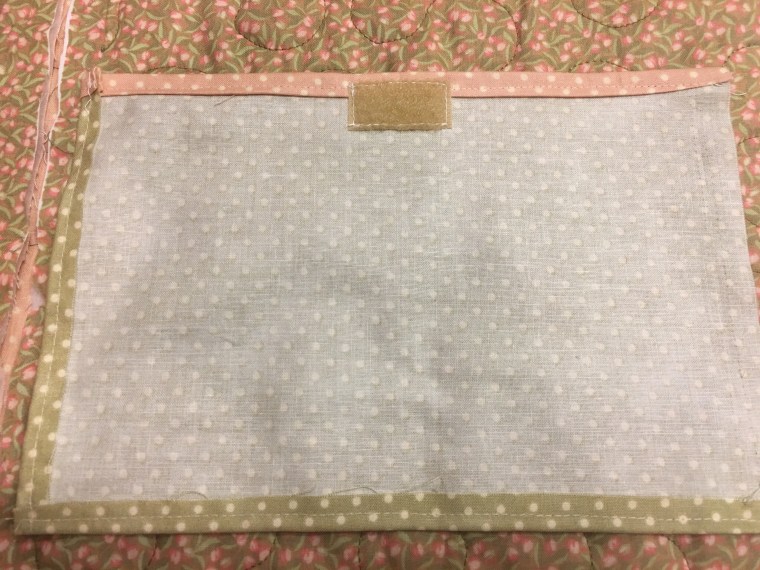
- Sew a 1″ piece of hook and loop tape to the center back of all three pieces of fabric.

- Measure 3.5″ down from the top edge and place your pieces on the bag matching the raw edges in the middle. Fold the tape edge back and pin in place the matching hook and loop piece.
- Take the bag to your machine and sew the tape pieces down.

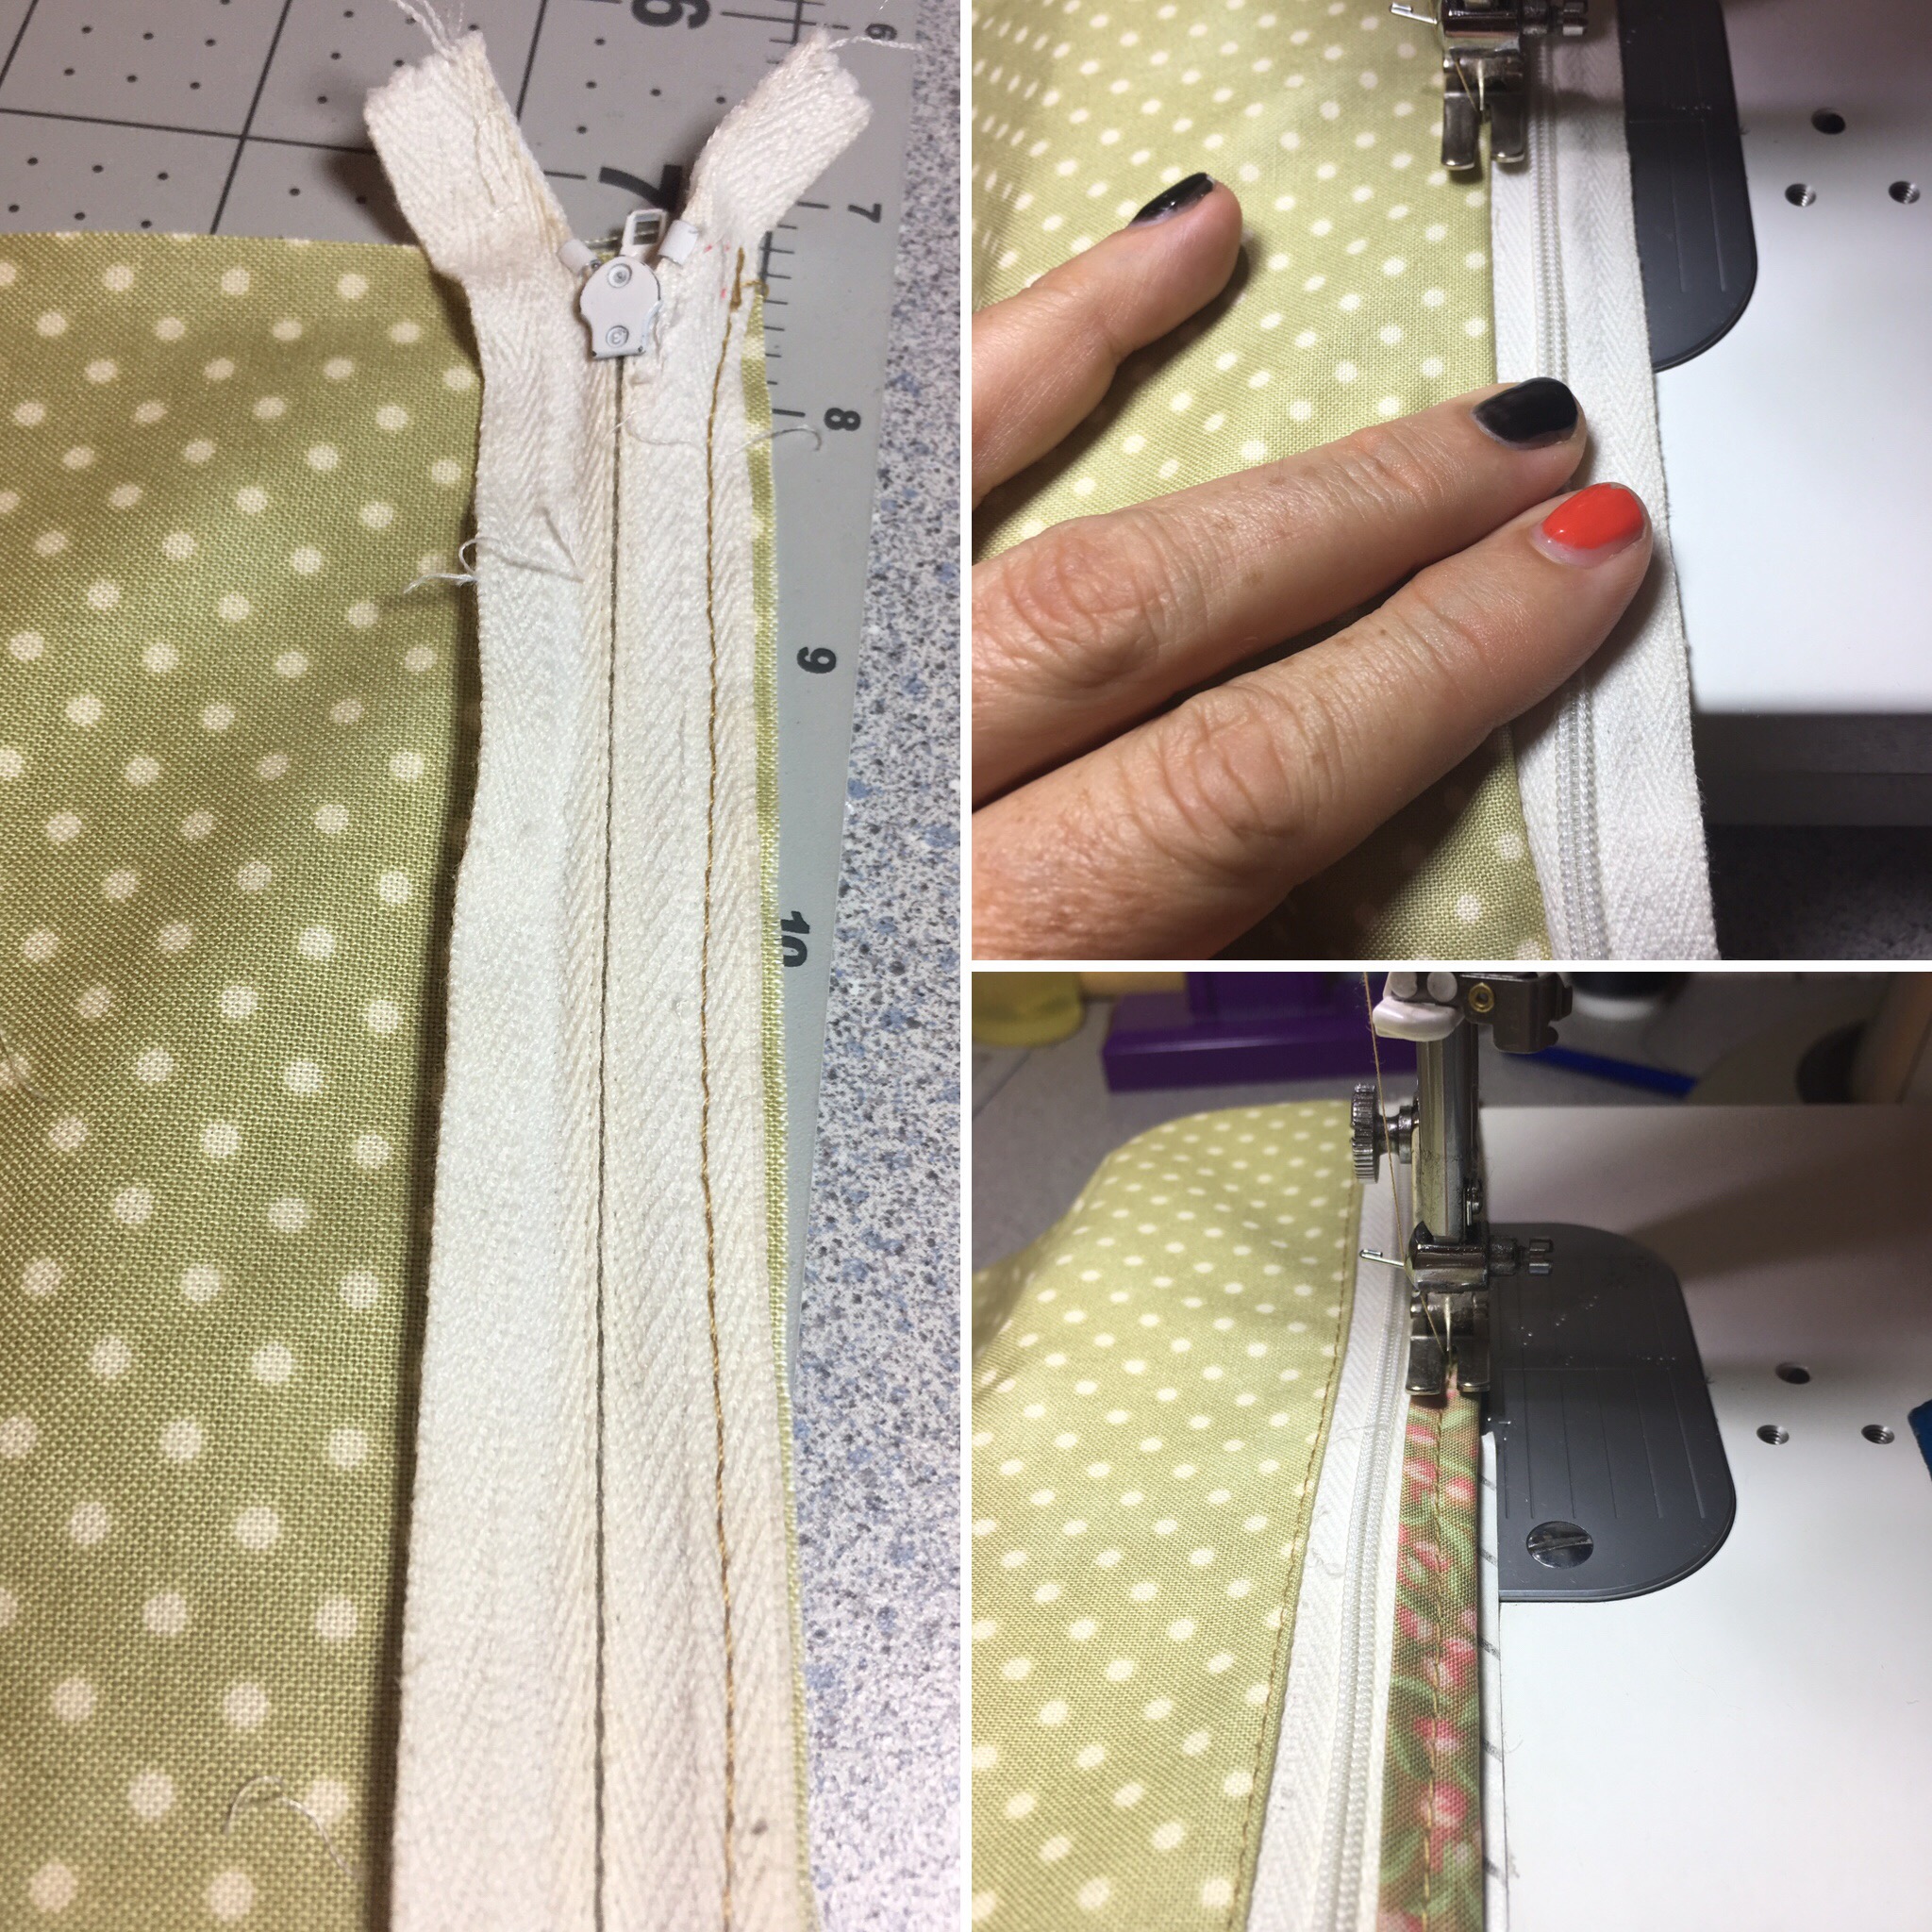
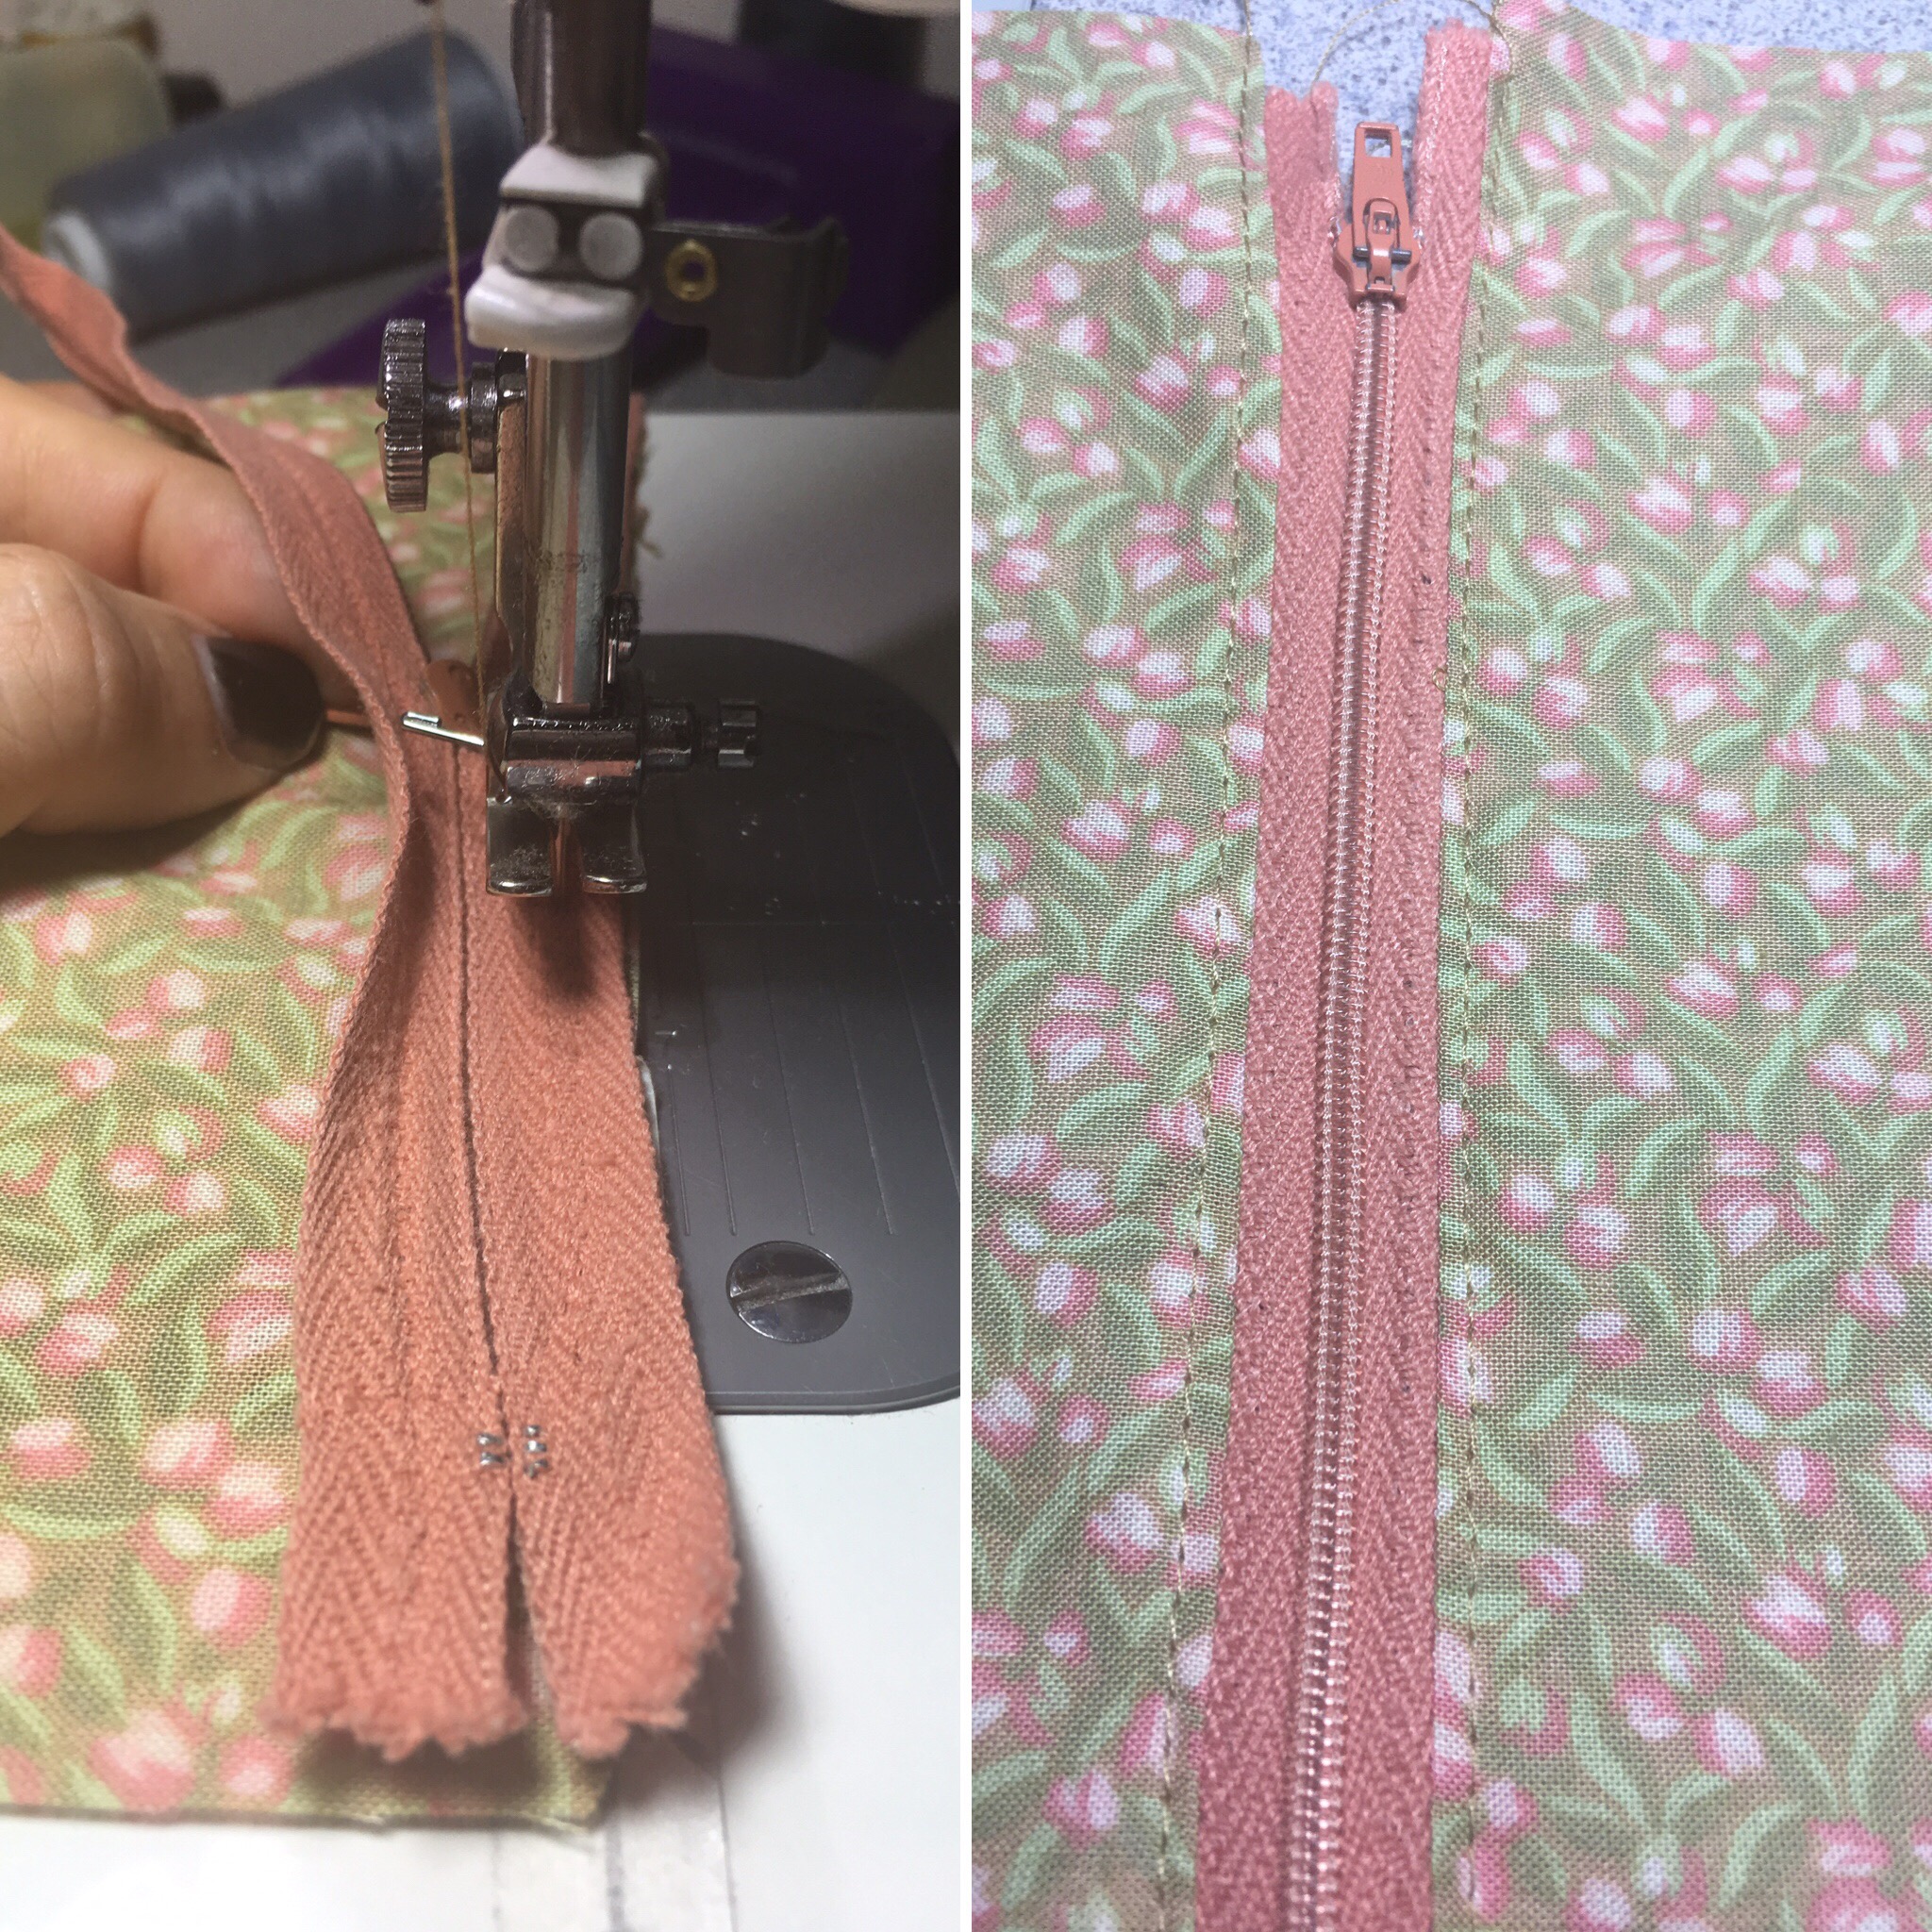
- Sew a 20″ zipper to the long edge of your large cut pocket fabric.
- Fold it over and top stitch the fabric down
- Sew binding to the top side of the zipper and cut the zipper and binding even with the fabric.

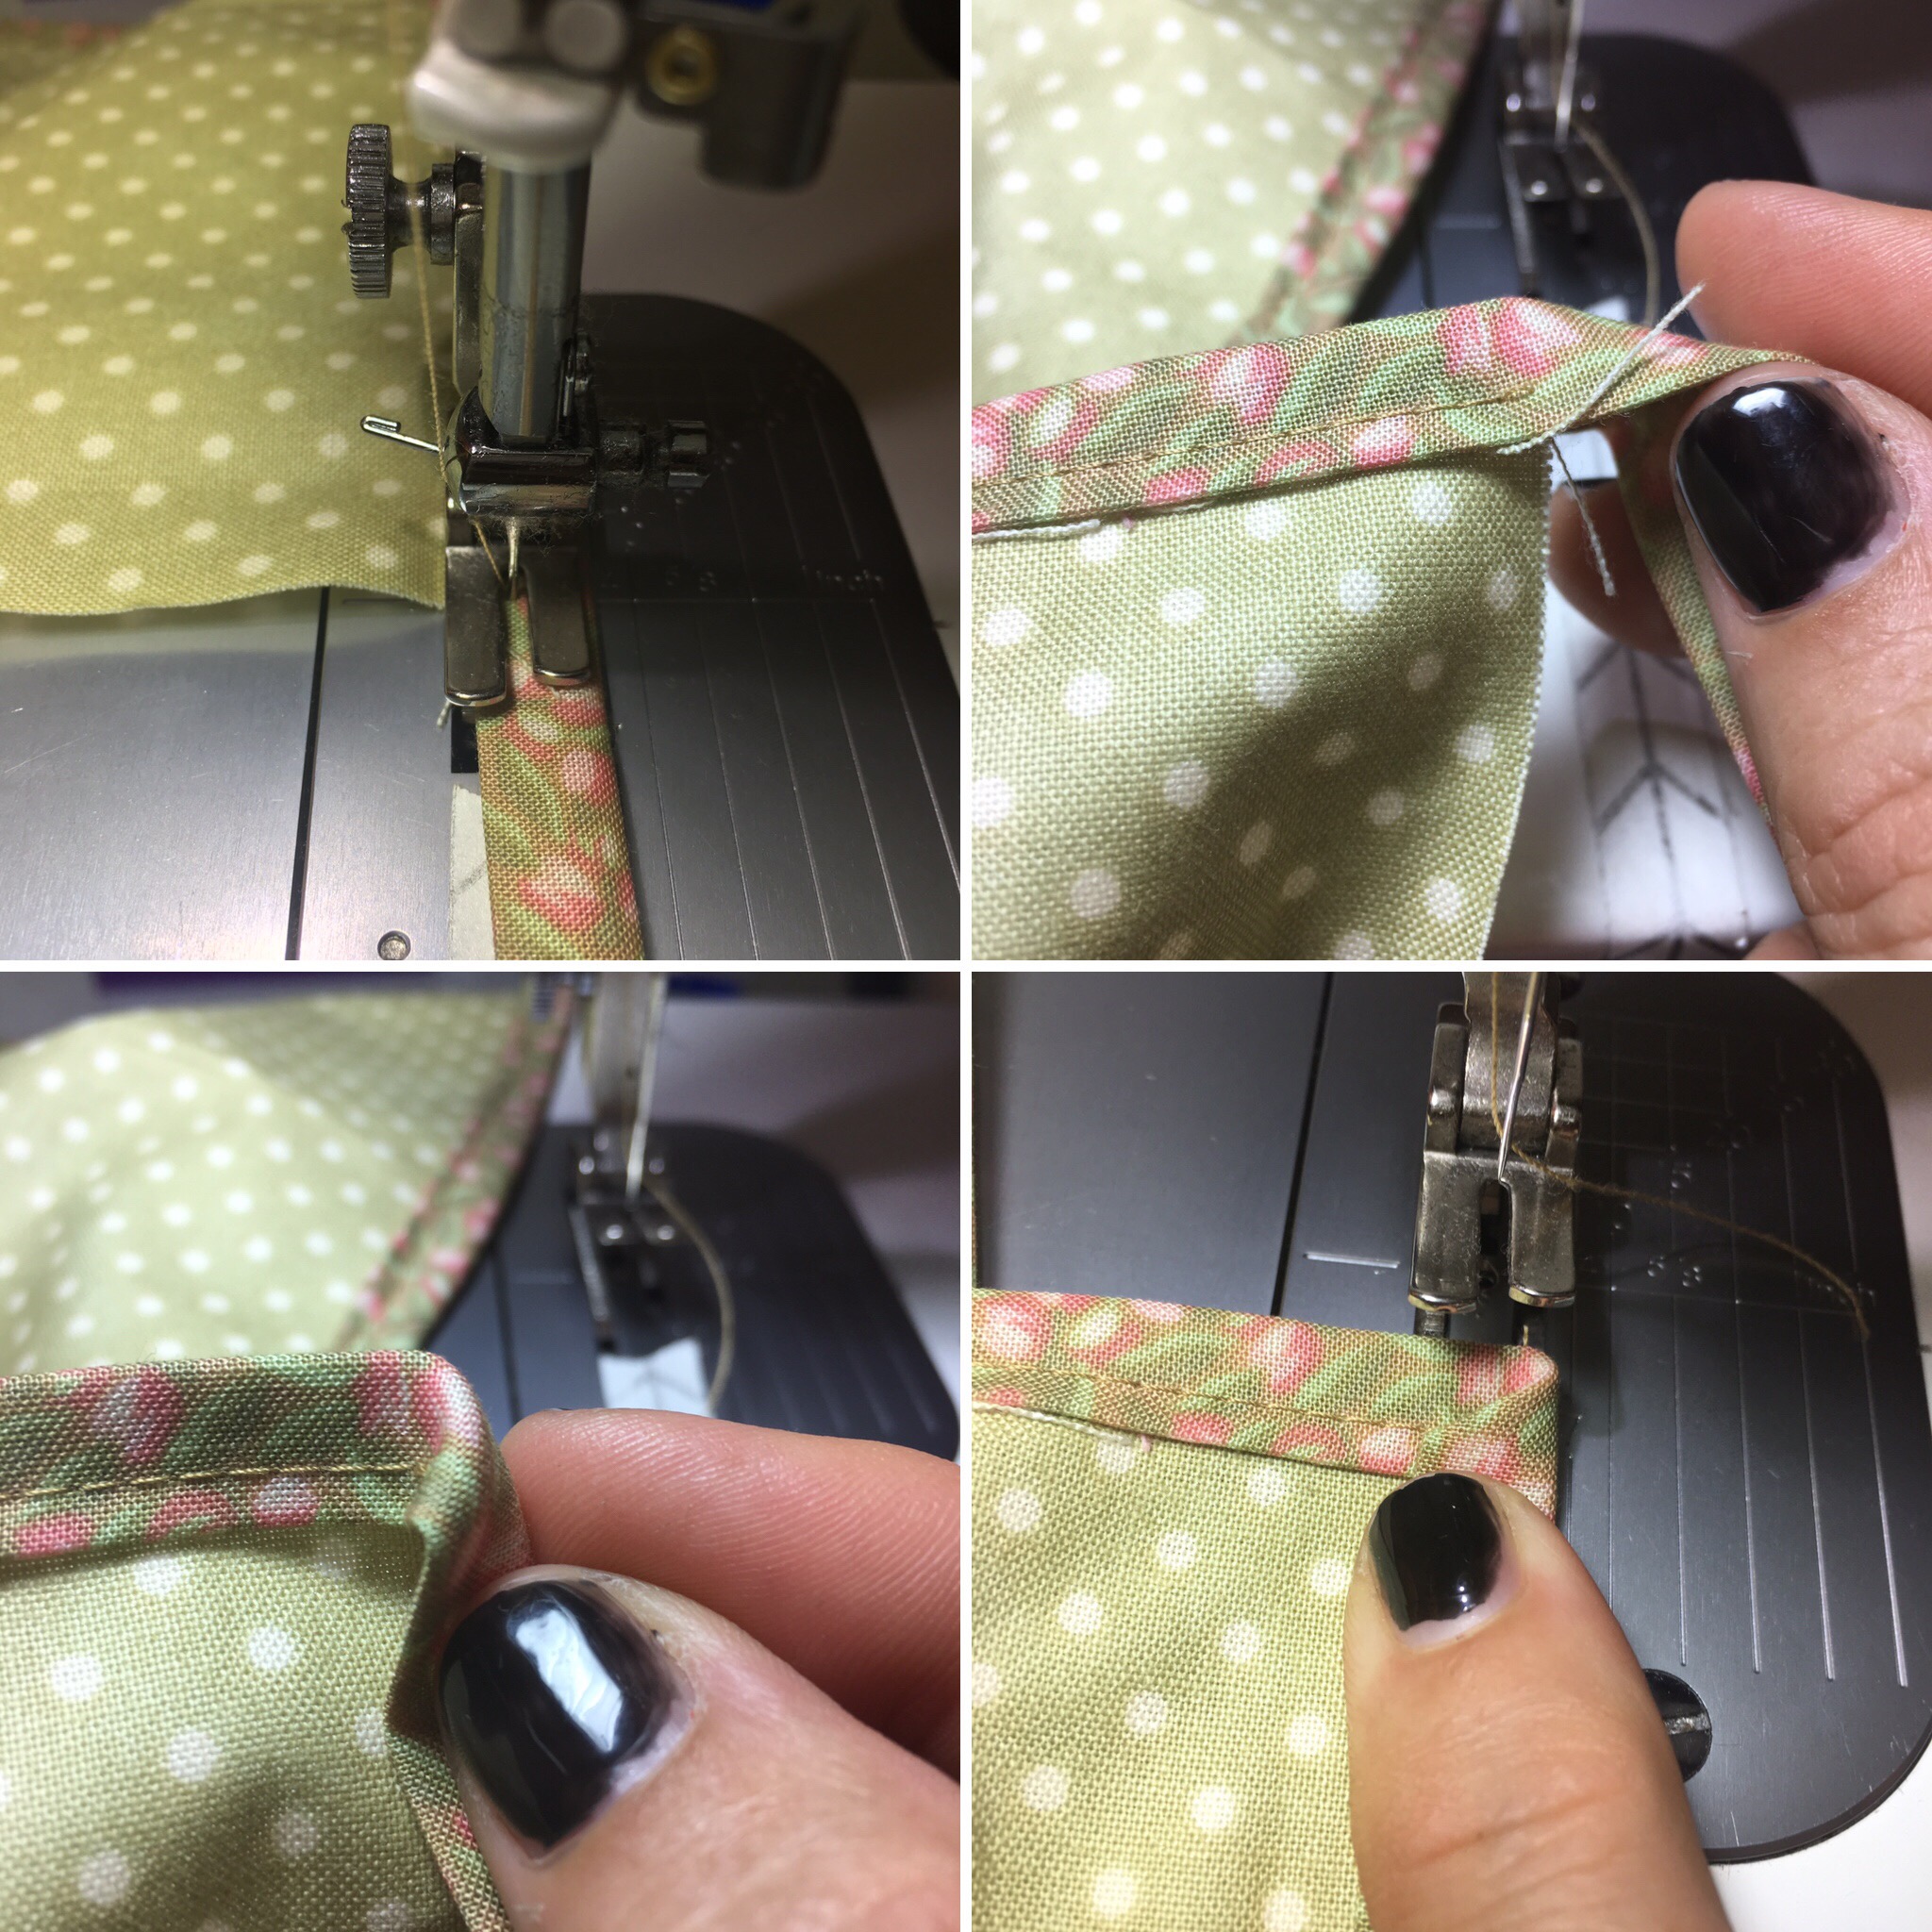
- Fold over the top of another piece of binding and cover the remaining three sides of the pocket piece. Sew to the edge and turn and fold at the corner to make a pretty mitered edge.

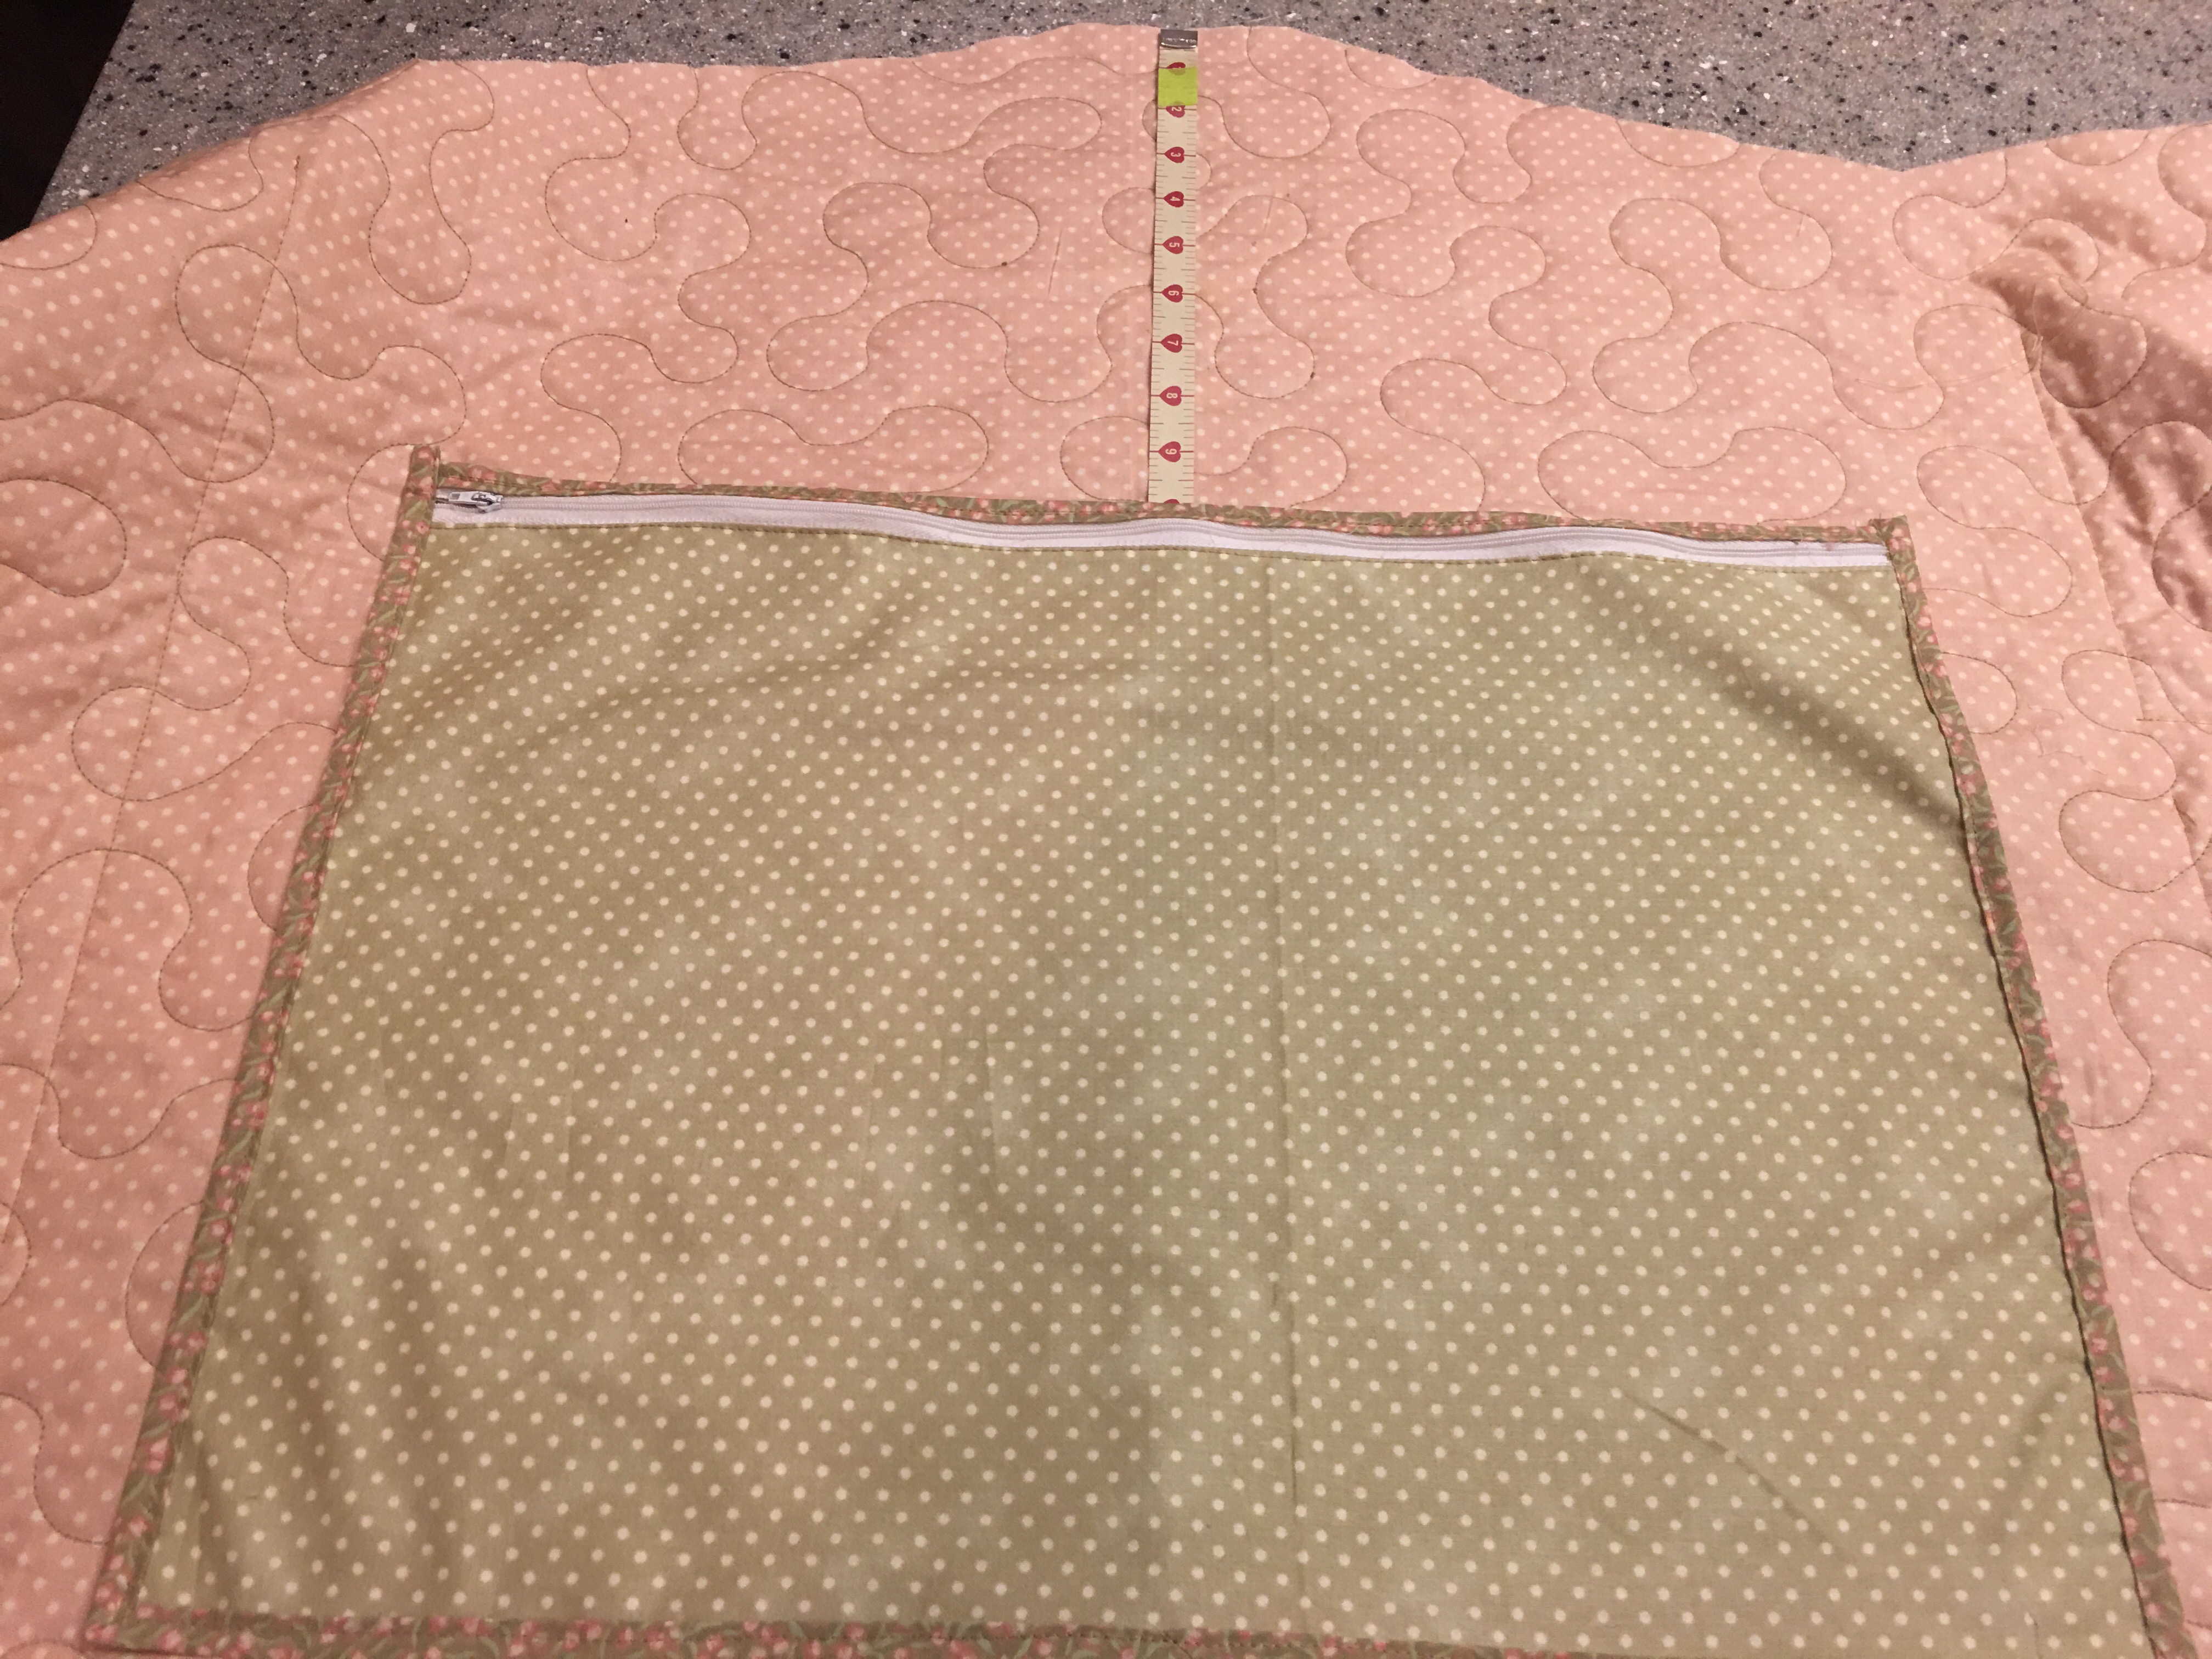
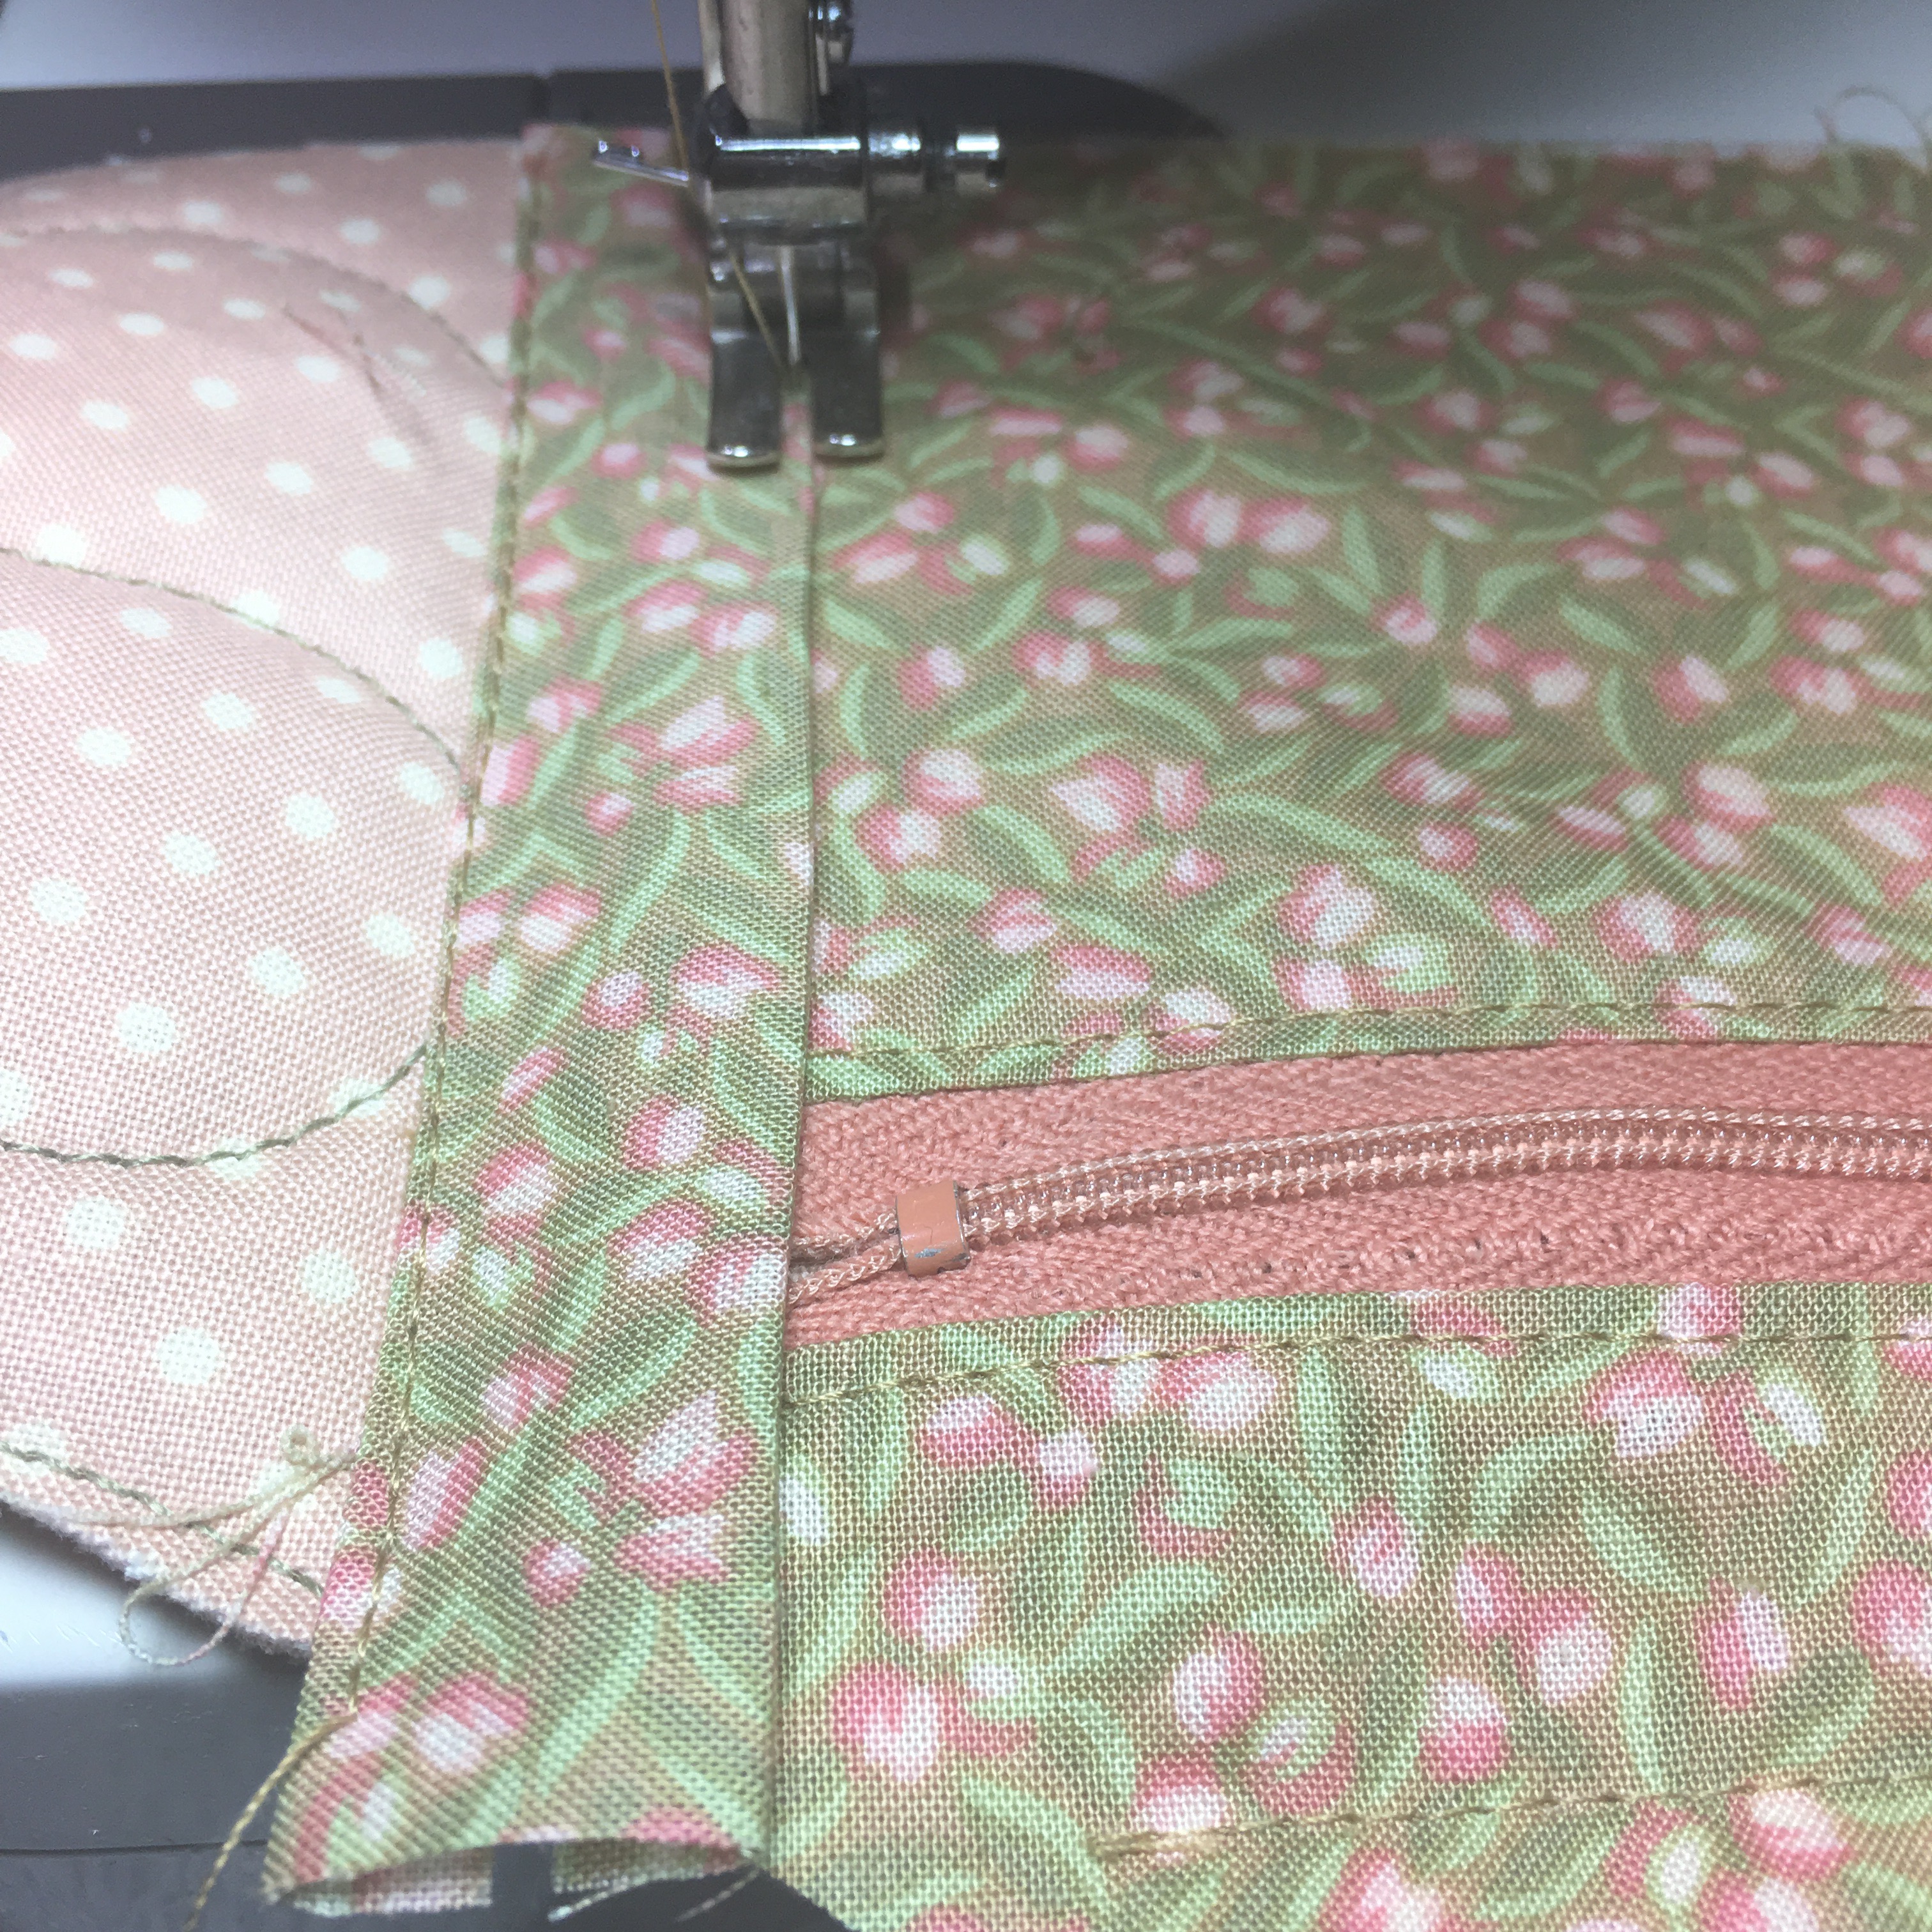
- Place large pocket 10″ down from the top and in the center of the inside of the bag. Pin and sew all around the four sides.
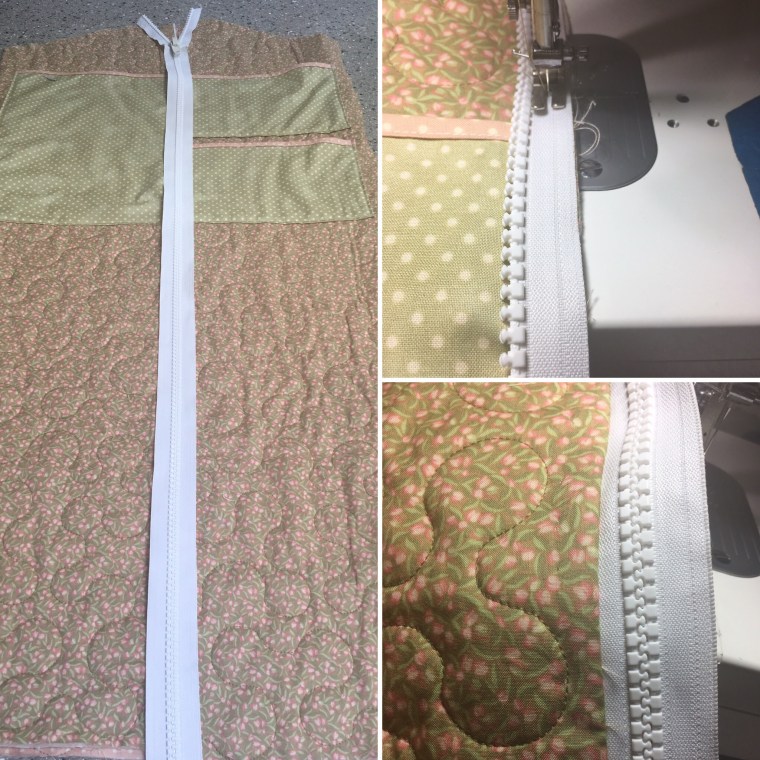
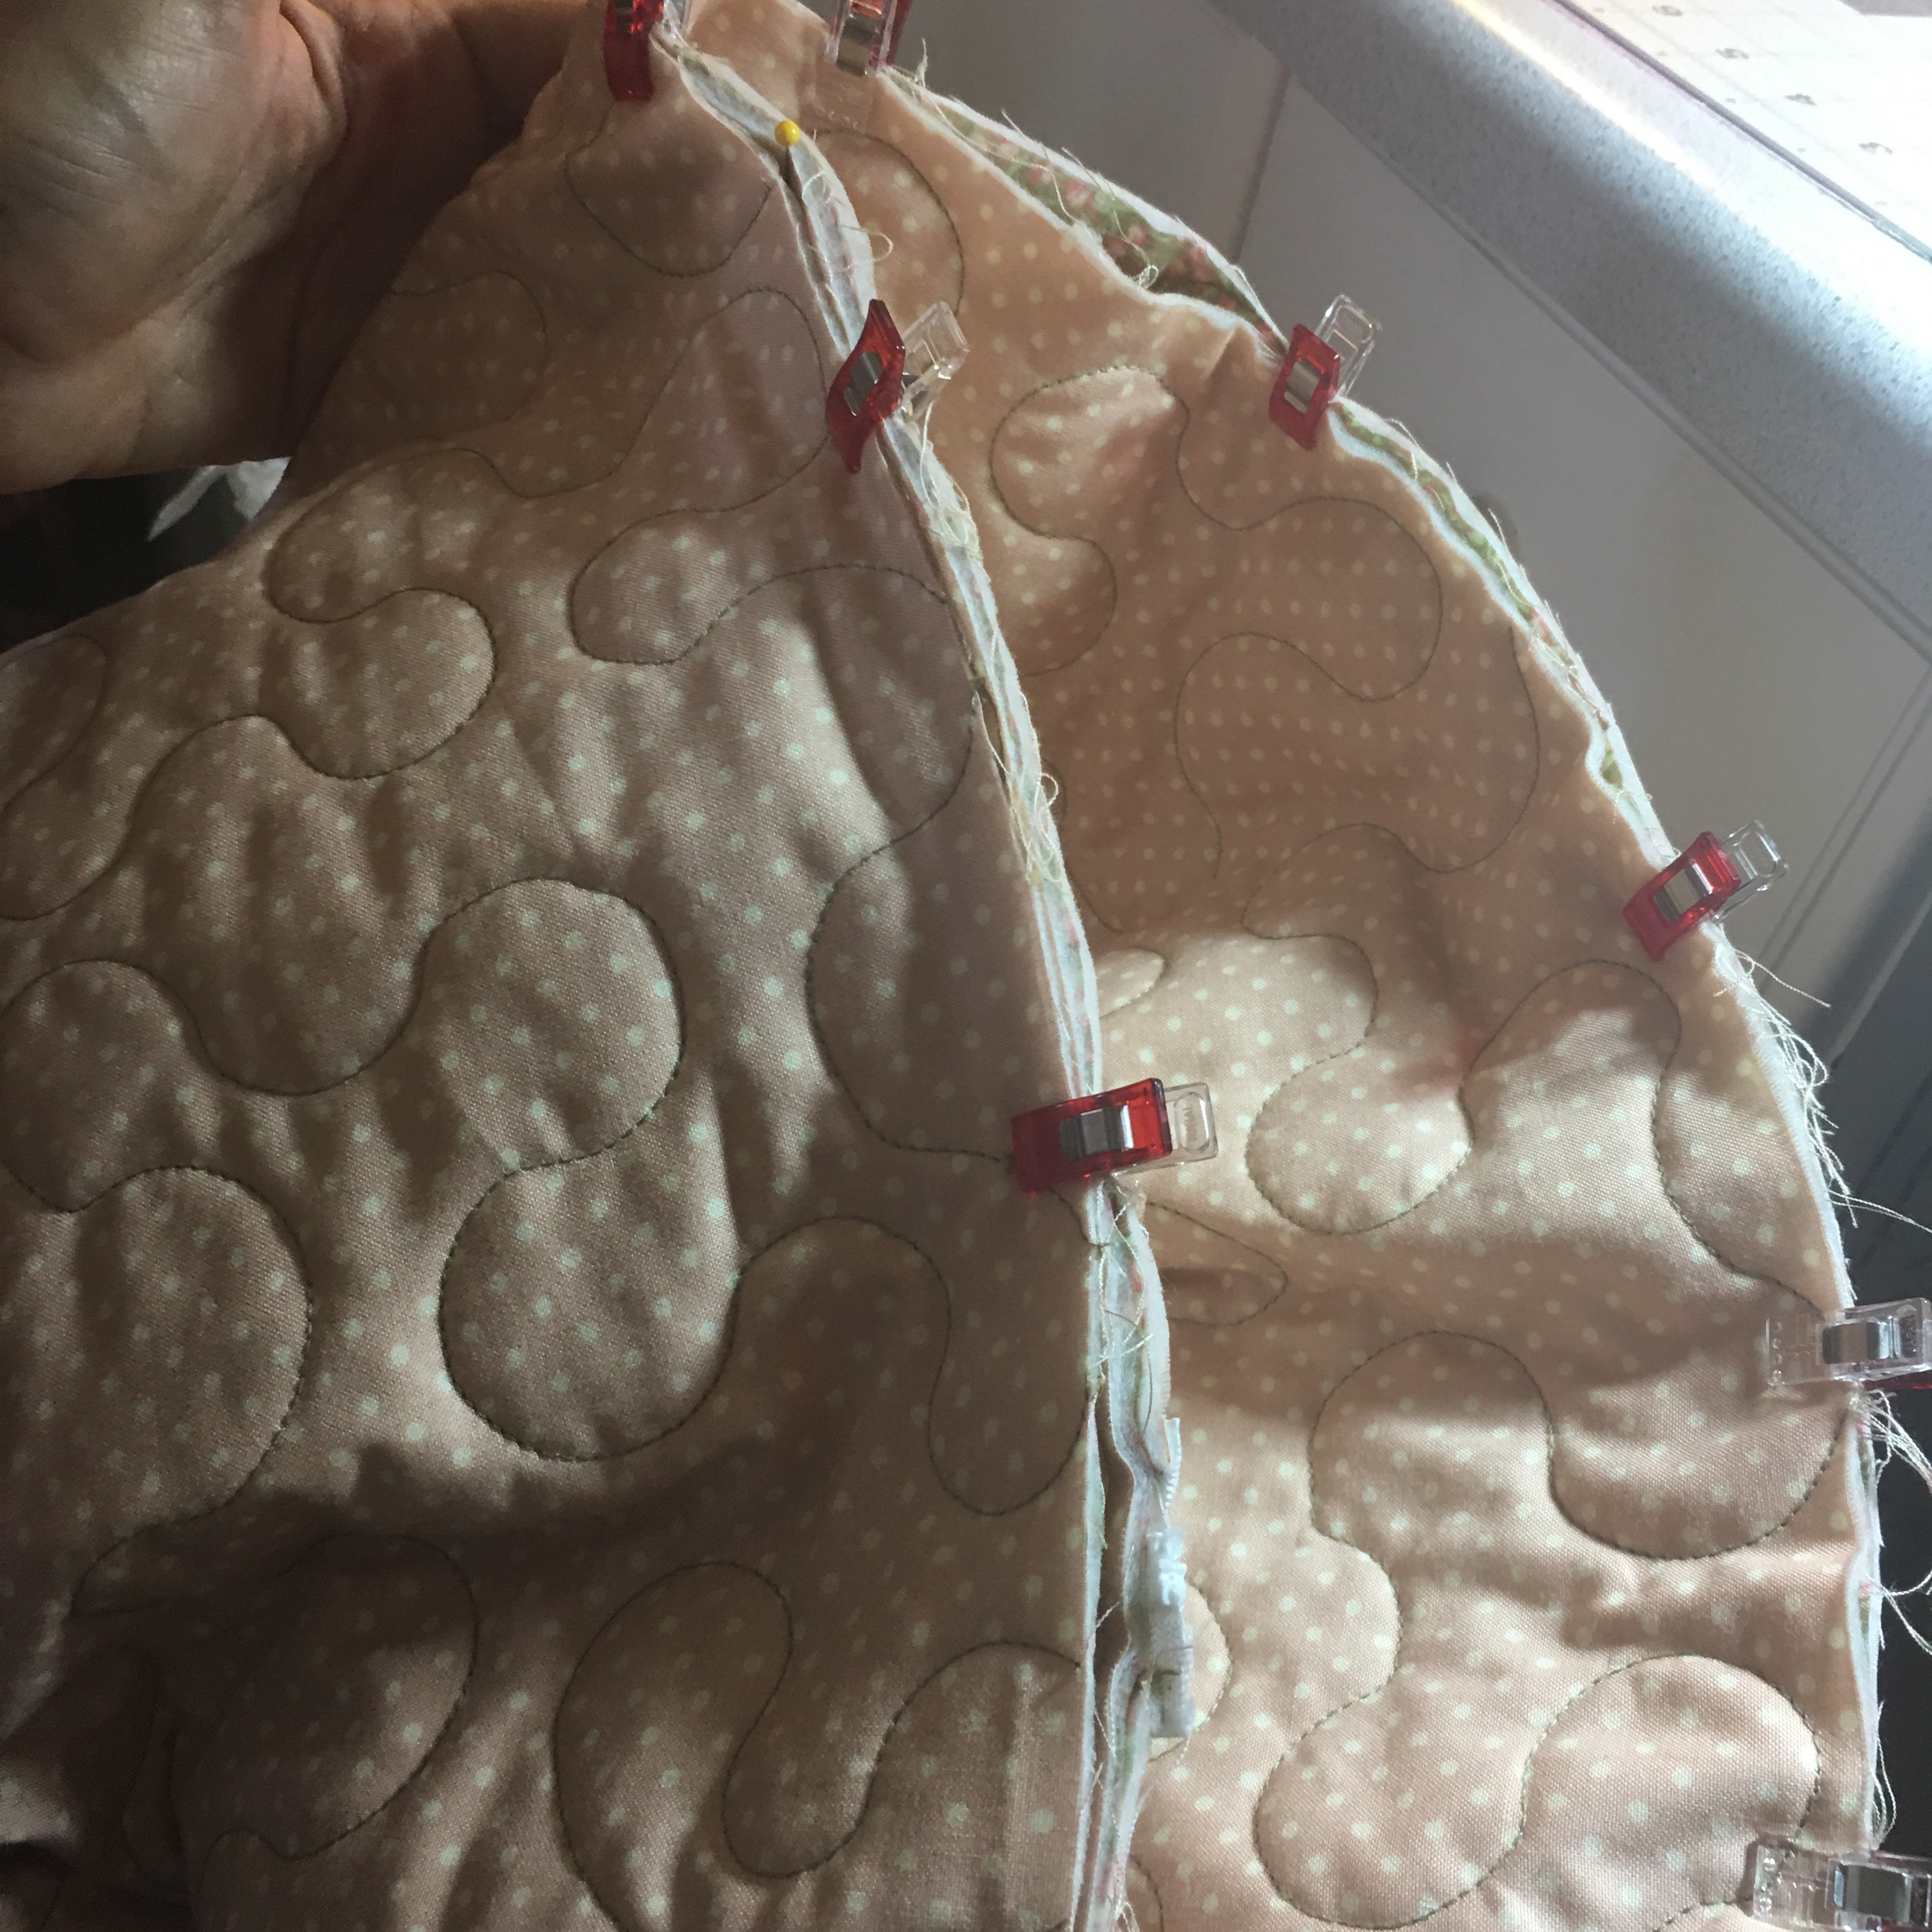
- Sew zipper to the left side of the bag. Fold over and top stitch.
- Fold the right side over and match the pockets. Pin in place.
- Open the zipper and sew.
- Fold over and top stitch.

- Sew a binding piece over the top flat part of the front and back. Walk the needle over the teeth of the zipper by hand to avoid bending or breaking your needle.
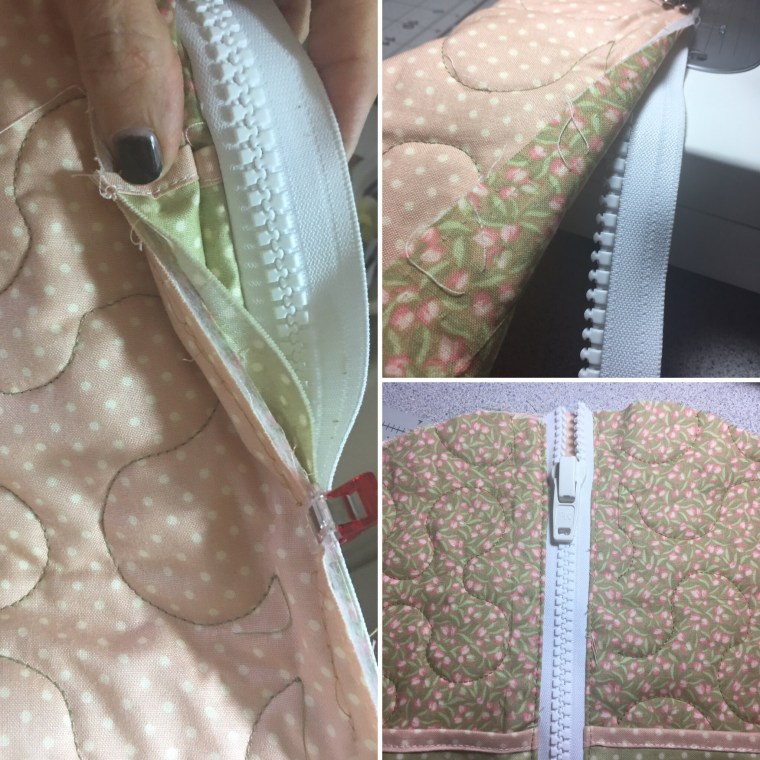
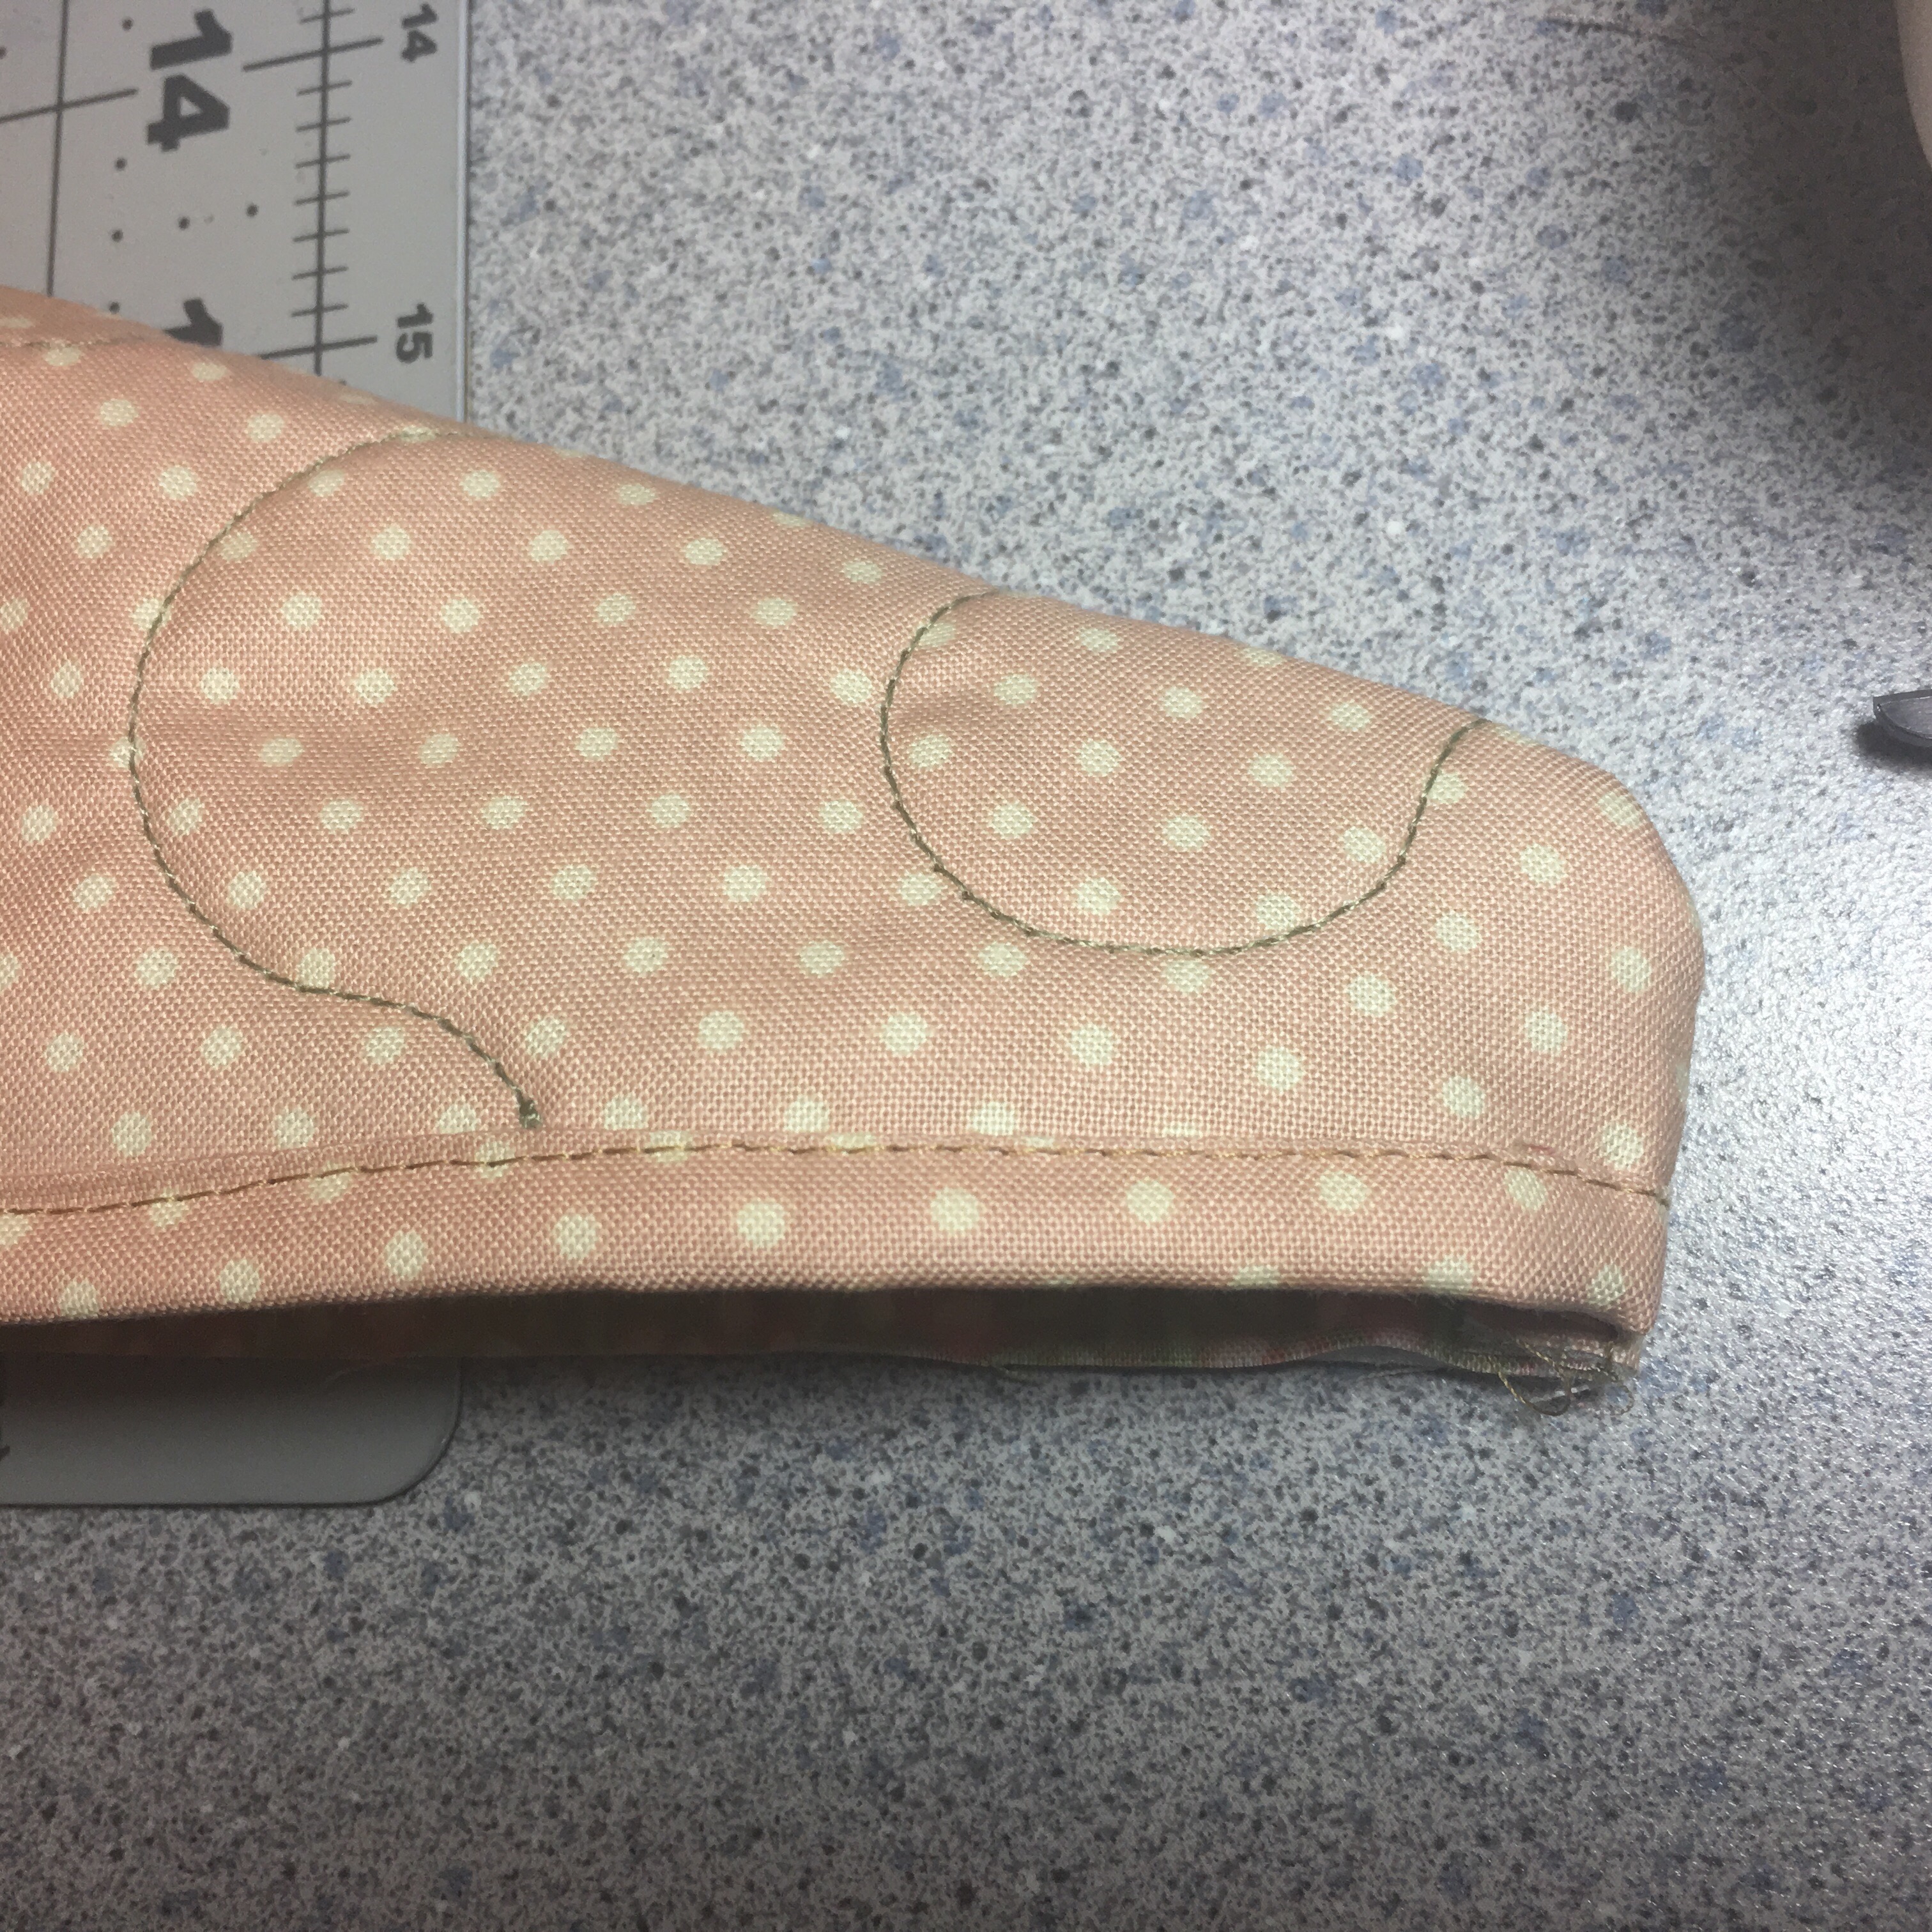
- Place right sides together and sew the shoulder seams. Leave the hanger hole open.
- Turn right side out and poke the corners out.

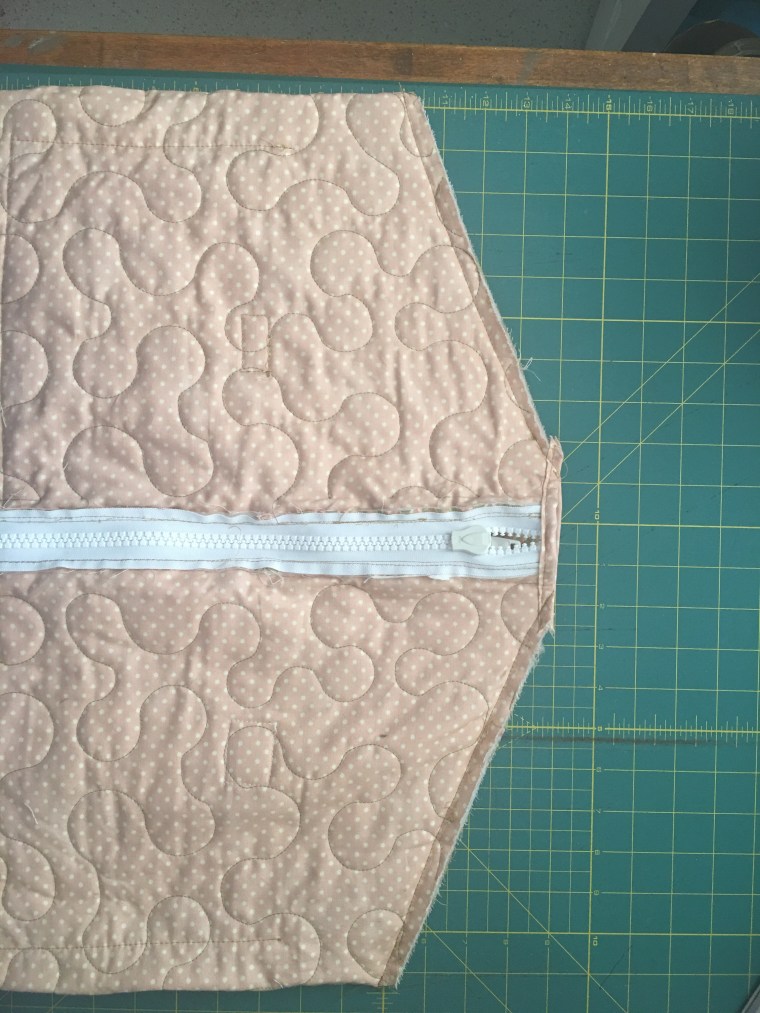
- From you fabric scrap, cut 1″ off of the pointed tip. Cut the pieces apart at the fold.

- Cut the long straight edge 5″ down from the small cut edge. Do not cut in half!

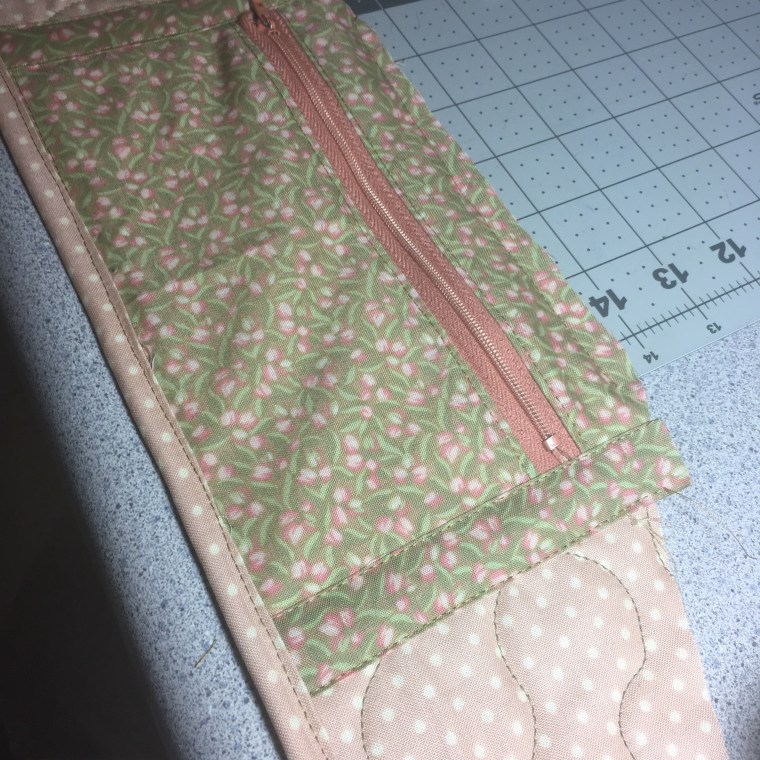
- Sew the small zipper to the 8.5″ fabric strips with the larger piece on the left of the zipper and the 1.5″ piece on the right.
- Fold and top stitch. Trim zipper and edges straight.

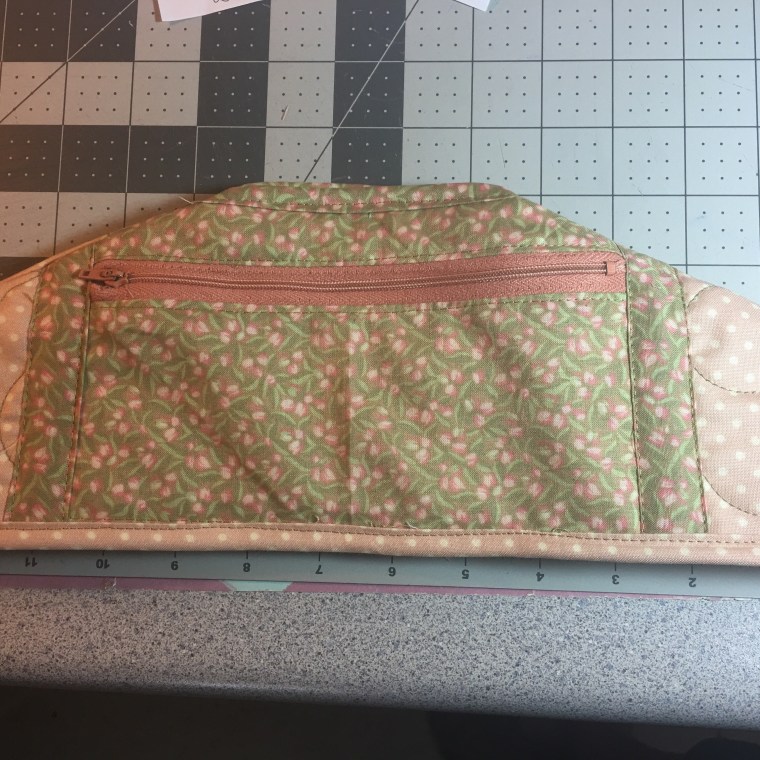
- Center this pocket piece over the top of one of the hanger topper pieces and sew in place.(I’m sorry, there is not a picture for this)
- Trim pocket to match the shape of the topper piece.
- Place an opened piece of binding tape over both sides of the pocket. Sew down both sides of the bias tape covering the raw edges.
- Fold and sew a piece of binding over the bottom and small straight top edge of both fabric pieces.
- With right sides together, sew the shoulder seams and small side seams.

- Turn and poke corners.
- Place the wrong side of the back topper piece to the front right side of the bag.
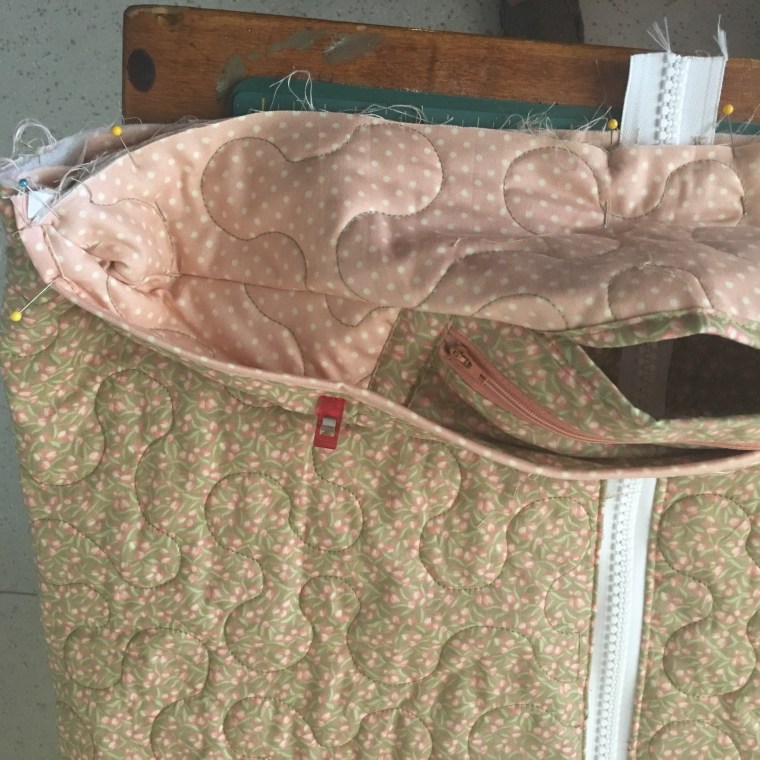
- Pin in place. Pin the front piece of the topper up and out of the way to avoid sticking in the seam.(this looks and feels trickier than it really is)

- Sew the topper to the front of the bag. Leave the back of the bag free. In other words, do not sew the bag closed!
- Remove the seam pins, but leave the pins holding the front topper piece out of the way.

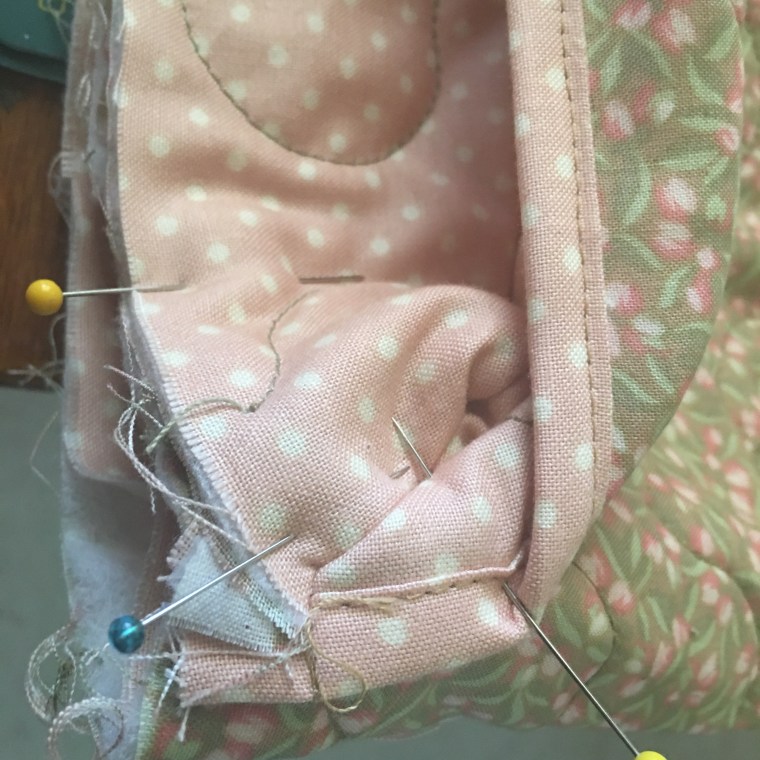
- Fold the 20″ quilted fabric scrap right sides together and the two short edges closed making a tube.

- Place the tube over the bottom of the bag with right sides together and matching the sides. Pin in place making sure to leave the pinned back edges of the topper free.
- Sew around the circle back stitching over the edges of the topper for extra strength.
- Open the bag and remove the pins from the topper.
- Open the zipper and turn bag inside out.
- Sew the bottom edge closed.
- Turn right side out and poke bottom corners out.


Done!! Isn’t it beautiful? Great job!:)

I hope you enjoy this pattern and tutorial. You are more than welcome to use this pattern for items you may want to sell or blog about, but please give me credit in your work:)
Thank you for stopping by. Have a super SWEET rest of your day!
–Tracy:)
